
To add, remove, and configure fields for custom blocks, we need to locate the blocks we want to modify, which in our case is labeled Basic block, and then click on the Manage fields button.
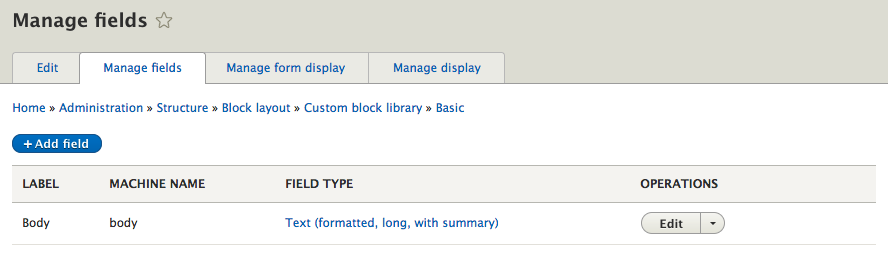
The Manage fields UI consists of the following:
- LABEL: This is a descriptive name for our field that will be used as a label when inputting content into this field
- MACHINE NAME: The machine name is a lowercase field name used by Drupal to distinguish this field from others
- FIELD TYPE: This allows us to choose from various field types, such as date, file, text, and more
Currently our block only contains a single Textfield that allows us to add content to the Body of our block. We can add a new field to our block by following these steps:
- Click on the Add field button.
- Select Image from the Add a new field dropdown.
- Enter a Label of Featured Image.
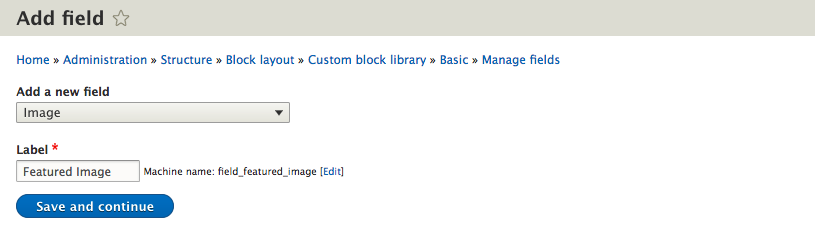
- Click on the Save and continue button.
- Leave the default settings on the field settings page.
- Click on the Save field settings button.
- Leave the default settings on the Edit page.
- Click on the Save settings button.
We have successfully added a new field to the Basic block type that all future custom blocks can use to add a Featured Image.

Let's try adding one more field. This time we will add a Textfield for capturing a Headline:
- Click on the Add field button.
- Select Text (plain) from the Add a new field dropdown.
- Enter a Label of Headline.
- Click on the Save and continue button.
- Click on the Save field settings button.
- Click on the Save settings button.
We now have a total of three fields that our custom block can capture: a Body field, Featured Image, and Headline. In the current order, our fields may not make logical sense to the end user regarding what information he/she is being asked to input. We can remedy that by managing the form's display of fields.