
Now that we have our title configured, we can do the exact same thing for the body. We'll specify our options object and provide those three arguments: describe, demand, and alias for body:
const argv = yargs
  .command('add', 'Add a new note', {
    title: {
      describe: 'Title of note',
      demand: true,
      alias: 't'
    },
    body: {

    }
  })
  .help()
  .argv;
The first one is describe and that one's pretty easy. describe is going to get set equal to a string, and in this case Body of note will get the job done:
const argv = yargs
  .command('add', 'Add a new note', {
    title: {
      describe: 'Title of note',
      demand: true,
      alias: 't'
    },
    body: {
      describe: 'Body of note'
    }
  })
  .help()
  .argv;
The next one will be demand, and to add a note we are going to need a body. So we'll set demand equal to true, just like we do up previous for title:
const argv = yargs
  .command('add', 'Add a new note', {
    title: {
      describe: 'Title of note',
      demand: true,
      alias: 't'
    },
    body: {
      describe: 'Body of note'
      demand: true
    }
  })
  .help()
  .argv;
And last but not least is the alias. The alias is going to get set equal to a single letter, I'll use the letter b for body:
const argv = yargs
  .command('add', 'Add a new note', {
    title: {
      describe: 'Title of note',
      demand: true,
      alias: 't'
    },
    body: {
      describe: 'Body of note'
      demand: true,
      alias: 'b'
    }
  })
  .help()
  .argv;
With this in place, we can now save app.js and inside Terminal, we can take a moment to rerun node app.js add with the help flag:
node app.js add --help
When we run this command, we should now see the body argument showing up, and you can even see it shows the flag version, as shown in the following output, the alias -b (Body of note), and it is required:

Now I'll run node app.js add passing in two arguments t. I'll set that equal to t, and b setting it equal to b.
When I run the command, everything works as expected:
node app.js add -t=t -b=b
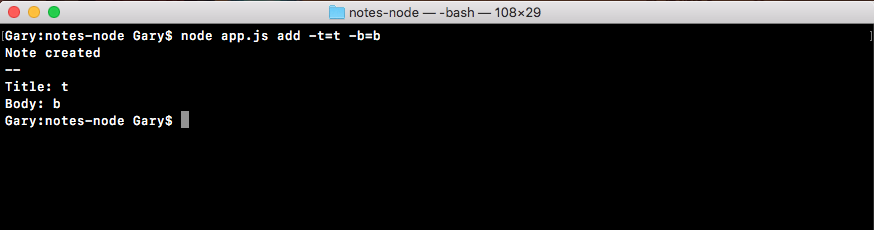
As shown in the preceding output screenshot, a new note was created with a title of t and a body of b. With this in place, we've now successfully completed the setup for the add command. We have our add command title, a description, and the block that specifies the arguments for that command. Now we do have three more commands to add support for, so let's get started doing that.