
The next thing we'd look into is how we can send some JSON data back. Sending JSON is really easy with Express. To illustrate how we can do it we'll comment out our current call to res.send and add a new one. We'll call res.send passing in an object:
app.get('/', (req, res) => {
  // res.send('<h1>Hello Express!</h1>');
  res.send({

  })
});
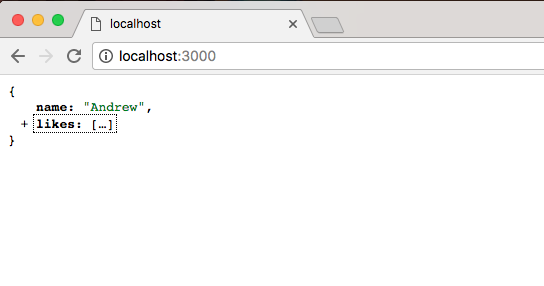
On this object we can provide whatever we like. We can create a name property, setting it equal to the string version of any name, say Andrew. We can make a property called likes, setting it equal to an array, and we can specify some things we may like. Let's add Biking as one of them, and then add Cities as another:
  res.send({
    name: 'Andrew',
    likes: [
      'Biking',
      'Cities'
    ]
  });
When we call res.send passing in an object, Express notices that. Express takes it, converts it into JSON, and sends it back to the browser. When we save server.js and nodemon refreshes, we can refresh the browser, and what we get is my data formatted using JSON view:

This means we can collapse the properties and quickly navigate the JSON data.
Now the only reason JSON view picked up on this is because that Content-Type header that we explored in our last request it actually changed. If I open up localhost, a lot of things look the same. But now Content-Type has an application/json Content-Type:
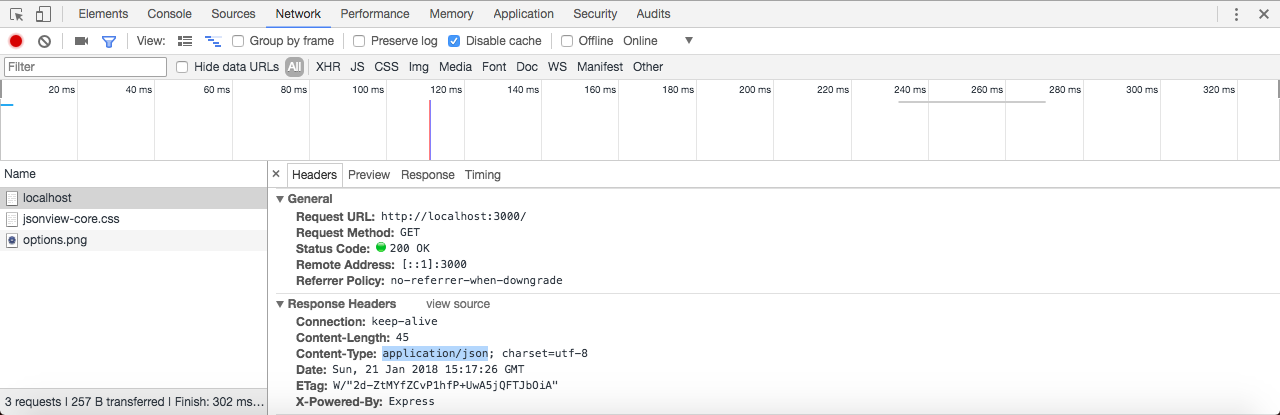
This Content-Type tells the requester whether it's an Android phone, an iOS device, or the browser that JSON data is coming back, and it should parse it as such. That's exactly what the browser does in this case.
Express also makes it really easy to set up other routes aside from the root route. We can explore that inside Atom by calling app.get a second time. We'll call app.get. We'll create a second route. We'll call this one about:
app.get('/about')

app.listen(3000);
Notice that we just used /about as the route. It's important to keep that forward slash in place, but after that you can type whatever you like. In this case we'll have a /about page that someone can visit. Then I'll provide the handler. The handler will take the req and the res object:
app.get('/about', (req, res) => {

});

app.listen(3000);
This will let us figure out what kind of request came in, and it will let us respond to that request. For now just to illustrate we can create more pages, we'll keep the response simple, res.send. Inside the string we're going to print About Page:
app.get('/about', (req, res) => {
  res.send('About Page');
});
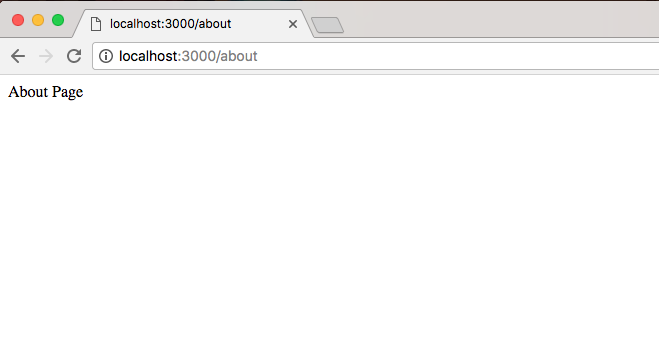
Now when we save the server.js file, the server is going to restart. In the browser we can visit localhost:3000/about. At /about we should now see our new data, and that's exactly what we get back, About Page shows up as shown here:
Using app.get we're able to specify as many routes as we like. For now we just have an about route and a / route, which is also referred to as the root route. The root route returns some data, which happens to be JSON, and the about route returns a little bit of HTML. Now that we have this in place and we have a very basic understanding about how we can set up routes in Express, we'd like you to create a new route /bad. This is going to simulate what happens when a request fails.