Table of Contents for
Learning Node.js Development

Version ebook / Retour

Cover image for bash Cookbook, 2nd Edition Learning Node.js Development by Andrew Mead Published by Packt Publishing, 2018
  1. Learning Node.js Development
  2. Title Page
  3. Copyright and Credits
  4. Learning Node.js Development
  5. Packt Upsell
  6. Why subscribe?
  7. PacktPub.com
  8. Contributor
  9. About the author
  10. Packt is searching for authors like you
  11. Table of Contents
  12. Preface
  13. Who this book is for
  14. What this book covers
  15. To get the most out of this book
  16. Download the example code files
  17. Conventions used
  18. Get in touch
  19. Reviews
  20. Getting Set Up
  21. Node.js installation
  22. Node.js version confirmation
  23. Installing Node
  24. Verifying installation
  25. What is Node?
  26. Differences between JavaScript coding using Node and in the browser
  27. Why use Node
  28. Blocking and non-blocking software development
  29. The working of blocking I/O
  30. The working non-blocking I/O
  31. Blocking and non-blocking examples using Terminal
  32. Node community – problem solving open source libraries
  33. Different text editors for node applications
  34. Hello World – creating and running the first Node app
  35. Creating the Node application
  36. Running the Node application
  37. Summary
  38. Node Fundamentals – Part 1
  39. Module basics
  40. Using case for require()
  41. Initialization of an application
  42. The built-in module to use require()
  43. Creating and appending files in the File System module
  44. The OS module in require()
  45. Concatenating user.username
  46. Using template strings
  47. Require own files
  48. Making a new file to load other files
  49. Exporting files from note.js to use in app.js
  50. A simple example of the working of the exports object
  51. Exporting the functions
  52. Exercise – adding a new function to the export object
  53. Solution to the exercise
  54. Third-party modules
  55. Creating projects using npm modules
  56. Installing the lodash module in our app
  57. Installation of lodash
  58. Using the utilities of lodash
  59. Using the _.isString utility
  60. Using _.uniq
  61. The node_modules folder
  62. Global modules
  63. Installing the nodemon module
  64. Executing nodemon
  65. Getting input
  66. Getting input from the user inside the command line
  67. Accessing the command-line argument for the notes application
  68. Adding if/else statements
  69. Exercise – adding two else if clauses to an if block
  70. Solution to the exercise
  71. Getting the specific note information
  72. Summary
  73. Node Fundamentals – Part 2
  74. yargs
  75. Installing yargs
  76. Running yargs
  77. Working with the add command
  78. Working with the list command
  79. The read command
  80. Dealing with the errors in parsing commands
  81. The remove command
  82. Fetching command
  83. JSON
  84. Converting objects into strings
  85. Defining a string and using in app as an object
  86. Converting a string back to an object
  87. Storing the string in a file
  88. Writing the file in the playground folder
  89. Reading out the content in the file
  90. Adding and saving notes
  91. Adding notes
  92. Adding notes to the notes array
  93. Fetching new notes
  94. Trying and catching code block
  95. Making the title unique
  96. Refactoring
  97. Moving functionality into individual functions
  98. Working with fetchNotes
  99. Working with saveNotes
  100. Testing the functionality
  101. Summary
  102. Node Fundamentals – Part 3
  103. Removing a note
  104. Using the removeNote function
  105. Printing a message of removing notes
  106. Reading note
  107. Using the getNote function
  108. Running the getNote function
  109. The DRY principle
  110. Using the logNote function
  111. Debugging
  112. Executing a program in debug mode
  113. Working with debugging
  114. Using debugger inside the notes application
  115. Listing notes
  116. Using the getAll function
  117. Advanced yargs
  118. Using chaining syntax on yargs
  119. Calling the .help command
  120. Adding the options object
  121. Adding the title
  122. Adding the body
  123. Adding support to the read and remove commands
  124. Adding the titleOption and bodyOption variables
  125. Testing the remove command
  126. Arrow functions
  127. Using the arrow function
  128. Exploring the difference between regular and arrow functions
  129. Exploring the arguments array
  130. Summary
  131. Basics of Asynchronous Programming in Node.js
  132. The basic concept of asynchronous program
  133. Illustrating the async programming model
  134. Call stack and event loop
  135. A synchronous program example
  136. The call stack
  137. Running the synchronous program
  138. A complex synchronous program example
  139. An async program example
  140. The Node API in async programming
  141. The callback queue in async programming
  142. The event loop
  143. Running the async code
  144. Callback functions and APIs
  145. The callback function
  146. Creating the callback function
  147. Running the callback function
  148. Simulating delay using setTimeout
  149. Making request to Geolocation API
  150. Using Google Maps API data in our code
  151. Installing the request package
  152. Using request as a function
  153. Running the request
  154. Pretty printing objects
  155. Using the body argument
  156. Making up of the HTTPS requests
  157. The response object
  158. The error argument
  159. Printing data from the body object
  160. Printing the formatted address
  161. Printing latitude and longitude
  162. Summary
  163. Callbacks in Asynchronous Programming
  164. Encoding user input
  165. Installing yargs
  166. Configuring yargs
  167. Printing the address to screen
  168. Encoding and decoding the strings
  169. Encoding URI component
  170. Decoding URI component
  171. Pulling the address out of argv
  172. Callback errors
  173. Checking error in Google API request
  174. Adding the if statement for callback errors
  175. Adding if else statement to check body status property
  176. Testing the body status property
  177. Abstracting callbacks
  178. Refactoring app.js and code into geocode.js file
  179. Working on request statement
  180. Creating geocode file
  181. Adding callback function to geocodeAddress
  182. Setting up the function in geocodeAddress function in app.js
  183. Implementing the callback function in geocode.js file
  184. Testing the callback function in geocode.js file
  185. Wiring up weather search
  186. Exploring working of API in the browser
  187. Exploring the actual URL for code
  188. Making a request for the weather app using the static URL
  189. Error handling in the the callback function
  190. Another way of error handling
  191. Testing the error handling in callback
  192. Chaining callbacks together
  193. Refactoring our request call in weather.js file
  194. Defining the new function getWeather in weather file
  195. Providing weather directory in app.js
  196. Passing the arguments in the getWeather function
  197. Printing errorMessage in the getWeather function
  198. Implementing getWeather callback inside weather.js file
  199. Adding dynamic latitude and longitude
  200. Changing console.log calls into callback calls
  201. Chaining the geocodeAddress and getWeather callbacks together
  202. Moving getWeather call into geocodeAddress function
  203. Replacing static coordinates with dynamic coordinates
  204. Testing the chaining of callbacks
  205. Summary
  206. Promises in Asynchronous Programming
  207. Introduction to ES6 promises
  208. Creating an example promise
  209. Calling the promise method then
  210. Running the promise example in Terminal
  211. Error handling in promises
  212. Merits of promises
  213. Advanced promises
  214. Providing input to promises
  215. Returning the promises
  216. Promise chaining
  217. Error handling in promises chaining
  218. The catch method
  219. The request library in promises
  220. Testing the request library
  221. Weather app with promises
  222. Fetching weather app code from the app.js file
  223. Axios documentations
  224. Installing axios
  225. Making calls in the app-promise file
  226. Making axios request
  227. Error handling in axios request
  228. Error handling with ZERO_RESULT body status
  229. Generating the weather URL
  230. Chaining the promise calls
  231. Summary
  232. Web Servers in Node
  233. Introducing Express
  234. Configuring Express
  235. Express docs website
  236. Installing Express
  237. Creating an app
  238. Exploring the developer tools in the browser for the app request
  239. Passing HTML to res.send
  240. Sending JSON data back
  241. Error handling in the JSON request
  242. The static server
  243. Making an HTML page
  244. The head tag
  245. The body tag
  246. Serving the HTML page in the Express app
  247. The call to app.listen
  248. Rendering templates
  249. Installing the hbs module
  250. Configuring handlebars
  251. Our first template
  252. Getting the static page for rendering
  253. Injecting data inside of templates
  254. Rendering the template for the root of the website
  255. Advanced templates
  256. Adding partials
  257. Working of partial
  258. The Header partial
  259. The Handlebars helper
  260. Arguments in Helper
  261. Express Middleware
  262. Exploring middleware
  263. Creating a logger
  264. Printing message to file
  265. The maintenance middleware without the next object
  266. Testing the maintenance middleware
  267. Summary
  268. Deploying Applications to Web
  269. Adding version control
  270. Installing Git
  271. Git on macOS
  272. Git on Windows
  273. Testing the installation
  274. Turning the node-web-server directory into a Git repository
  275. Using Git
  276. Adding untracked files to commit
  277. Making a commit
  278. Setting up GitHub and SSH keys
  279. Setting up SSH keys
  280. SSH keys documentations
  281. Working on commands
  282. Generating a key
  283. Starting up the SSH agent
  284. Configuring GitHub
  285. Testing the configuration
  286. Creating a new repository
  287. Setting up the repository
  288. Deploying the node app to the Web
  289. Installing Heroku command-line tools
  290. Log in to Heroku account locally
  291. Getting SSH key to Heroku
  292. Setting up in the application code for Heroku
  293. Changes in the server.js file
  294. Changes in the package.json file
  295. Making a commit in Heroku
  296. Running the Heroku create command
  297. Summary
  298. Testing the Node Applications – Part 1
  299. Basic testing
  300. Installing the testing module
  301. Testing a Node project
  302. Mocha – the testing framework
  303. Creating a test file for the add function
  304. Creating the if condition for the test
  305. Testing the squaring a number function
  306. Autorestarting the tests
  307. Using assertion libraries in testing Node modules
  308. Exploring assertion libraries
  309. Chaining multiple assertions
  310. Multiple assertions for the square function
  311. Exploring usage of expect with bogus test
  312. Using toBe and toNotBe to compare array/objects
  313. Using the toEqual and toNotEqual assertions
  314. Using toInclude and toExclude
  315. Testing the setName method
  316. The asynchronous testing
  317. Creating the asyncAdd function using the setTimeout object
  318. Writing the test for the asyncAdd function
  319. Making assertion for the asyncAdd function
  320. Adding the done argument
  321. The asynchronous testing for the square function
  322. Creating the async square function
  323. Writing test for asyncSquare
  324. Making assertions for the asyncSquare function
  325. Summary
  326. Testing the Node Applications – Part 2
  327. Testing the Express application
  328. Setting up testing for the Express app
  329. Testing the Express app using SuperTest
  330. The SuperTest documentation
  331. Creating a test for the Express app
  332. Writing the test for the Express app
  333. Testing our first API request
  334. Setting up custom status
  335. Adding flexibility to SuperTest
  336. Creating an express route
  337. Writing the test for the express route
  338. Organizing test with describe()
  339. Adding describe() for individual methods
  340. Adding the route describe block for the server.test.js file
  341. Test spies
  342. Creating a test file for spies
  343. Creating a spy
  344. Setting up spies assertions
  345. More details out of spy assertion
  346. Swapping of the function with spy
  347. Installing and setting up the rewire function
  348. Replacing db with the spy
  349. Writing a test to verify swapping of the function
  350. Summary
  351. Conclusion
  352. Another Book You May Enjoy
  353. Leave a review - let other readers know what you think

Using the getAll function

In order to get started, all we need to do is fill out the list notes function, which in this case we called getAll. The getAll function is responsible for returning every single note. That means it's going to return an array of objects, an array of all of our notes.

All we have to do that is to return fetchNotes, as shown here:

var getAll = () => {
return fetchNotes();
}

There's no need to filter, there's no need to manipulate the data, we just need to pass the data from fetchNotes back through getAll. Now that we have this in place, we can fill out the functionality over inside of app.js.

We have to create a variable where we can store the notes, I was going to call it notes, but I probably shouldn't because we already have a notes variable declared. I'll create another variable, called allNotes, setting it equal to the return value from getAll, which we know because we just filled out returns all the notes:

else if (command === 'list') {
var allNotes = notes.getAll();
}

Now I can use console.log to print a little message and I'll use template strings so I can inject the actual number of notes that are going to be printed.

Inside the template strings, I'll add Printing, then the number of notes using the $ (dollar) sign and the curly braces, allNotes.length: that's the length of the array followed by notes with the s in parenthesis to handle both singular and plural cases, as shown in the following code block:

else if (command === 'list') {
var allNotes = notes.getAll();
console.log(`Printing ${allNotes.length} note(s).`);
}

So, if there were six notes, it would say printing six notes.

Now that we have this in place, we have to go about the process of actually printing each note, which means we need to call logNote once for every item in the allNotes array. To do, this we'll use forEach, which is an array method similar to filter.

Filter lets you manipulate the array by returning true or false to keep items or remove items; forEach simply calls a callback function once for each item in the array. In this case we can use it using allNotes.forEach, passing in a callback function. Now, that callback function will be an arrow function (=>) in our case, and it will get called with the note variable just like filter would have. And all we'll call is notes.logNote, passing in the note argument, which is right here:

else if (command === 'list') {
var allNotes = notes.getAll();
console.log(`Printing ${allNotes.length} note(s).`);
allNotes.forEach((note) => {
notes.logNote(note);
});
}

And now that we have this in place, we can actually simplify it by adding the logNote call, as shown in here:

else if (command === 'list') {
var allNotes = notes.getAll();
console.log(`Printing ${allNotes.length} note(s).`);
allNotes.forEach((note) => notes.logNote(note));
}

This is the exact same functionality, only using the expression syntax. Now that we have our arrow function (=>) in place, we are calling notes.logNote once for each item in the all notes array. Let's save the app.js file and test this out over in Terminal.

In order to test out the list command, all I'll use is node app.js with the command list. There is no need to pass in any arguments:

node app.js list

When I run this, I do get Printing 3 note(s) and then I get my 3 notes to buy, to buy from store, and things to do, as shown in the following code output, which is fantastic:

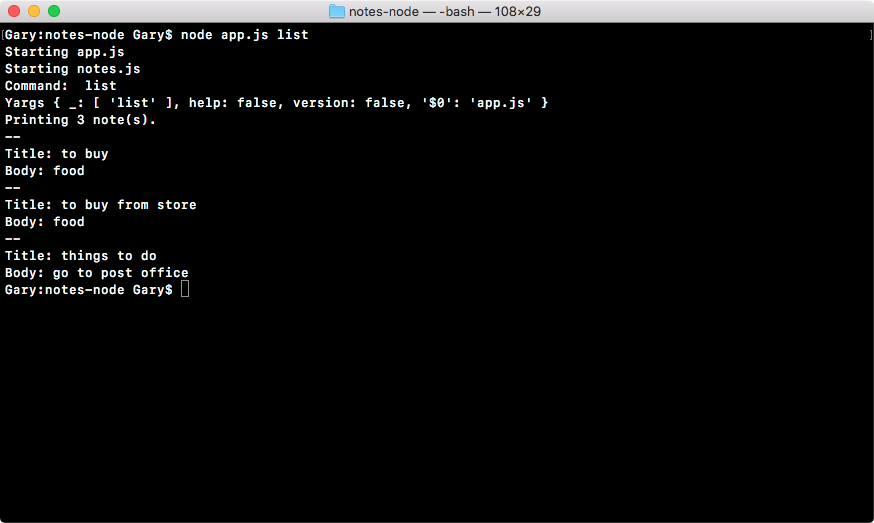
With this in place, all of our commands are now working. We can add notes, remove notes, read an individual note, and list all of the notes stored in our JSON file.

Moving on to the next section, I want to clean up some of the commands. Inside app.js and notes.js, we have some console.log statements that are printing out a few things we no longer need.

At the very top of app.js, I am going to remove the console.log('Starting app.js') statement, making the constant fs the first line.

I'll also remove the two statements: console.log('Command: ', command) and console.log('Yargs', argv) that print the command and the yargs variable value.

Inside notes.js, I will also remove the console.log('Stating notes.js') statement at the very top of that file, since it is no longer necessary, putting constant fs at the top.

It was definitely useful when we first started exploring different files, but now we have everything in place, there's no need. If I rerun the list command, this time you can see it looks a lot cleaner:

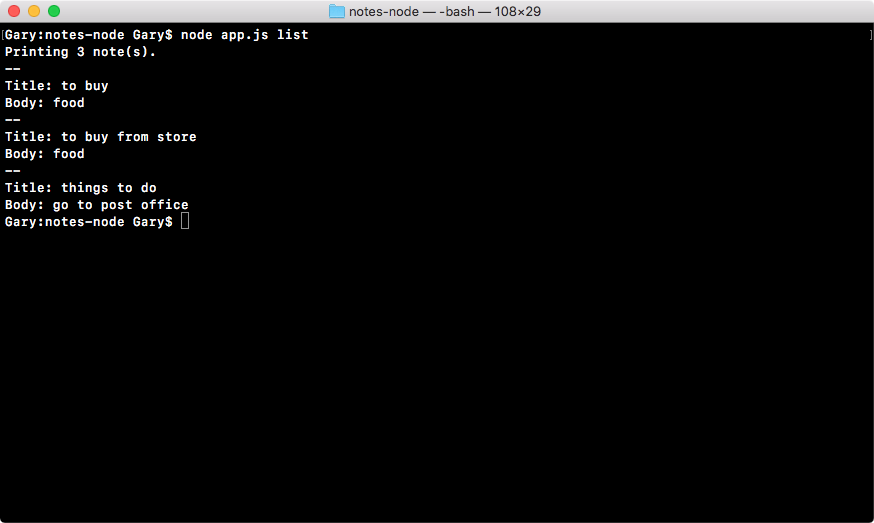
Printing three notes is the very first line showing up. With this in place, we have done our commands.

In the next section, we're going to take a slightly more in-depth look at how we can configure yargs. This is going to let us require certain arguments for our commands. So if someone tries to add a note without a title, we can warn the user and prevent the program from executing.