The first map we create should be the road map we created in GeoServer. We have to set up a blank map and load a WMS layer in it. Once it's working, we can bind the map to the appropriate button:
- Create a new map with the L.map function and save it to a variable. It needs the ID of the container element as a string, while it can additionally accept other parameters bundled in an object. For now, let's provide a center and a zoom parameter. The center is an array of two WGS 84 coordinates (latitude and longitude), while the zoom is a positive integer. Supply center coordinates that fit our map. We can get them either from QGIS or from Google Maps by centering the map on our study area and noting down the coordinates from the URL:
        var map = L.map('map', {
         center: [46.06, 18.25],
         zoom: 9
        });
The map canvas is there, although it has some visual glitches. The problem is that Leaflet also uses <div> elements to create its containers, while we defined some styles on every <div> element. That is why creating styling rules that are too general can lead to broken design:
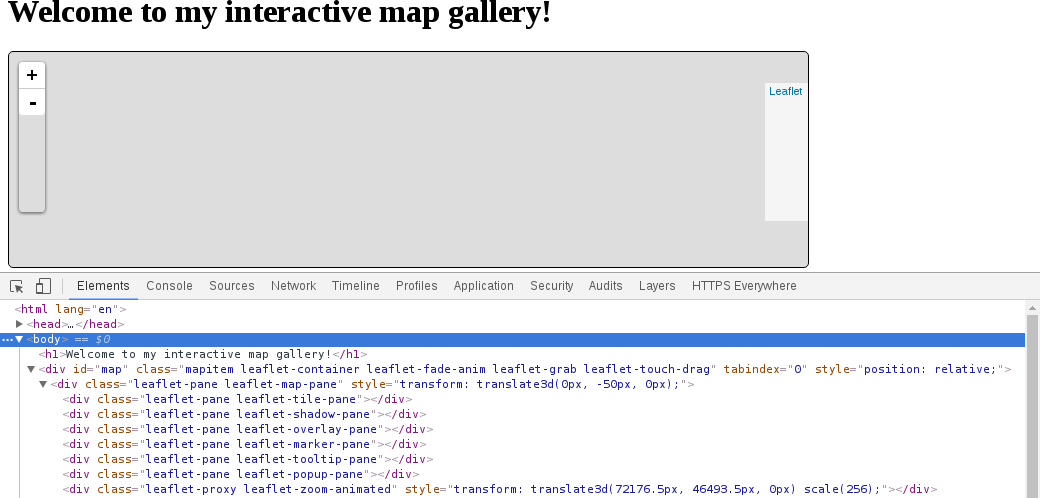
- Edit the map.html file and define a class name on every <div> element (class="mapitem").
- Edit the map.css file and rename the div selector to the new class (.mapitem).
- Now that our map canvas is fixed, we can load our first layer. We can create a new WMS layer with the L.tileLayer.wms function. It requires a mandatory URL parameter pointing at our WMS server and some optional WMS parameters (for example, layers, crs, format) bundled in an object. Let's just stick with the layers and format parameters. Create the WMS layer and save it to a variable. The layers parameter needs our layer group's name in GeoServer, along with the workspace's name it is in:
        var wms = L.tileLayer.wms('http://localhost:8080/geoserver/ows', {
         layers: 'practical_gis:road_map',
         format: 'image/png'
        });
- Add the new layer to the map with the map's addLayer method. It requires a layer object as an only parameter. Use the variable containing the WMS layer:
map.addLayer(wms);
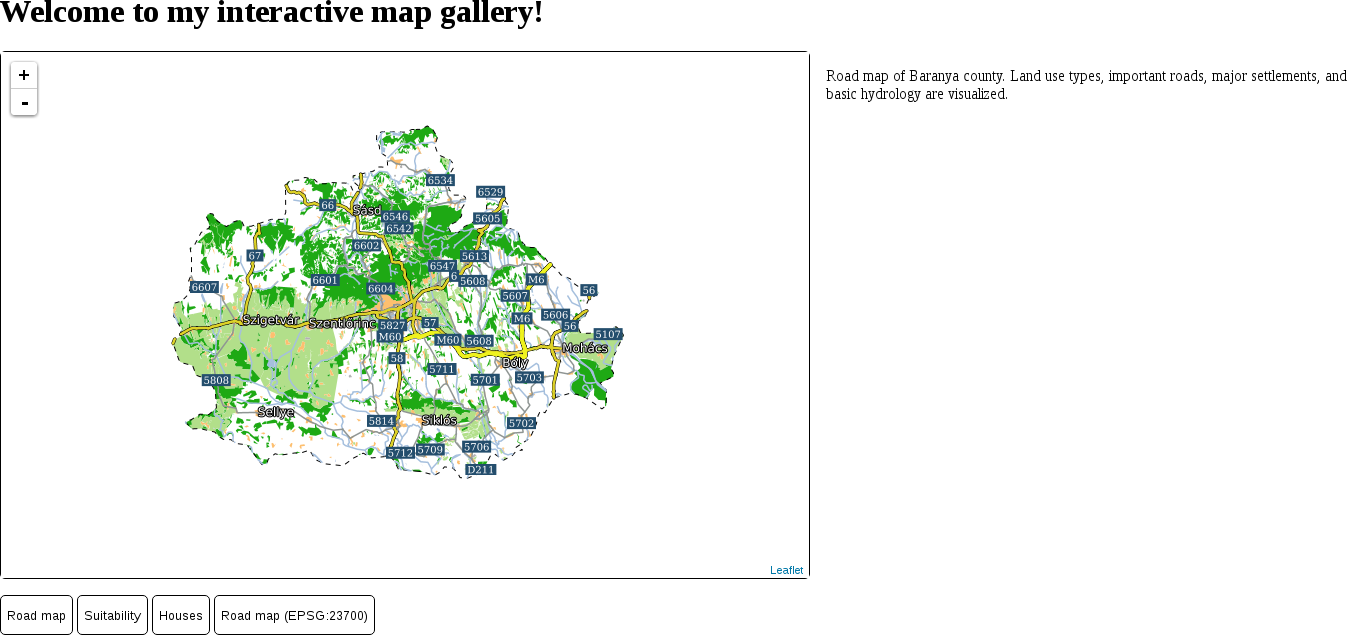
- Inspect the result. Alter the map's center and zoom parameters, if required.
L.tileLayer.wms('http://localhost:8080/geoserver/ows', {
layers: 'practical_gis:road_map',
format: 'image/png'
}).addTo(map);
Our map is working, although we still need to bind it to our first button. We do not have to give up the general function we created, though. As object values can be anything, we can create a second object containing our buttons' IDs as keys and the functions creating our maps as values.
- Create a new, empty object after the object, containing our descriptions:
var maps = {};
- Define the maps object's first property. Name it after the ID of the first button. It should contain a function with the Leaflet code we created earlier. The function does not require any parameters:
        maps.roadmap = function() {
          var map = L.map('map', {
            center: [46.06, 18.25],
            zoom: 9
          });

          L.tileLayer.wms('http://localhost:8080/geoserver/ows', {
            layers: 'practical_gis:road_map',
            format: 'image/png'
          }).addTo(map);
        };
- Add a third line to the updateMap function, executing the appropriate function from our maps object:
maps[evt.target.id]();
If we save our changes and refresh our page, we can see our road map by pressing the corresponding button: