So far, we used the public schema with the postgres role to create and fill our database. These are the default values, which are great for creating a local database, but far from ideal if we would like to create a remote GIS server. Let's discuss how roles and schemas work in PostgreSQL.
Roles are basically users that can log in, and do some stuff based on their permissions. Different roles can have different access levels to different databases. There are two kinds of roles--login roles and no-login roles (group roles). Group roles act as groups in operating systems; therefore, they can group multiple login roles, and manage their permissions in one place. Login roles are the typical users with passwords. The catch is, roles and group roles are independent from users and groups used by the operating system. System users cannot log in the database with their usernames, if a role was not created for them. Following this analogy, new users do not get roles created for them automatically by PostgreSQL.
Roles can have individual permissions, but they can also be managed by a group role. Similar to traditional users, roles can also have superuser (admin) capabilities. These superusers can modify roles and databases; therefore, they are quite dangerous to use as regular roles in a remote server. Additionally, they bypass every permission check, which makes them even more dangerous if exposed. The role postgres is a superuser role, which cannot be modified or dropped. It is completely fine to use in a local environment, as, by default, PostgreSQL does not accept connection requests from remote places, but only from the machine it is installed on.
Let's create two new login roles. One will be a regular GIS role with every kind of access to the GIS tables, while the other one will be a public role, which can only query the tables. It cannot modify them in any way; therefore, it will be safe to use by GeoServer, for example. We can create new roles by right-clicking on Login Roles, and selecting New Login Role. We must provide a name, and we should also add a password. As we do not want to create a superuser (having the postgres role is enough for that purpose), that's all we have to define. If we take a look at the last tab (SQL) after defining the required parameters, we can see the command that pgAdmin will use to create the role, which is as follows:
    CREATE ROLE gis LOGIN ENCRYPTED PASSWORD
    'md53929f8e603334cb5a8c5a632bcc3f3ac'
     VALID UNTIL 'infinity';
That is, it creates a role with CREATE ROLE, declares it as a login role with LOGIN, and, as it already calculated the hash of the password, it stores it directly with ENCRYPTED PASSWORD. It also includes a validity extent of infinity, which is superfluous.
If we wish to add a login role manually, we can simplify the command to the following:
CREATE ROLE gis LOGIN PASSWORD 'mypassword';
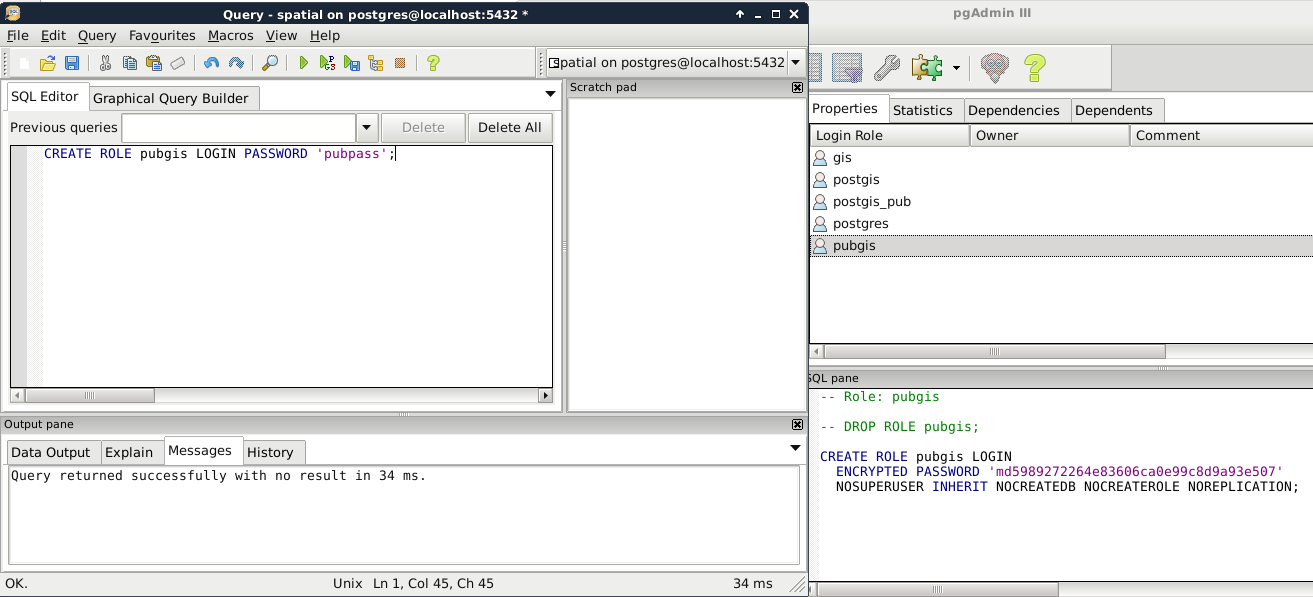
In this case, the password is provided in plain text, and the hash is calculated by PostgreSQL. We can try this method out by creating the other role from the command line by opening an SQL window (Execute arbitrary SQL queries in pgAdmin 3 and Tools | Query Tool in pgAdmin 4). If the tool is disabled, first select a database by clicking on it. If we run the following query, we should be able to see the new role created:
CREATE ROLE pubgis LOGIN PASSWORD 'pubpass';
Now that we have some roles, we can give them privileges to administer or just query tables. However, doing so is very cumbersome, as these kinds of privileges do not apply on tables created later on. To solve this issue, PostgreSQL uses schemas to group tables and a lot of other things. In PostgreSQL, schemas are similar to folders in a file system. A database groups different schemas, while a single schema groups different tables. Schemas are like group roles for user management. The only difference is that using a schema is mandatory.
There are three different schemas--information_schema, pg_catalog, and public. The first two are system schemas used by the RDBMS internally, and showed as Catalogs in pgAdmin.
We should not alter those schemas in any way. The last is the default one in which we stored our data and PostGIS functionality. Having multiple schemas is a convenient way of organizing a big database, where only a single part contains spatial data. If we select the public schema, we can see the SQL command that creates it:
    CREATE SCHEMA public
     AUTHORIZATION postgres;

    GRANT ALL ON SCHEMA public TO postgres;
    GRANT ALL ON SCHEMA public TO public;
    COMMENT ON SCHEMA public
     IS 'standard public schema';
Apart from the comment section, every command is important when creating a schema. We have to create it with CREATE SCHEMA, assign an owner with AUTHORIZATION, and give privileges to roles with the GRANT expressions. By using GRANT ALL, PostgreSQL automatically gives every privilege to postgres and public. The only problem is that we don't have a public role. By giving every permission to public, PostgreSQL implicitly says that every role ever created in this database should have every privilege to this schema. Sounds dangerous? It is very convenient though if used carefully.
As a rule of thumb, we shouldn't keep any tables in the public schema which shouldn't be accessed and edited by every role. Let's put our spatial database in a dedicated schema with the following steps:
- Create a new schema by right-clicking on Schemas and selecting New Schema.
- Give a name to the new schema, and assign an owner. The owner should be the role we created for managing the spatial database (for me it is gis).
- Click on OK to create the schema.
- Open a new SQL window, and grant some schema privileges to the roles we created.
- Grant every privilege to the administrator role by running the expression GRANT ALL ON SCHEMA spatial TO gis;.
- Grant only select privileges to the public role by running the expression GRANT USAGE ON SCHEMA spatial TO pubgis;.
- In the SQL window, also grant some table privileges to the roles.
- Grant every privilege to the administrator role with ALTER DEFAULT PRIVILEGES IN SCHEMA spatial GRANT ALL ON TABLES TO gis;.
- Grant only select privileges to the public role with ALTER DEFAULT PRIVILEGES IN SCHEMA spatial GRANT SELECT ON TABLES TO pubgis;.
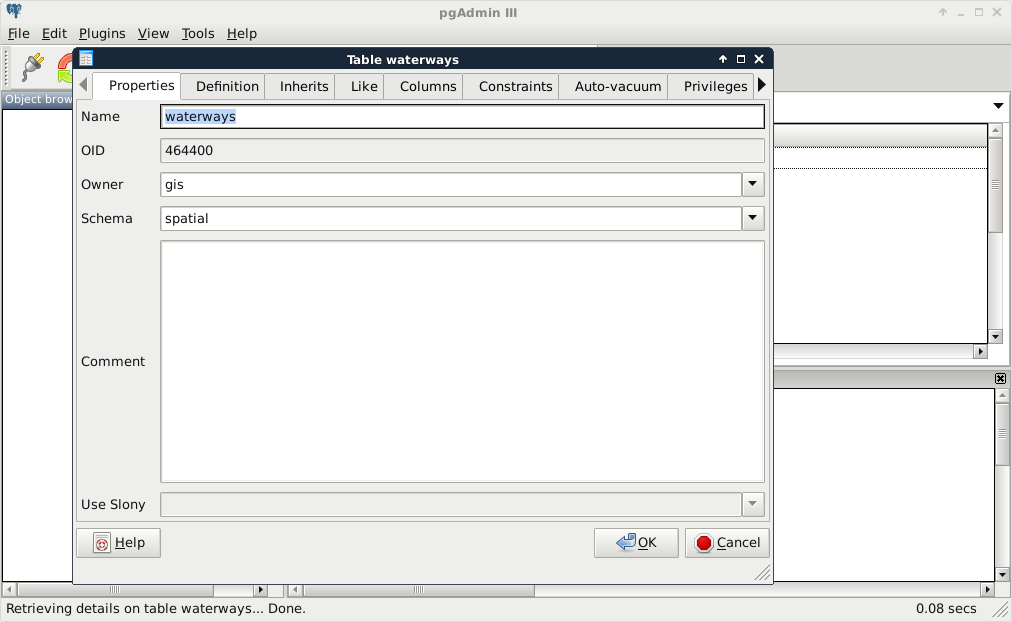
- Move every table to the new schema. Right-click on the tables in the public schema, and select Properties. There we can alter these properties. Watch out not to move the spatial_ref_sys table created by PostGIS. We can optionally set the owner of the tables to our GIS role:
We are all set. Let's try out our new schema by doing a spatial query that we've already done before:
    SELECT g.* FROM landuse l, geonames g
    WHERE ST_Intersects(l.geom, g.geom);
The preceding query returns an error. As we moved our tables out of the public schema, we have to explicitly define the schema of the tables with the syntax schema.table. If we update our query appropriately, PostGIS returns the intersecting features:
    SELECT g.* FROM spatial.landuse l, spatial.geonames g
    WHERE ST_Intersects(l.geom, g.geom);
I'm completely sure you've already found out why PostGIS still works. As we left it in the public schema, its functionality remained exposed. Can we move it out to our new schema, and use its functions by prefixing them with the schema name? Not easily. PostGIS quite heavily relies on sitting in the public (or a similarly exposed) schema. However, as we witnessed, we can move out our spatial tables wherever we see them fit.
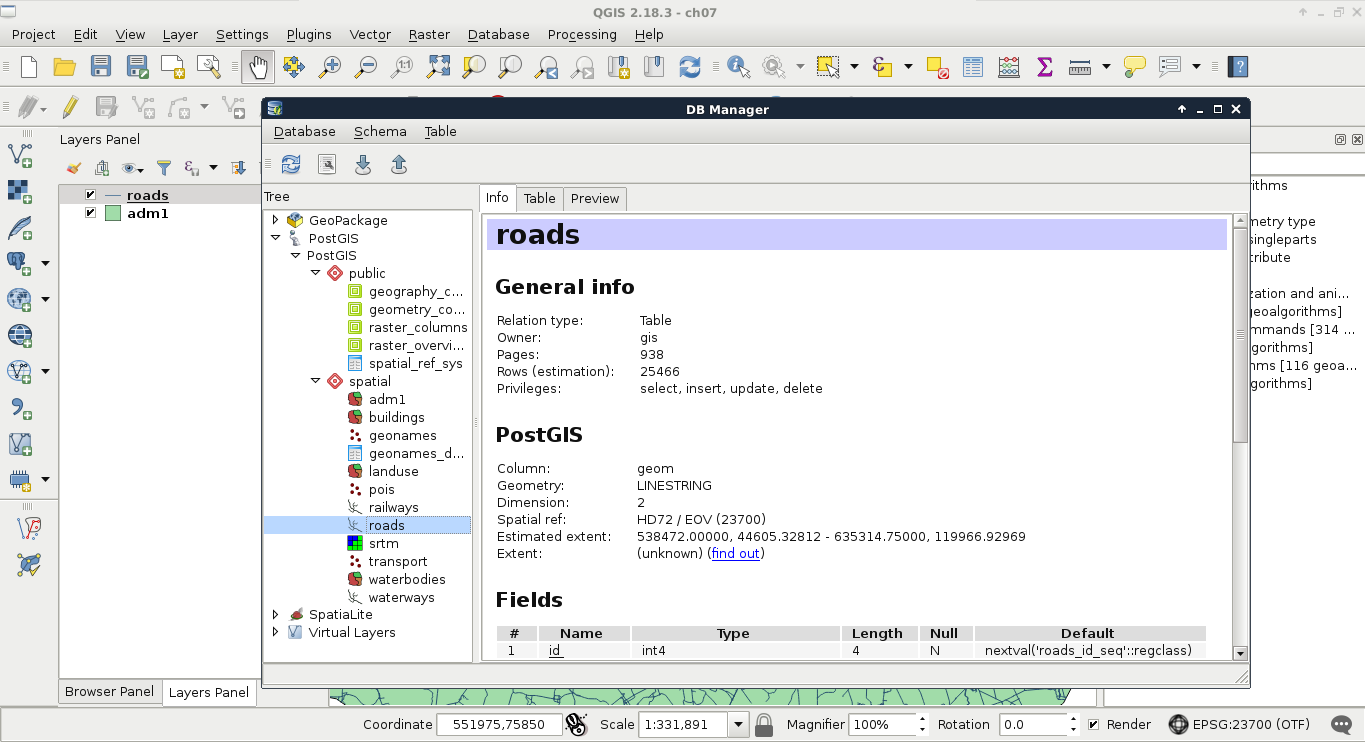
As the final task, let's open QGIS, and edit our PostGIS connection to use our new gis role. We have to use the database manager to get our layers again, as the project file for the previous chapter still thinks they are placed in the public schema, and, therefore, it cannot access them: