
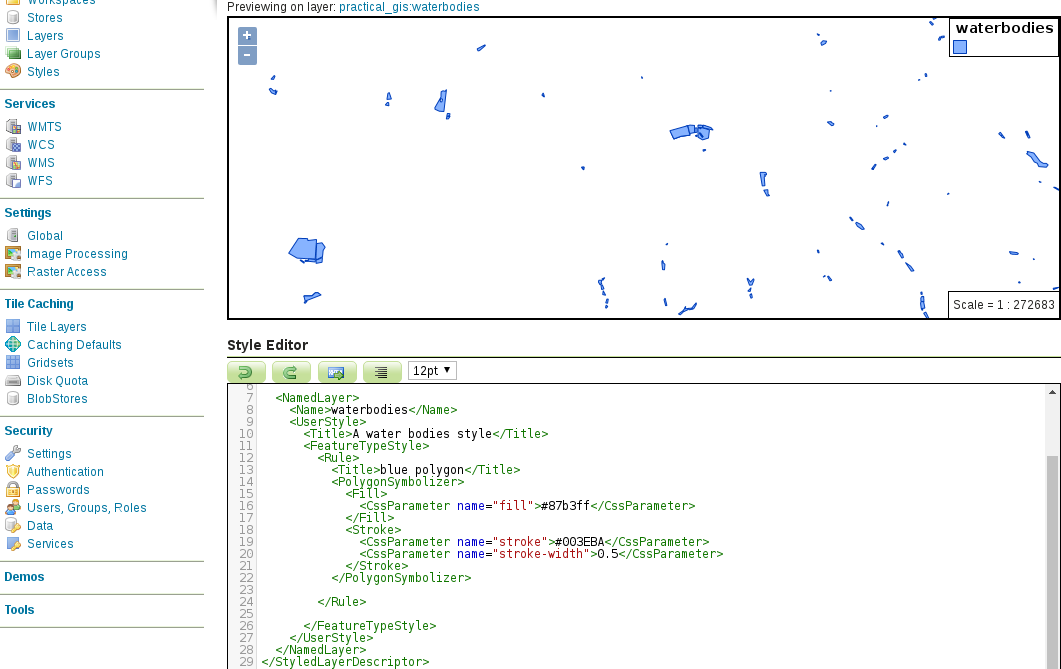
Let's style our waters by editing an existing style as follows:
- Note down the color of the rivers in its SLD document (#003EBA).
- Go to Data | Styles.
- Initialize a new style by clicking on Add a new style.
- Give it a short, but descriptive, name, like waterbodies.
- Generate a polygon template by selecting Polygon in Generate a default style, and clicking on Generate.
- Click on Submit to save the template.
- Select the new style from the existing styles. Now we have access to the Layer Preview tab. Navigate to it, and select our water bodies layer as the preview layer.
- Edit the stroke, and fill colors of the template. Optionally, edit the stroke width. Click on Apply, and check the result. Modify the fill color until you get a decent result.
- Go to the Publishing tab, and set this style as a default for our water bodies layer:
Optionally, you can style the water bodies like we did it in QGIS. To do that, remove the <Stroke> element with its content, and set the fill color to the same shade of blue as the rivers.