
PostGIS has a very big benefit over other DBMSs--QGIS can communicate with it very well. The same applies for SQLite containers and the GeoPackage format, but PostGIS offers the best capabilities as it can be deployed as a server and accessed from multiple clients even concurrently. For accessing a PostGIS database from QGIS, first we need to connect to it. Remember the database we created in Chapter 1, Setting Up Your Environment? We will use the data provided there to define and save a connection in QGIS:
- Click on the Add PostGIS Layers button in the layers toolbar.
- Define a new connection by clicking on New.
- Fill out the required parameters we used to set up our database:
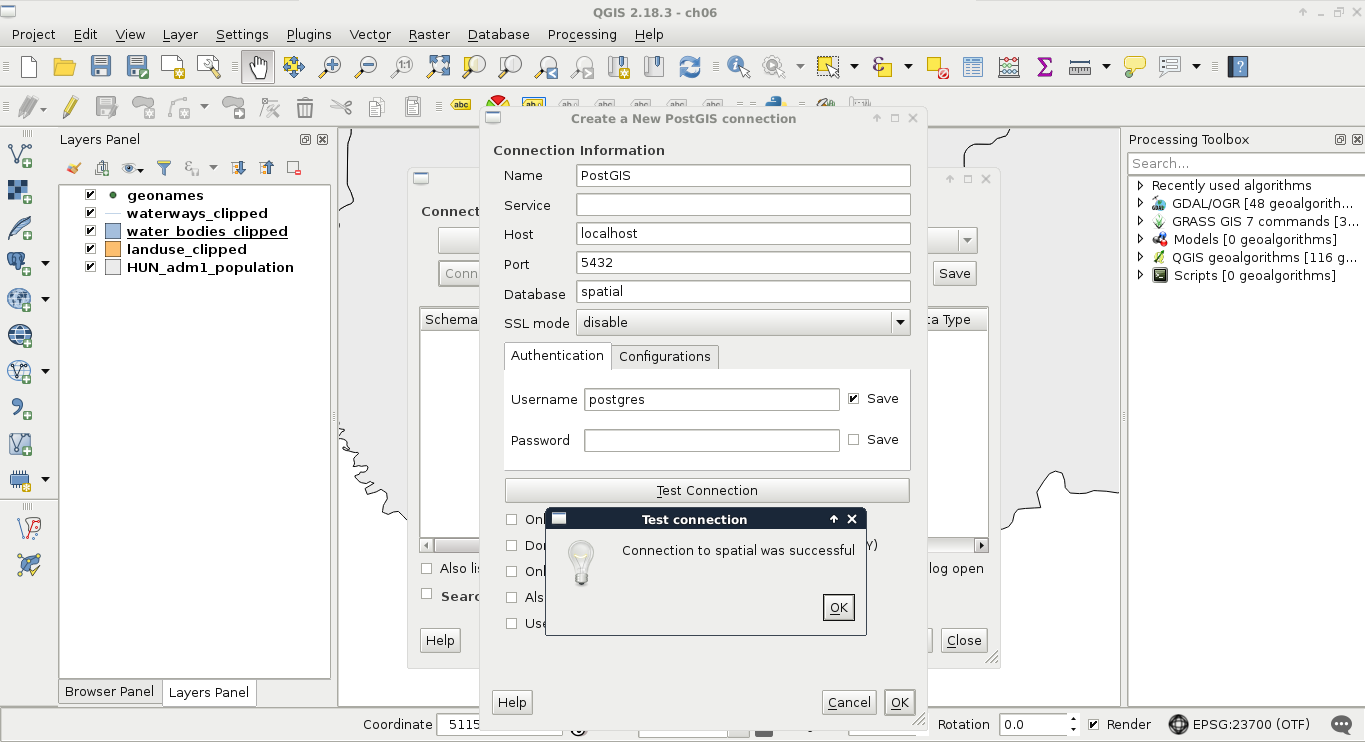
- By clicking on Test Connection, we can ask QGIS if the provided parameters are correct and sufficient. If it says so, we can save the connection by applying with the OK button.
Now that we have defined a connection, we can use QGIS's database manager. We can access it from Database | DB Manager | DB Manager in the menu bar. There we can click on PostGIS and select the name of the connection we defined. We can see that we have a simple PostgreSQL database as we did not enable the PostGIS spatial extension yet. We have some permissions, though, which is nice as we can enable PostGIS directly from QGIS. To do this, we have to click on the SQL window button and type the following expression in the dialog:
CREATE EXTENSION postgis;
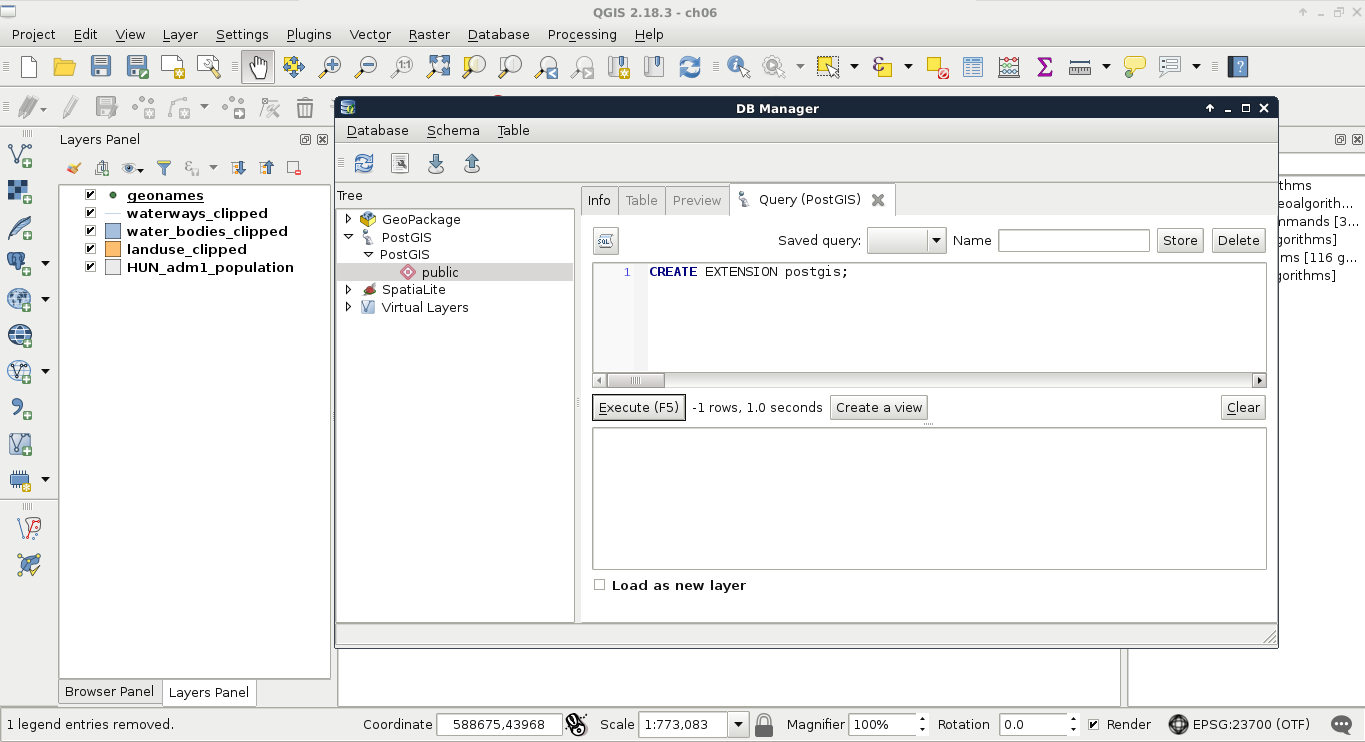
After executing and refreshing the connection (right-click on the connection's name and click on Re-connect), we can see some views and table created by the PostGIS extension. If we open the table spatial_ref_sys in QGIS and browse its content, we can take a glance at the CRSs PostGIS support (Appendix 1.4). Now our database is spatially enabled and we can start importing layers into it.