While PostgreSQL's, and therefore PostGIS's, structure is optimized to use vector data, we can also store raster data in a PostGIS database. The gains in this case are not as great as with vector data as QGIS will suffer a performance hit when it has to parse raster data from a PostGIS database instead of a file. On the other hand, PostGIS can query raster tables at various locations and, therefore, we can build expressions executing spatial analysis with mixed data. Furthermore, we might need to store rasters with vectors in a distributed system. One of the main pitfalls of adding raster data to a PostGIS database is that we cannot do it from QGIS. We have to use the command-line tool raster2pgsql.
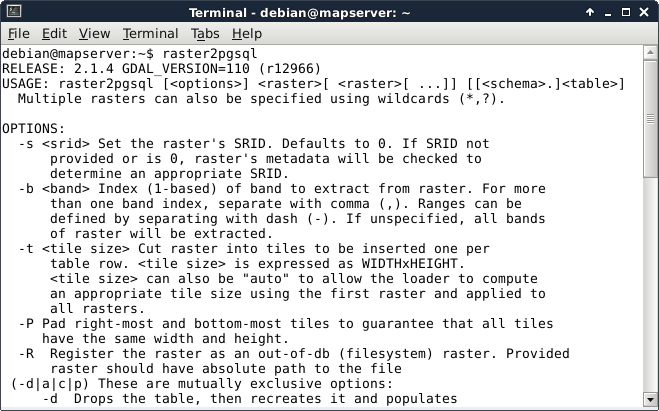
Our first task is to locate the tool. If you are using Linux or macOS, you just have to open up a terminal to have instant access to the tool if PostGIS is installed properly. Windows users will have a harder time, though. If you are using Windows, you have to find the installation folder of raster2pgsql.exe. You have to open a command line there or navigate there with cd commands. If we have access to the tool, we can run it without parameters and see the help page:
The next step is to prepare our raster layer. As raster2pgsql cannot warp rasters between projections, we have to create a transformed version if we are using a local projection. We can do this by saving the srtm layer in QGIS (with Save As from its context menu) with our local projection defined in the CRS field. Additionally, we can choose a High compression profile to decrease the file's size in the Create Options menu .
Now that we have raster2pgsql located and accessible and also our srtm layer exported in the projection which we would like to use in PostGIS, we can build our command for import as follows:
    raster2pgsql -t "auto" -I -d -C /home/debian/practical_gis
      /processed/srtm/srtm_23700.tif public.srtm > srtmimport.sql
Let's see how the flags and parameters which we provided work:
- -t: PostGIS can tile raster data to speed up queries. With this parameter, we can define the size of the individual tiles. By providing the "auto" parameter, we ask raster2pgsql to calculate the optimal tile sizes for our raster. If we would like to override it with our values, we have to provide it as WIDTHxHEIGHT (for example, 512x512).
- -I: Creates a spatial index for the bounding boxes of the tiles. It can speed up queries even more.
- -d: Drops the destination table if it exists before feeding our data.
- -C: Enforces adding constraints. Without it, the metadata of the raster (like projection) won't get added and we cannot visualize the raster in QGIS.
- /home/debian/practical_gis/processed/srtm/srtm_23700.tif: This is the path to our raster image.
- public.srtm: This is the destination schema and table name for the stored raster. We have to provide it in the form of schema.table.
The last part of the command redirects the output of raster2pgsql to a file named srtmimport.sql. We can use that output to create our table in PostGIS. There are additional parameters we can use. If our raster does not contain projection data, for example, we can add -s SRID. That is, if we would like to import a WGS84 raster, it will be -s 4326.
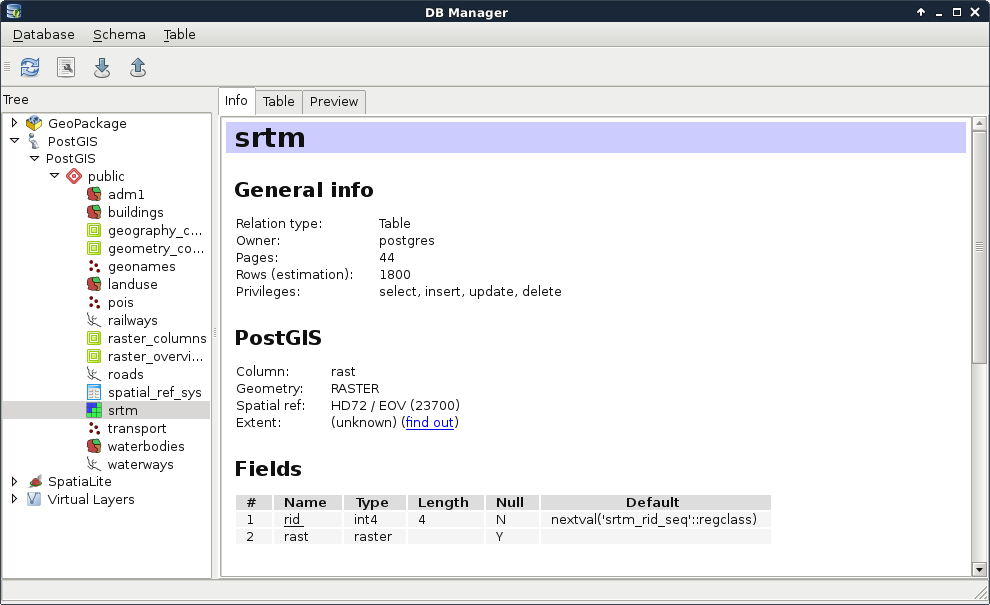
The last step is to execute the resulting SQL file in PostGIS. For this, we can open up pgAdmin 3 and click on the Execute arbitrary SQL queries button (Tools | Query Tool in pgAdmin 4). There we can open our SQL file with the Open files button. Once pgAdmin reads the content, we can run our query with the Execute button. That's it. If we refresh our database manager's connection in QGIS, we can see our raster layer added to our PostGIS tables: