- In the web browser, navigate to the address http://localhost/phpmyadmin/ to access your web server's database administration tool.
- Click on Databases tab in phpMyAdmin.
- Type the name of the new database to be created in the empty field following to the words Create database. In this case, we will use the name wordpressdev:
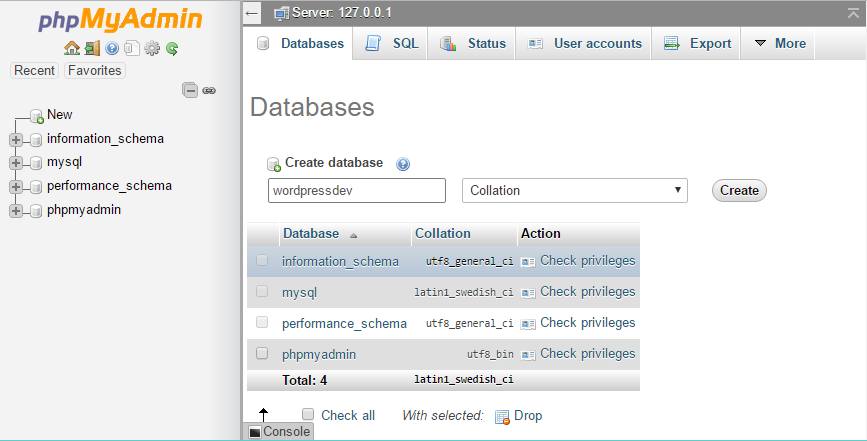
- Click on the Create button to complete the database creation process.
- Download the latest WordPress installation package from the official WordPress website (https://wordpress.org). The download link can be found on the very first page of the website and the download package will work on any web server, local, or remote.
The following instructions have been tested against WordPress version 4.8. While the installation process does not usually change much between versions, there may be slight differences in these steps on newer versions.
- Extract the WordPress archive file contents using your favorite file archiver utility or your operating system's built-in capabilities.
- Copy the contents of the resulting wordpress folder to your local web server's web content directory (c:\WPDev, if you followed the previous recipe). You should not copy the wordpress folder itself unless you want the address of your WordPress website to be http://localhost/wordpress.
- Direct your web browser to http://localhost to start the WordPress installation process.
- Select your preferred language and click on Continue.
- On the next page, click on the Let's Go button to start your development site's configuration.
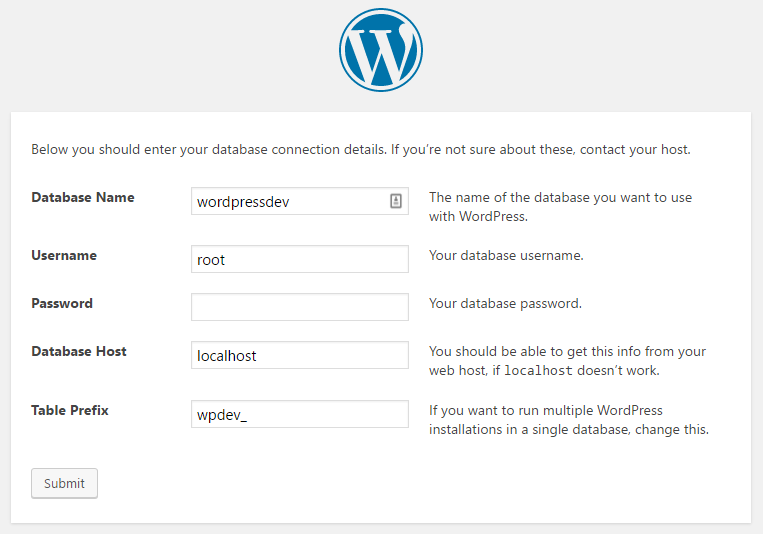
- Update the Database Name field to reflect the name of our newly-created database (wordpressdev).
- Set the MySQL User Name to root.
- Delete all the characters from MySQL Password to leave it empty, since local MySQL server root accounts are typically configured without any password.
- Leave the Database Host field with its default value (localhost).
- Change the Table Prefix field from its default value to wpdev_:
- Click on the Submit button to validate the information entered. If any parameters are not entered correctly, or if the WordPress installation process cannot correctly access your database server, it will display an error page and give you an opportunity to make corrections.
- Click on the Run the install button for WordPress to create the required table structure in the designated MySQL database.
- Specify a Site Title (for example, Development Site).
- Set Username for the admin user. For increased security, it's always best to choose a username that people would not be able to easily guess. Obvious names such as admin or administrator should be avoided.
- Optionally, change the randomly generated password with a password of your own choice. If WordPress determines that your new password is weak, you will need to check the additional checkbox that appears to confirm that you want to use a weak password.
- Enter your email address in the appropriate field (although no email will actually be sent on most local development installations).
- If you are configuring a live external development server, check the Discourage search engines from indexing this site option, since we do not want this development site to appear anywhere.
- Click on Install WordPress to complete the installation and you will be automatically logged in to the site's WordPress Dashboard.
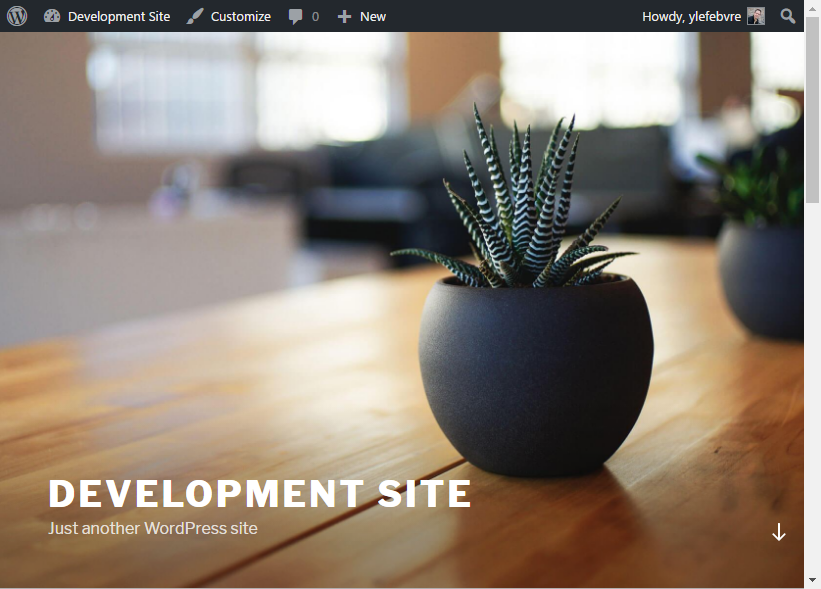
- Click on the Development Site link in the Dashboard admin bar to see your new site: