
- Navigate to the WordPress plugin directory (wp-content/plugins) of your development installation.
- Create a new subdirectory called ch2-plugin-header within the plugin directory.
- Navigate to this directory and create a new text file called ch2-plugin-header.php.
- Open the new file in a text editor and add the following text:
<?php
/*
Plugin Name: Chapter 2 - Plugin Header
Plugin URI:
Description: Declares a plugin that will be visible in the WordPress admin interface
Version: 1.0
Author: Yannick Lefebvre
Author URI: http://ylefebvre.ca
License: GPLv2
*/
While the Description text is shown on two separate lines in the code example, it should all be entered on a single line in your code to be completely displayed in the WordPress Installed Plugins list.
Downloading the example code
You can download the example code files for all Packt books you have purchased from your account at https://www.packtpub.com. If you purchased this book elsewhere, you can visit https://www.packtpub.com/support and register to have the files emailed directly to you.
You can download the example code files for all Packt books you have purchased from your account at https://www.packtpub.com. If you purchased this book elsewhere, you can visit https://www.packtpub.com/support and register to have the files emailed directly to you.
- Save and close the new file.
- Log in to the administration page of your development WordPress installation.
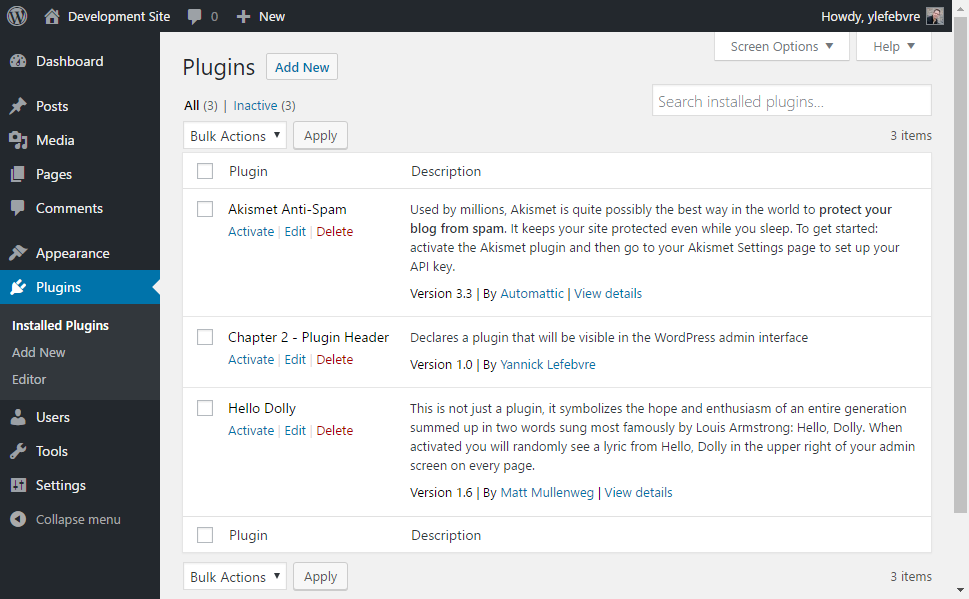
- Click on Plugins in the left-hand navigation menu to show a list of all the installed plugins. You should see your new plugin listed next to the two default ones that come pre-packaged with WordPress:
- Enable the plugin by clicking on the Activate link under its name. You will see that the background color of your new plugin changes to indicate that it has been activated, along with a message specifying that the activation was successful.