
- Navigate to the WordPress plugin directory of your development installation.
- Create a new directory called ch2-nav-menu-filter.
- Navigate to this directory and create a new text file called ch2-nav-menu-filter.php.
- Open the new file in a code editor and add an appropriate header at the top of the plugin file, naming the plugin Chapter 2 - Nav Menu Filter.
- Add the following line of code to register a function that will be called when WordPress is preparing data to display the site's navigation menu:
add_filter( 'wp_nav_menu_objects', 'ch2nmf_new_nav_menu_items',
            10, 2 );
- Add the following code section to provide an implementation for the ch2nmf_new_nav_menu_items function. Notice that the word functio is mistyped on purpose at the beginning of the first line:
functio ch2nmf_new_nav_menu_items( $sorted_menu_items, $args ) {
    print_r( $sorted_menu_items );
    return $sorted_menu_items;
}
If you are using a dedicated code editor, you should be able to tell that the text font is not a recognized keyword since it will not be colored as a PHP keyword.
- Save the plugin file and leave your code editor open.
- Log in to the administration page of your development WordPress installation.
- Click on Plugins in the left-hand navigation menu.
- Activate your new plugin.
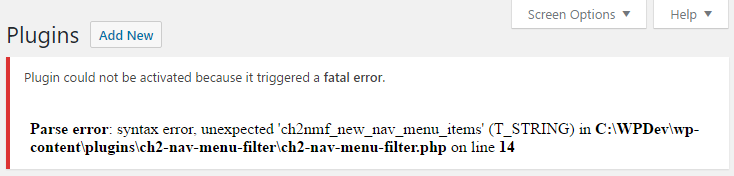
- WordPress will display a fatal error message indicating that the plugin could not be activated, since a syntax error was found. It also indicates the exact filename and line where the error occurred, helping to narrow down where the problem occurred:
- Go back to your code editor, correct the spelling of the word function, and save the file.
- Activate the plugin a second time. It should now activate correctly.
- Back in the code editor, remove the last letter of the word kbd>function to reintroduce a syntax error.
- Visit your website. You will now see that the entire site has disappeared and your browser only displays a blank page with an error message similar to the one we just saw. You may also only get a blank page, depending on your web server configuration.
- Correct the spelling error once again and your website will go back to normal. You will also see a lot of information printed before the navigation menu. This output is generated by the print_r function and is meant to help us understand how the data received by our filter function is organized. Once we have a good understanding of that data, we will be able to properly make changes to this information in a further step.
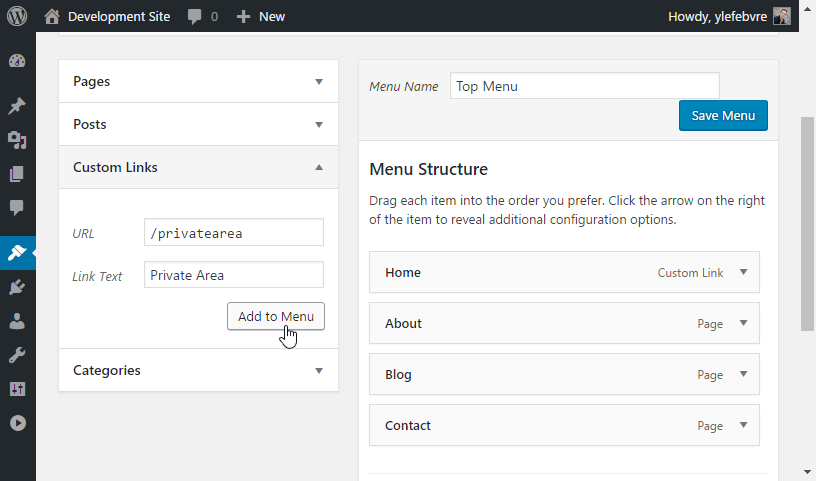
- In the WordPress dashboard, navigate to the Appearance | Menus item and create an additional item in your menu as Custom Link, setting the URL to /privatearea and the Link Text to Private Area:
- Click on the Save Menu button to store all of your updates.
- Back in the code editor, replace the print_r function call inside of the filter function with the following code:
// Check if used is logged in, continue if not logged
if ( is_user_logged_in() == FALSE ) {
    // Loop through all menu items received
    // Place each item's key in $key variable
    foreach ( $sorted_menu_items as $key => $sorted_menu_item ) {
        // Check if menu item title matches search string
        if ( 'Private Area' == $sorted_menu_item->title ) {
            // Remove item from menu array if found using
            // item key
            unset( $sorted_menu_items[ $key ] );
        }
    }
}
- Refresh your website and you will see that the large array printout has disappeared. If you are logged in as the administrator, you will also notice the Private Area link in your menu. Log out or use another browser where you are not logged in to your development site to hide the menu item.