- Navigate to the WordPress plugin directory of your development installation.
- Create a new directory called ch3-individual-options.
- Navigate to this directory and create a new text file called ch3-individual-options.php.
- Open the new file in a code editor and add an appropriate header at the top of the plugin file, naming the plugin Chapter 3 - Individual Options.
- Add the following line of code to register a function that will be executed when the plugin is activated, after its initial installation or following an upgrade:
register_activation_hook( __FILE__, 'ch3io_set_default_options' );
- Add the following code section to provide an implementation for the ch3io_set_default_options function:
function ch3io_set_default_options() {
    if ( false === get_option( 'ch3io_ga_account_name' ) ) {
        add_option( 'ch3io_ga_account_name', 'UA-0000000-0' );
    }
}
- Save and close the plugin file. Execute the activation function that was just added by clicking on the Activate option of this chapter 3 - Individual Options plugin.
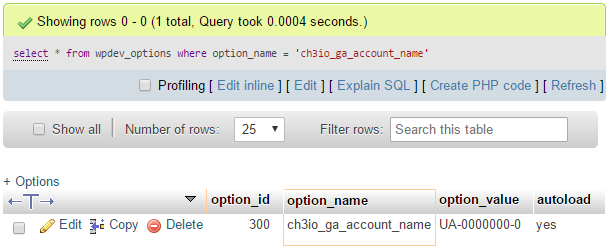
- In your web server's MySQL database administration tool, select your WordPress database (wordpressdev if you followed the recipe in Chapter 1, Preparing a Local Development Environment), then select the wpdev_options table. Click on the SQL tab, replace the default query with the following statement, and click on Go:
select * from wpdev_options where option_name = 'ch3io_ga_account_name'
- Your query should return a single row with the default value assigned to the new option: