- Navigate to the WordPress plugin directory of your development installation.
- Create a new directory called ch9-pop-up-dialog.
- Navigate to the directory and create a text file called ch9-pop-up-dialog.php.
- Open the new file in a code editor and add an appropriate header at the top of the plugin file, naming the plugin Chapter 9 - Pop-Up Dialog.
- Add the following line of code to register a function to be called when script loading requests are made:
add_action( 'wp_enqueue_scripts', 'ch9pud_load_scripts' );
- Add the following code segment to provide an implementation for the ch9pud_load_scripts function:
function ch9pud_load_scripts() {
    wp_enqueue_script( 'jquery' );
    add_thickbox();
}
- Insert the following line of code to register a function to display content in the page footer:
add_action( 'wp_footer', 'ch9pud_footer_code' );
- Append the following block of code to provide an implementation for the ch9pud_footer_code function:
function ch9pud_footer_code() { ?>
<script type="text/javascript">
jQuery( document ).ready(function() {
setTimeout( function() {
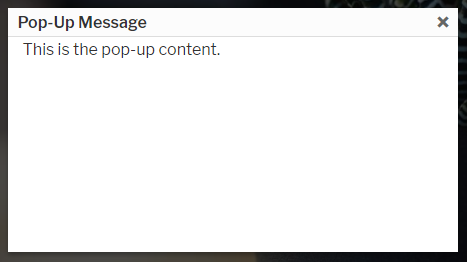
tb_show( 'Pop-Up Message', '<?php echo plugins_url(
'content.html?width=420&height=220',
__FILE__ ); ?>', null );
}, 2000 );
} );
</script>
<?php
}
- Save and close the plugin file.
- Create a new HTML file named content.html and open it in a code editor.
- Insert the following HTML code as the file's content:
<!DOCTYPE html>
<html>
    <body>
        <div>This is the pop-up content.</div>
    </body>
</html>
- Save and close the HTML file.
- Navigate to the Plugins management page and Activate the Chapter 9 - Pop-Up Dialog plugin.
- Visit any page of the website to see the new pop-up dialog appear two seconds after the whole page is displayed: