
- Visit the XAMPP website (https://www.apachefriends.org/) and download the appropriate XAMPP package for your computer.
XAMPP is available for Windows, macOS, and Linux platforms. The screenshots in this recipe were taken from XAMPP version 5.6.30 on Windows 10. The installation steps and exact dialog content might vary based on your choice of platform.
- Optional on Windows: Disable the Windows User Access Control (UAC) feature to give full permissions to XAMPP to install itself on your system (look up the steps to perform this procedure on your favorite search engine).
- Launch the XAMPP installer (xampp-win32-5.6.30-0-VC11-installer.exe on the Windows platform).
- Acknowledge the warning message about User Access Control (UAC) and click on Next to start the installation process.
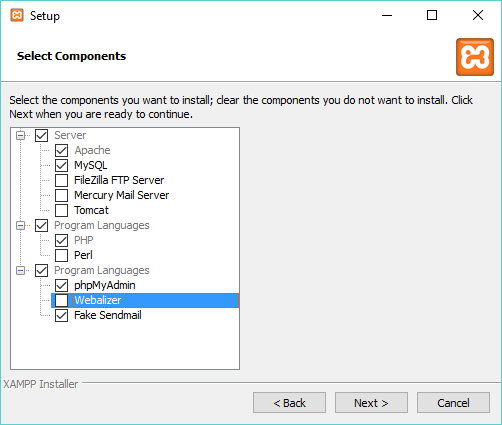
- On the following screen, which lists all of the components that can be installed, uncheck the boxes for FileZilla FTP Server, Mercury Mail Server, Tomcat, Perl, and Webalizer, then click on Next:
- On the Installation folder screen, leave the default value for the installation directory if possible (c:\xampp), since some references to this folder will be made in this book, then click on Next.
- Click on the Next button to proceed with the web server installation.
- Make sure that the option to start the Control Panel is checked and click on Finish once the installation is complete.
- Select your preferred language for the XAMPP Control Panel and click on Save to launch the application.
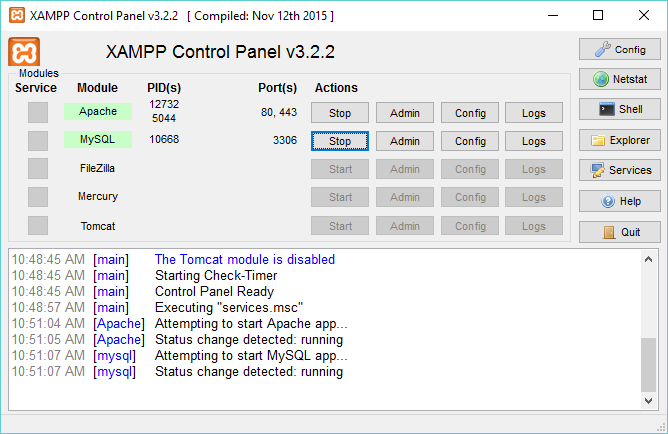
- Click the Start buttons for Apache and MySQL to launch these modules. Their names will be highlighted in green once they have been successfully started, as shown in the following screenshot:
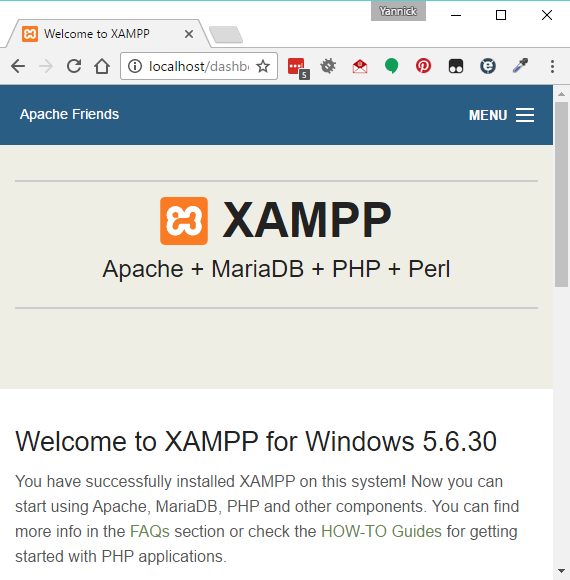
- Open a web browser and navigate to the address http://localhost to display your local web server's welcome page:
- Open the c:\xampp\apache\conf\httpd.conf file in a text editor (for example, Notepad).
- Search for the DocumentRoot configuration option and change its value to a different location on the disk to avoid keeping your project files under the original installation directory. For example, you could set it to a new directory designed to hold your local development installation of WordPress, such as DocumentRoot "C:/WPDev".
Notice that forward slashes are used in this path. You should be careful if you copy and paste a path from a file explorer window.
- Search for the Directory option and change it to the same path that was used for DocumentRoot, that is, <Directory "C:/WPDev">.
- Save and close the httpd.conf file.
- Create the directory specified as DocumentRoot, if it does not already exist on your computer.
- Open XAMPP Control Panel.
- Stop and re-start the Apache service for the new configuration to take effect.
Trying to access the local web server's welcome page will no longer work after having performed steps 14 through 20, since the new directory specified is currently empty. This will be corrected in the next recipe.