Now it's time to give the data we downloaded a look using QGIS. We must first create a connection to the database in order to access the table. Get connected and add the table as a layer by following the ensuing steps:
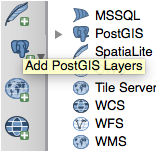
- Click on the Add PostGIS Layers icon:
- Click on the New button below the Connections drop-down menu.
- Create a new PostGIS connection. After the Add PostGIS Table(s) window opens, create a name for the connection and fill in a few parameters for your database, including Host, Port, Database, Username, and Password:

- Once you have entered all of the pertinent information for your database, click on the Test Connection button to verify that the connection is successful. If the connection is not successful, double-check for typos and errors. Additionally, make sure you are attempting to connect to a PostGIS-enabled database.
- If the connection is successful, go ahead and check the Save Username and Save Password checkboxes. This will prevent you from having to enter your login information multiple times throughout the exercise.
- Click on OK at the bottom of the menu to apply the connection settings. Now you can connect!
Make sure the name of your PostGIS connection appears in the drop-down menu and then click on the Connect button. If you choose not to store your username and password, you will be asked to submit this information every time you try to access the database.
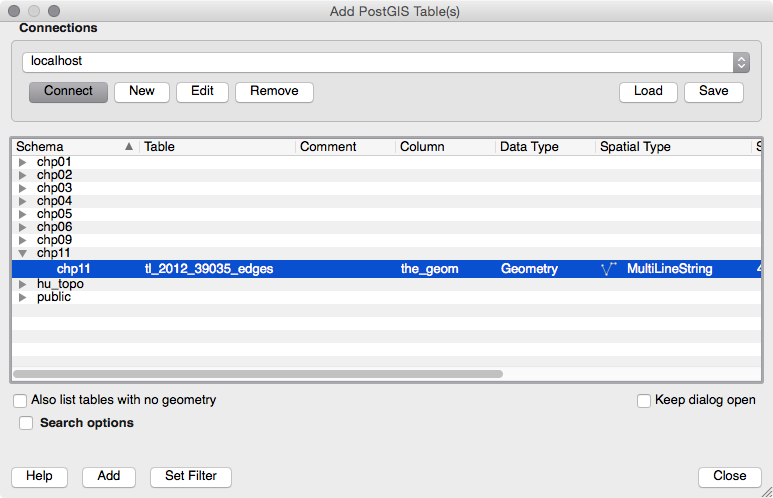
Once connected, all schemas within the database will be shown and the tables will be made visible by expanding the target schema.
- Select the table(s) to be added as a layer by simply clicking on the table name or anywhere along its row. Selection(s) will be highlighted in blue. To deselect a table, click on it a second time and it will no longer be highlighted. Select the tl_2012_39035_edges table that was downloaded at the beginning of the chapter and click on the Add button, as shown in the following screenshot:
- A subset of the table can also be added as a layer. This is accomplished by double-clicking on the desired table name.
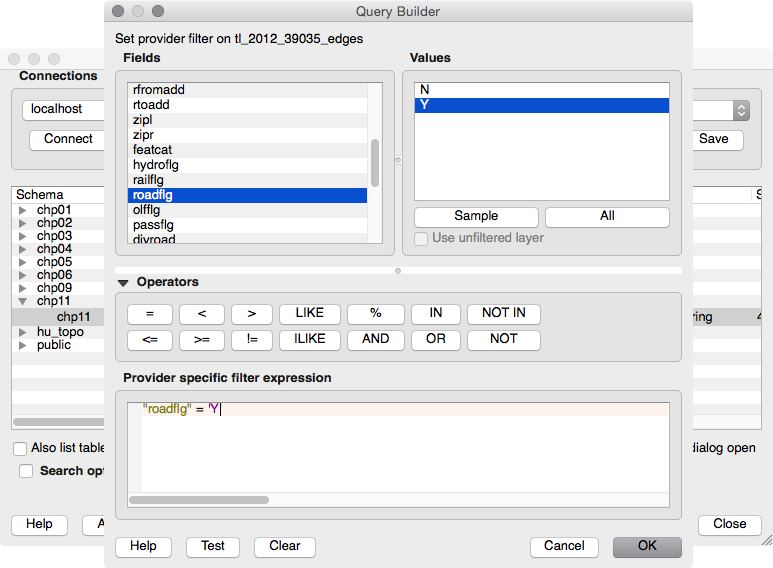
- The Query Builder window will open, which aids in creating simple SQL WHERE clause statements. Add the roads by selecting the records where roadflg = Y. This can be done by typing a query or using the buttons within Query Builder:
- Click on the OK button followed by the Add button. A subset of the table is now loaded into QGIS as a layer. The layer is strictly a static, temporary copy of your database. You can make whatever changes you like to the layer and not affect the database table.
The same holds true the other way around. Changes to the table in the database will have no effect on the layer in QGIS.
If needed, you can save the temporary layer in a variety of formats, such as DXF, GeoJSON, KML, or SHP. Simply right-click on the layer name in the Layers panel and click on Save As. This will then create a file, which you can recall at a later time or share with others.
The following screenshot shows the Cuyahoga county road network:

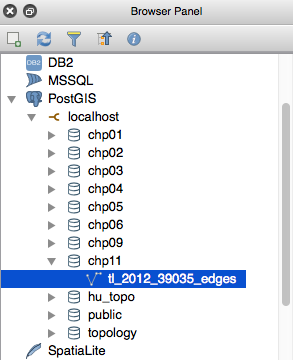
You may also use the QGIS Browser Panel to navigate through the now connected PostGIS database and list the schemas and tables. This panel allows you to double-click to add spatial layers to the current project, providing a better user experience not only of connected databases, but on any directory of your machine: