If you did not follow the recipes in Chapter 1, Moving Data in and out of PostGIS, be sure to import the hotspots (Global_24h.csv) in PostGIS. The following steps explain how to do it with ogr2ogr (you should import the dataset in their original SRID, 4326, to make spatial operations faster):
- Start a session in the postgis_cookbook database:
> psql -d postgis_cookbook -U me
- Create a new schema chp10 in the postgis_cookbook database:
postgis_cookbook=# CREATE SCHEMA chp10;
- We need to create the hotspots_dist table, that will serve as parent for the foreign tables:
      postgis_cookbook =# CREATE TABLE chp10.hotspots_dist (id serial
      PRIMARY KEY, the_geom public.geometry(Point,4326));
- Exit the psql environment:
postgis_cookbook=# \q
- Connect to the psql environment as the postgres user:
> psql -U me
- Create the remote databases, connect them, create the postgis extension and create the foreign tables that will receive the sharded data. Then, exit the psql environment. For this, execute the following SQL commands:
      postgres=# CREATE DATABASE quad_NW;
      CREATE DATABASE quad_NE;
      CREATE DATABASE quad_SW;
      CREATE DATABASE quad_SE;
      postgres=# \c quad_NW;
      quad_NW =# CREAT EXTENSION postgis;
      quad_NW =# CREATE TABLE hotspots_quad_NW (
        id serial PRIMARY KEY,
        the_geom public.geometry(Point,4326)
      );
      quad_NW =# \c quad_NE;
      quad_NE =# CREAT EXTENSION postgis;
      quad_NE =# CREATE TABLE hotspots_quad_NE (
        id serial PRIMARY KEY,
        the_geom public.geometry(Point,4326)
      );
      quad_NW =# \c quad_SW;
      quad_SW =# CREAT EXTENSION postgis;
      quad_SW =# CREATE TABLE hotspots_quad_SW (
        id serial PRIMARY KEY,
        the_geom public.geometry(Point,4326)
      );
      quad_SW =# \c quad_SE;
      quad_SE =# CREAT EXTENSION postgis;
      quad_SE =# CREATE TABLE hotspots_quad_SE (
        id serial PRIMARY KEY,
        the_geom public.geometry(Point,4326)
      );
      quad_SE =# \q
- In order to import the fire dataset, create a GDAL virtual data source composed of just one layer derived from the Global_24h.csv file. To do so, create a text file named global_24h.vrt in the same directory where the CSV file is and edit it as follows:
        <OGRVRTDataSource>
          <OGRVRTLayer name="Global_24h">
            <SrcDataSource>Global_24h.csv</SrcDataSource>
            <GeometryType>wkbPoint</GeometryType>
            <LayerSRS>EPSG:4326</LayerSRS>
            <GeometryField encoding="PointFromColumns"
             x="longitude" y="latitude"/>
          </OGRVRTLayer>
        </OGRVRTDataSource>
- Import in PostGIS the Global_24h.csv file using the global_24.vrt virtual driver you created in a previous recipe:
      $ ogr2ogr -f PostgreSQL PG:"dbname='postgis_cookbook' user='me'
      password='mypassword'" -lco SCHEMA=chp10 global_24h.vrt
      -lco OVERWRITE=YES -lco GEOMETRY_NAME=the_geom -nln hotspots
- Create the extension postgres_fdw in the database:
postgis_cookbook =# CREATE EXTENSION postgres_fdw;
- Define the servers that will host the external databases. You need to define the name of the database, the host address and the port in which the database will receive connections. In this case we will create 4 databases, one per global quadrant, according to latitude and longitude in the Mercator SRID. Execute the following commands to create the four servers:
      postgis_cookbook =# CREATE SERVER quad_NW
        FOREIGN DATA WRAPPER postgres_fdw OPTIONS
        (dbname 'quad_NW', host 'localhost', port '5432');
      CREATE SERVER quad_SW FOREIGN DATA WRAPPER postgres_fdw OPTIONS
        (dbname 'quad_SW', host 'localhost', port '5432');
      CREATE SERVER quad_NE FOREIGN DATA WRAPPER postgres_fdw OPTIONS
        (dbname 'quad_NE', host 'localhost', port '5432');
      CREATE SERVER quad_SE FOREIGN DATA WRAPPER postgres_fdw OPTIONS
        (dbname 'quad_SE', host 'localhost', port '5432');
- For this example, we will be using local databases, but the host parameter can be either an IP address or a database file. The user who creates these commands will be defined as the local owner of the servers.
- Create the user mapping in order to be able to connect to the foreign databases. For this, you need to write the login information of the owner of the foreign database in their local server:
      postgis_cookbook =# CREATE USER MAPPING FOR POSTGRES SERVER quad_NW
        OPTIONS (user 'remoteme1', password 'myPassremote1');
      CREATE USER MAPPING FOR POSTGRES SERVER quad_SW
        OPTIONS (user 'remoteme2', password 'myPassremote2');
      CREATE USER MAPPING FOR POSTGRES SERVER quad_NE
        OPTIONS (user 'remoteme3', password 'myPassremote3');
      CREATE USER MAPPING FOR POSTGRES SERVER quad_SE
        OPTIONS (user 'remoteme4', password 'myPassremote4');
- Create the tables in the foreign databases, based on the local table chp10.hotspots_dist:
    postgis_cookbook =# CREATE FOREIGN TABLE hotspots_quad_NW ()
      INHERITS (chp10.hotspots_dist) SERVER quad_NW
      OPTIONS (table_name 'hotspots_quad_sw');
    CREATE FOREIGN TABLE hotspots_quad_SW () INHERITS (chp10.hotspots_dist)
      SERVER quad_SW OPTIONS (table_name 'hotspots_quad_sw');
    CREATE FOREIGN TABLE hotspots_quad_NE () INHERITS (chp10.hotspots_dist)
      SERVER quad_NE OPTIONS (table_name 'hotspots_quad_ne');
    CREATE FOREIGN TABLE hotspots_quad_SE () INHERITS (chp10.hotspots_dist)
      SERVER quad_SE OPTIONS (table_name 'hotspots_quad_se');
- The name of the table name should preferably be written in lowercase.
- Create a function that will calculate the quadrant of the point to be inserted in the database:
      postgis_cookbook=# CREATE OR REPLACE
      FUNCTION __trigger_users_before_insert() RETURNS trigger AS $__$
      DECLARE
      angle integer;
      BEGIN
        EXECUTE $$ select (st_azimuth(ST_geomfromtext('Point(0 0)',4326),
         $1)
        /(2*PI()))*360 $$ INTO angle
        USING NEW.the_geom;
        IF (angle >= 0 AND angle<90) THEN
          EXECUTE $$
          INSERT INTO hotspots_quad_ne (the_geom) VALUES ($1)
          $$ USING
          NEW.the_geom;
        END IF;
        IF (angle >= 90 AND angle <180) THEN
          EXECUTE $$ INSERT INTO hotspots_quad_NW (the_geom) VALUES ($1)
          $$ USING NEW.the_geom;
        END IF;
        IF (angle >= 180 AND angle <270) THEN
          EXECUTE $$ INSERT INTO hotspots_quad_SW (the_geom) VALUES ($1)
          $$ USING NEW.the_geom;
        END IF;
        IF (angle >= 270 AND angle <360) THEN
          EXECUTE $$ INSERT INTO hotspots_quad_SE (the_geom) VALUES ($1)
          $$ USING NEW.the_geom;
        END IF;
        RETURN null;
      END;
      $__$ LANGUAGE plpgsql;
      CREATE TRIGGER users_before_insert
      BEFORE INSERT ON chp10.hotspots_dist
      FOR EACH ROW EXECUTE PROCEDURE __trigger_users_before_insert();
- Insert the test coordinates (10, 10), (-10, 10) and (-10 -10). The first one should be stored in the NE quadrant, the second on the SE quadrant and the third on the SW quadrant.
      postgis_cookbook=# INSERT INTO CHP10.hotspots_dist (the_geom)
        VALUES (0, st_geomfromtext('POINT (10 10)',4326));
      INSERT INTO CHP10.hotspots_dist (the_geom)
        VALUES ( st_geomfromtext('POINT (-10 10)',4326));
      INSERT INTO CHP10.hotspots_dist (the_geom)
        VALUES ( st_geomfromtext('POINT (-10 -10)',4326));
- Check the data insertion in the tables, both the local view and the external database hotspots_quad_NE:
      postgis_cookbook=# SELECT ST_ASTEXT(the_geom)
      FROM CHP10.hotspots_dist;

- As can be seen, the local version shows all the points that were inserted. Now, execute the query over a remote database:
postgis_cookbook=# SELECT ST_ASTEXT(the_geom) FROM hotspots_quad_ne;
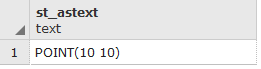
The remote databases only has the point that it should store, based on the trigger function defined earlier.
- Now, insert all the points from the original hotspot table, imported in step 8. For this test, we will just insert the geometry information. Execute the following SQL sentence:
      postgis_cookbook=# insert into CHP10.hotspots_dist
        (the_geom, quadrant)
      select the_geom, 0 as geom from chp10.hotspots;
- As in step 15, in order to check if the results were classified and stored correctly, execute the following queries, to the local table hotspots_dist and the remote table hotsports_quad_ne:
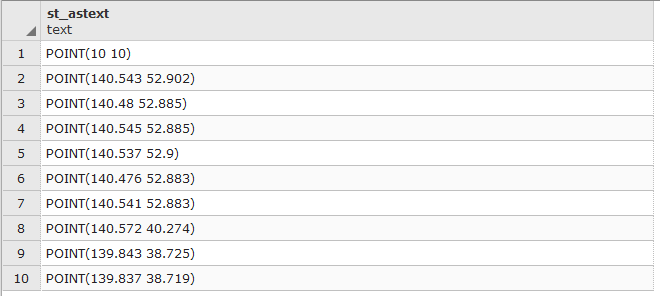
      postgis_cookbook=# SELECT ST_ASTEXT(the_geom)
      FROM CHP10.hotspots_dist;
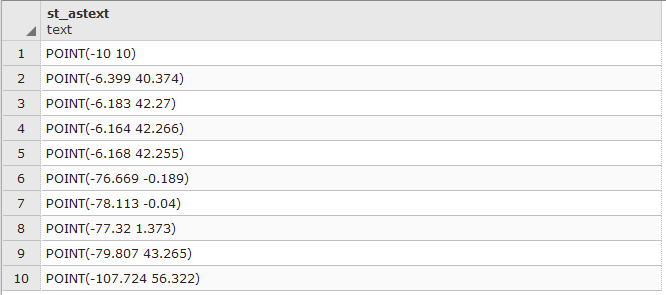
- The results show the first 10 points stored in the local logical version of the database.
postgis_cookbook=# SELECT ST_ASTEXT(the_geom) FROM hotspots_quad_ne;
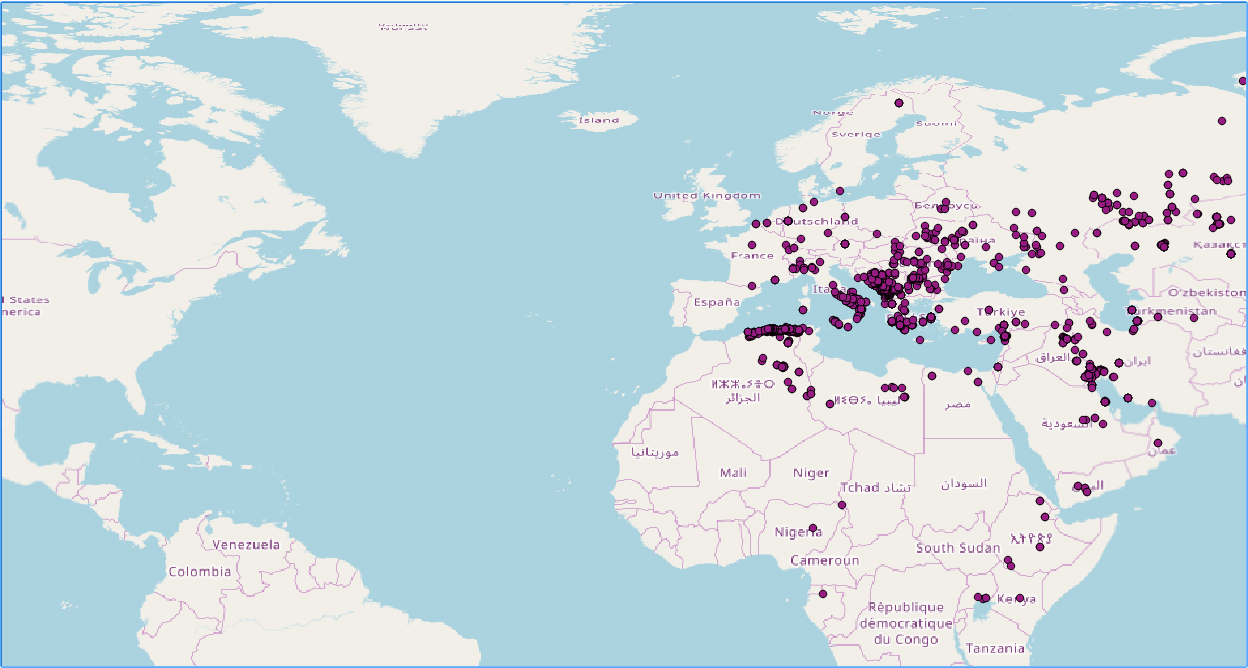
- The results show the first 10 points stored in the remote database with all the points in the NE quadrant. The points indeed show that they all have positive latitude and longitude values. When presented in a GIS application, the results is the following: