Carry out the following steps:
- Create a Django project using the django-admin command with the startproject option. Name the project wildlife. The command for creating the project will be as follows:
      (chp09-env)$ cd ~/postgis_cookbook/working/chp09
      (chp09-env)$ django-admin.py startproject wildlife
- Create a Django application using the django-admin command with the startapp option. Name the application sightings. The command will be as follows:
      (chp09-env)$ cd wildlife/
      (chp09-env)$ django-admin.py startapp sightings
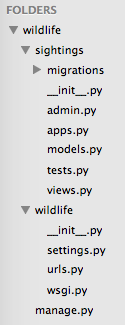
Now you should have the following directory structure:
- You will need to edit some files. Open your favorite editor (Sublime Text does the job) and go to the settings in the settings.py file in the code bundle under chp09/wildlife/wildlife. First, the DATABASES settings should be as shown in the following code, in order to use the postgis_cookbook PostGIS database for your application data:
        DATABASES = {
          'default': {
            'ENGINE': 'django.contrib.gis.db.backends.postgis',
            'NAME': 'postgis_cookbook',
            'USER': 'me',
            'PASSWORD': 'mypassword',
            'HOST': 'localhost',
            'PORT': '',
          }
        }
- Add the following two lines of code at the top of the wildlife/settings.py file (PROJECT_PATH is the variable in which you will enter the project's path in the settings menu):
        import os
        PROJECT_PATH = os.path.abspath(os.path.dirname(__file__))
- Make sure that in the settings.py file under chp09/wildlife/wildlife, MEDIA_ROOT, and MEDIA_URL are correctly set, as shown the following code (this is to set the media files' path and URLs for the images that the administrative user will upload):
        MEDIA_ROOT = os.path.join(PROJECT_PATH, "media")
        MEDIA_URL = '/media/'
- Make sure that the INSTALLED_APPS setting looks as shown in the following code in the settings.py file. You will use the Django admin site (django.contrib.admin), the GeoDjango core library (django.contrib.gis), and the sightings application you are creating in this recipe and the next. For this purpose, add the last three lines:
        INSTALLED_APPS = (
          'django.contrib.admin',
          'django.contrib.auth',
          'django.contrib.contenttypes',
          'django.contrib.sessions',
          'django.contrib.messages',
          'django.contrib.staticfiles',
          'django.contrib.gis',
          'sightings',
        )
- Now, synchronize the database using the Django migrations management commands. When prompted to create a superuser, answer yes and choose a preferred administrative username and password:
      (chp09-env)$ python manage.py makemigrations
      (chp09-env)$ python manage.py migrate
- Now you will add the models needed by the application. Edit the models.py file under chp09/wildlife/sightings and add the following code:
        from django.db import models
        from django.contrib.gis.db import models as gismodels

        class Country(gismodels.Model):
          """
            Model to represent countries.
          """
          isocode = gismodels.CharField(max_length=2)
          name = gismodels.CharField(max_length=255)
          geometry = gismodels.MultiPolygonField(srid=4326)
          objects = gismodels.GeoManager()

          def __unicode__(self):
            return '%s' % (self.name)

        class Animal(models.Model):
          """
            Model to represent animals.
          """
          name = models.CharField(max_length=255)
          image = models.ImageField(upload_to='animals.images')

          def __unicode__(self):
            return '%s' % (self.name)

          def image_url(self):
            return u'<img src="%s" alt="%s" width="80"></img>' %
                   (self.image.url, self.name)
            image_url.allow_tags = True

          class Meta:
            ordering = ['name']

        class Sighting(gismodels.Model):
          """
            Model to represent sightings.
          """
          RATE_CHOICES = (
            (1, '*'),
            (2, '**'),
            (3, '***'),
          )
          date = gismodels.DateTimeField()
          description = gismodels.TextField()
          rate = gismodels.IntegerField(choices=RATE_CHOICES)
          animal = gismodels.ForeignKey(Animal)
          geometry = gismodels.PointField(srid=4326)
          objects = gismodels.GeoManager()

          def __unicode__(self):
            return '%s' % (self.date)

          class Meta:
            ordering = ['date']
- Each model will become a table in the database with the corresponding fields defined using the models and gismodels class. Note that the geometry variable in the county and sighting layers will become the MultiPolygon and Point PostGIS geometry columns, thanks to the GeoDjango library.
- Create an admin.py file under chp09/wildlife/sightings and add the following code to it. The classes in this file will define and customize the behavior of the Django admin site when browsing the application models or tables (fields to display, fields to be used to filter records, and fields to order records). Create the file by executing the following code:
        from django.contrib import admin
        from django.contrib.gis.admin import GeoModelAdmin
        from models import Country, Animal, Sighting

        class SightingAdmin(GeoModelAdmin):
          """
            Web admin behavior for the Sighting model.
          """
          model = Sighting
          list_display = ['date', 'animal', 'rate']
          list_filter = ['date', 'animal', 'rate']
          date_hierarchy = 'date'

        class AnimalAdmin(admin.ModelAdmin):
          """
            Web admin behavior for the Animal model.
          """
          model = Animal
          list_display = ['name', 'image_url',]

        class CountryAdmin(GeoModelAdmin):
          """
            Web admin behavior for the Country model.
          """
          model = Country
          list_display = ['isocode', 'name']
          ordering = ('name',)

          class Meta:
            verbose_name_plural = 'countries'

        admin.site.register(Animal, AnimalAdmin)
        admin.site.register(Sighting, SightingAdmin)
        admin.site.register(Country, CountryAdmin)
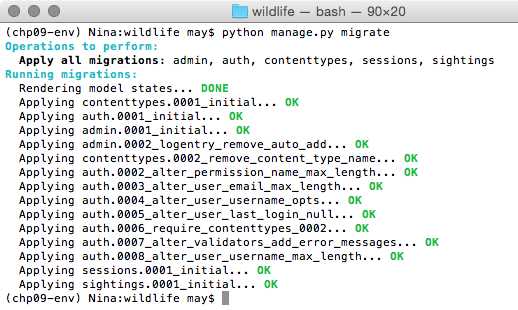
- Now, to synchronize the database, execute the following commands in the Django project folder:
      (chp09-env)$ python manage.py makemigrations
      (chp09-env)$ python manage.py migrate
The output should be as follows:
- Now, for each model in models.py, a PostgreSQL table should have been created. Check whether your PostgreSQL database effectively contains the three tables created in the preceding commands using your favorite client (that is, psql or pgAdmin) and whether or not the sightings_sighting and sightings_country tables contain PostGIS geometric fields.
- Any web application needs the definition of URLs where the pages can be accessed. Therefore, edit your urls.py file under chp09/wildlife/wildlife by adding the following code:
        from django.conf.urls import url
        from django.contrib import admin
        import settings
        from django.conf.urls.static import static
        admin.autodiscover()
        urlpatterns = [
          url(r'^admin/', admin.site.urls),
        ] + static(settings.MEDIA_URL, document_root=settings.MEDIA_ROOT)
In the urls.py file, you basically defined the location of the back office (which was built using the Django admin application) and the media (images) files' location uploaded by the Django administrator when adding new animal entities in the database. Now run the Django development server, using the following runserver management command:
(chp09-env)$ python manage.py runserver
- Access the Django admin site at http://localhost:8000/admin/ and log in with the superuser credentials you furnished in an earlier step in this recipe (step 7).
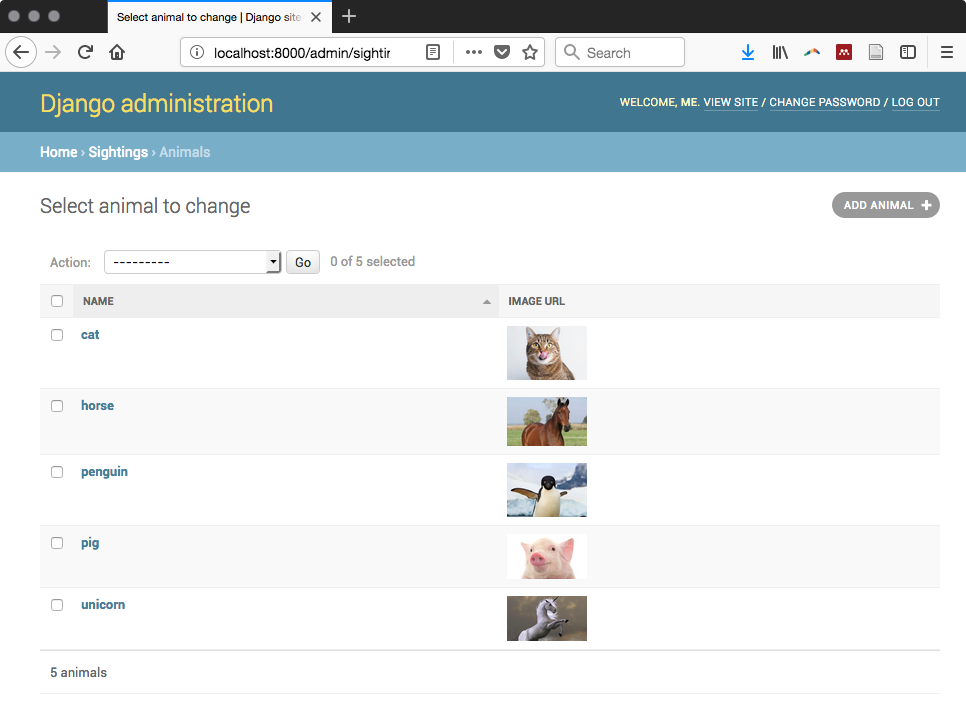
- Now, navigate to http://localhost:8000/admin/sightings/animal/ and add some animals using the Add animal button. For each animal, define a name and an image that will be used by the frontend that you will build in the next recipe. You created this page with almost no code, thanks to the Django admin! The following screenshot shows what the Animals list page will look like after adding some entities:
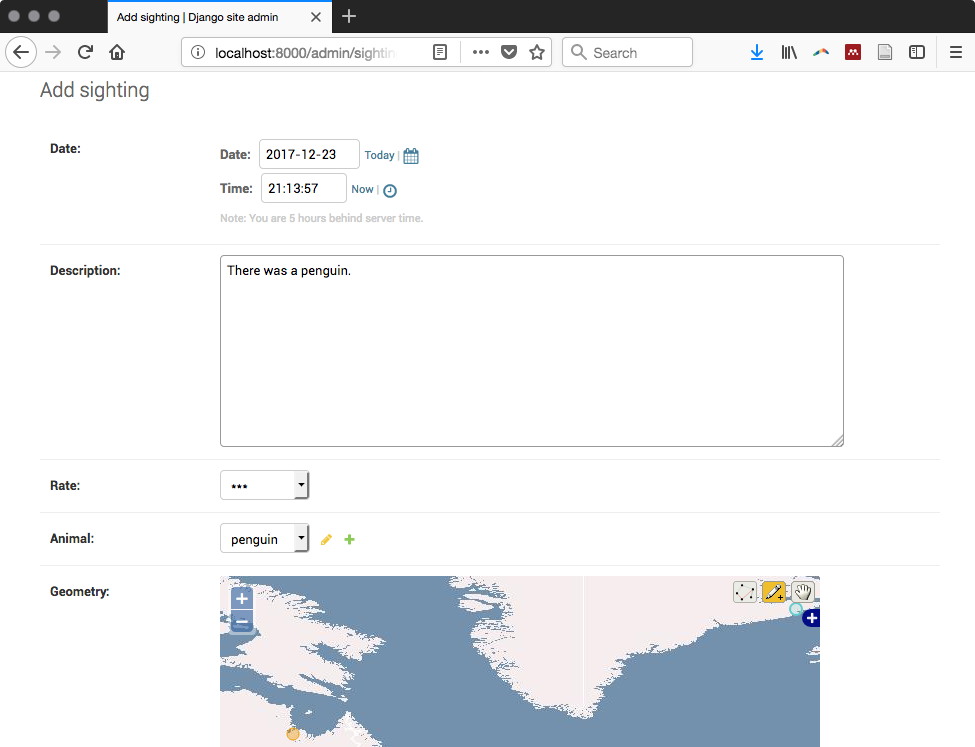
- Navigate to http://localhost:8000/admin/sightings/sighting/ and add some sightings using the Add sighting button. For each sighting, define the Date, Time, the name of the animal that was spotted, Rate, and the location. GeoDjango has added the map widget to the Django Admin site for you, based on the OpenLayers JavaScript library, to add or modify geometric features. The Sightings page is shown in the following screenshot:
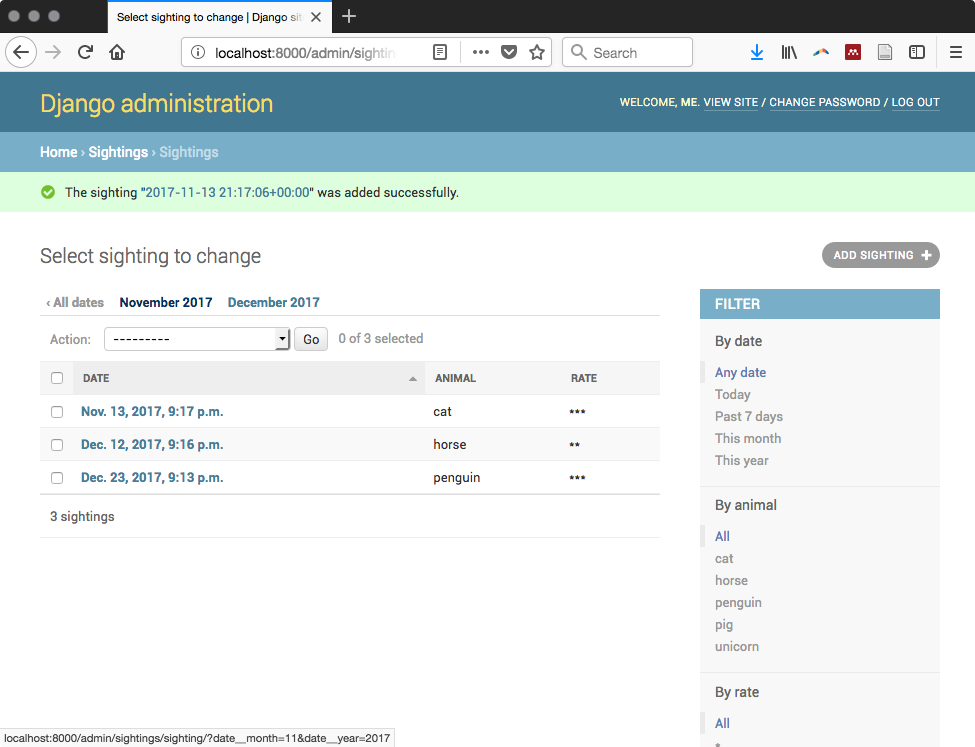
- The Sightings list page, thanks to the Django admin's efficiency, will provide the administrative user with useful features to sort, filter, and navigate the date hierarchy of all of the sightings in the system, as shown in the following screenshot:
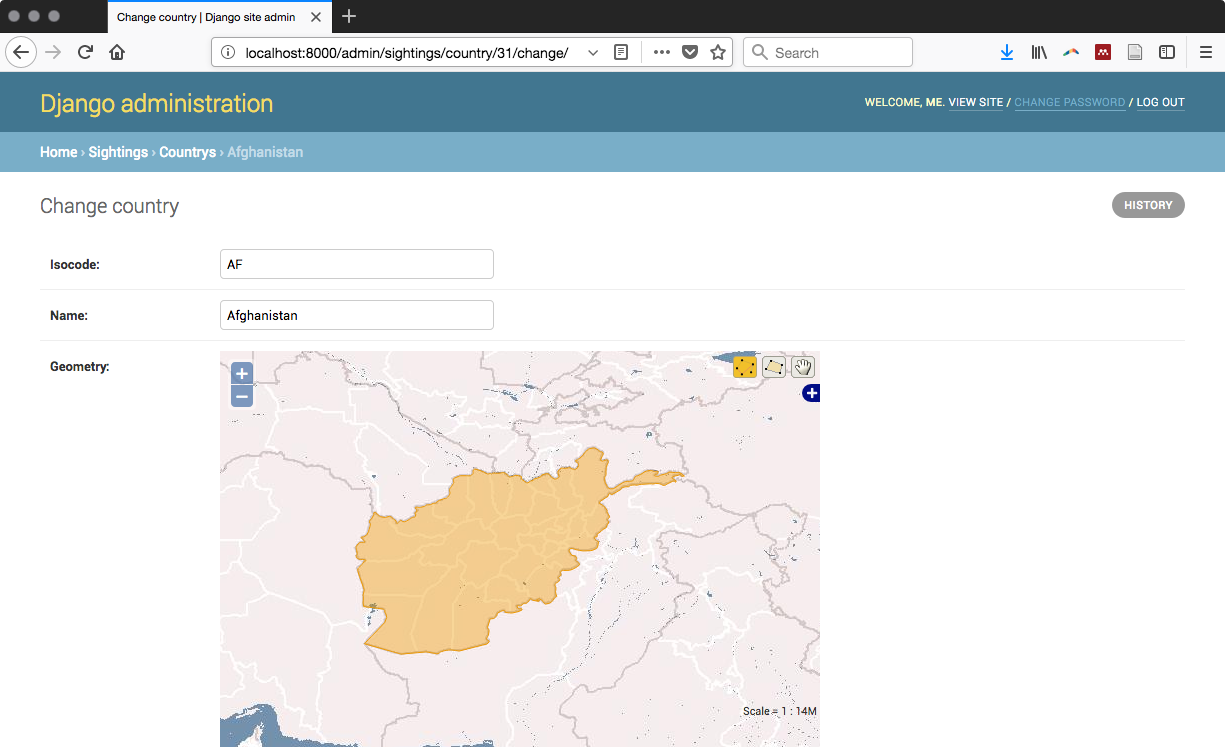
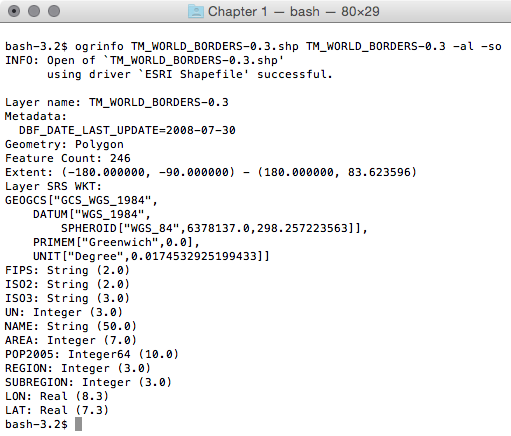
- Now, you will import the countries shapefile to its model. In the next recipe, you will use this model to find the country where each sighting occurred. Before going ahead in this recipe, investigate the shapefile structure; you will need to import just the NAME and ISO2 attributes to the model as the name and isocode attributes, using the following command:
$ ogrinfo TM_WORLD_BORDERS-0.3.shp TM_WORLD_BORDERS-0.3 -al -so
- Add a load_countries.py file under chp09/wildlife/sightings and import the shapefile to PostGIS, using the LayerMapping GeoDjango utility, using the following code:
        """
        Script to load the data for the country model from a shapefile.
        """

        from django.contrib.gis.utils import LayerMapping
        from models import Country

        country_mapping = {
          'isocode' : 'ISO2',
          'name' : 'NAME',
          'geometry' : 'MULTIPOLYGON',
        }

        country_shp = 'TM_WORLD_BORDERS-0.3.shp'
        country_lm =  LayerMapping(Country, country_shp, country_mapping,
                                   transform=False, encoding='iso-8859-1')
        country_lm.save(verbose=True, progress=True)
- You should have the TM_WORLD_BORDERS-0.3.shp file placed under chp09/wildlife for this code to work. Enter the Python Django shell and run the utils.py script. Then, check whether the countries have been correctly inserted in the sightings_country table in your PostgreSQL database, using the following command:
      (chp09-env)$ python manage.py shell
      >>> from sightings import load_countries
      Saved: Antigua and Barbuda
      Saved: Algeria Saved: Azerbaijan
      ...
      Saved: Taiwan
Now, you should see the countries in the administrative interface at http://localhost:8000/admin/sightings/country/, while running the Django server with:
(chp09-env)$ python manage.py runserver