Carry out the following steps:
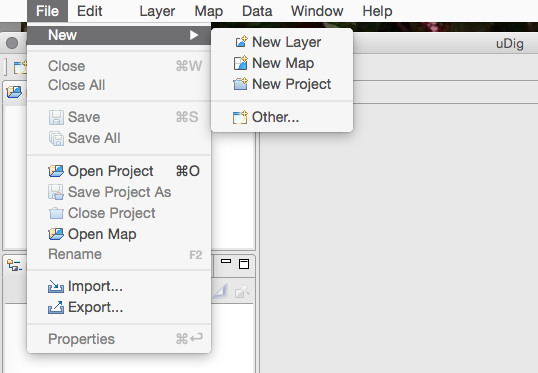
- Navigate to File | New Layer from the main menu, as shown in the following screenshot:
- Select PostGIS as the data source and click on the Next button to continue, as shown in the following screenshot:

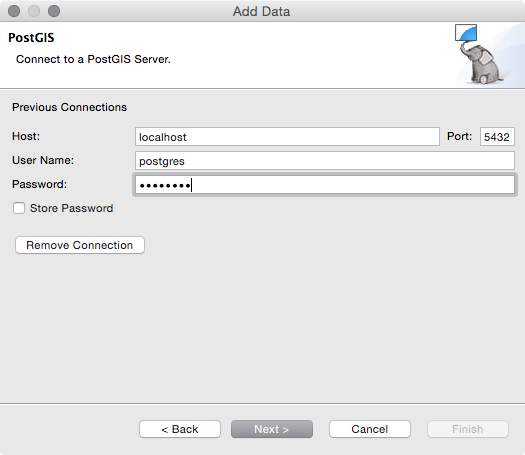
- Fill in your PostGIS connection parameters and then click on the Next button, as shown in the following screenshot:
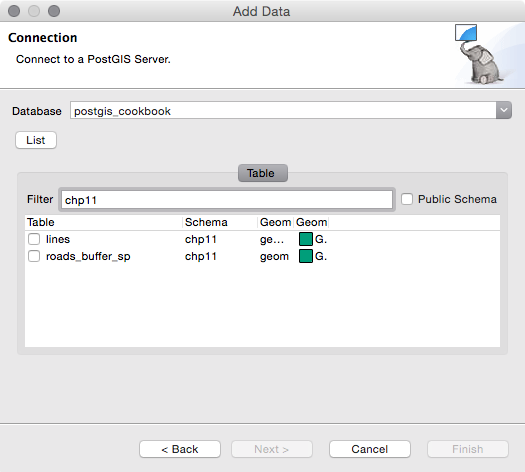
- Select the target database in the Database drop-down menu. Click on the List button to view all of the tables from the database that have valid geometries. Then, check the checkboxes for one or more tables to add them as layers, as shown in the following screenshot:
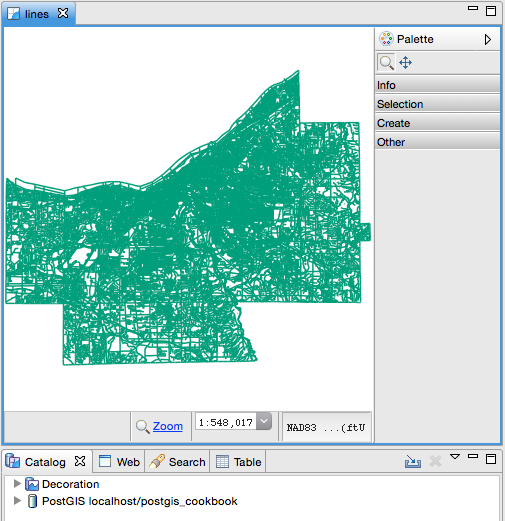
- Click on Finish and your data will be loaded in the Map window.