
To do this, we're going to create a few divs. They're all going to look identical so we'll make them once and duplicate them. We're going to add a class equal to form-field. Now we'll use this four times: title, name, room name, and button. In order to get that done, what we're going to do is simply copy the line and paste it four times:
<body class="centered-form">
  <div class="centered-form__form">
    <div class="form-field"></div>
    <div class="form-field"></div>
    <div class="form-field"></div>
    <div class="form-field"></div>
  </div>
Now all of this needs to go inside a form tag. The whole goal of this page is to take that data and submit it, redirecting the user to the chat page where we can then bring them into a specific chat room using the name they provided. That means we want to wrap these form fields inside a form tag, by opening it just above the div tags and closing it down below, just like this:
<body class="centered-form">
  <div class="centered-form__form">
    <form>
      <div class="form-field"></div>
      <div class="form-field"></div>
      <div class="form-field"></div>
      <div class="form-field"></div>
    </form>
  </div>
</body>
Now previously we saw the default behavior for a form tag is to reload the current page, posting the data as a query string. What we're going to do instead is specify an action attribute which, lets us customize which page to go to. In this case, we're going to go to /chat.html, the page that we set up just now. This means that when someone's done filling out the form field, they're going to get redirected to the chat page and the data down below will get passed along too.
Now the title div is easy, what we're going to do is add an h3 tag with whatever title you want; you could say Chat or Join a Chat. And then, I can go ahead and close my h3:
<form action="/chat.html">
  <div class="form-field">
    <h3>Join a Chat</h3>
  </div>
Then, I can move on to the next form field which is going to be the display name. I am going to use a label, a label is going to describe a field, this one will be Display name so we'll open and close the label tag like this:
<div class="form-field">
  <label>Display name</label>
</div>
Next up, we can add an input. We're going to add an input just like we did for the input on our message form. We're going to specify type equal to text. We want the user to be able to enter some text. We're also going to give it a name equal to name. We are going to use autofocus; once again, this is going to make sure that when a user first visits the app, their cursor is placed inside the Name field:
<div class="form-field">
  <label>Display name</label>
  <input type="text" name="name" autofocus/>
</div>
Next up is the field for the room name, which is going to look pretty similar to the one above, we are going to start with label once again. This label is going to be a string, something like Room name, and we're also going to add an input so the user can specify the room name, type="text", and the name will equal room:
<div class="form-field">
  <label>Room name</label>
  <input type="text" name="room"/>
</div>
There is no need for autofocus on this one since we already have an autofocus input in the preceding code.
Now that we have this in place, we can go ahead and fill out the final form field, which is going to be the Submit button for our form by simply creating the button tag, and giving it a text value. We can have ours set to Join:
<div class="form-field">
  <button>Join</button>
</div>
With this in place our index.html file is actually done. We can load it over inside the browser. Our server had automatically restarted, so a quick refresh should show our page Join a Chat app:
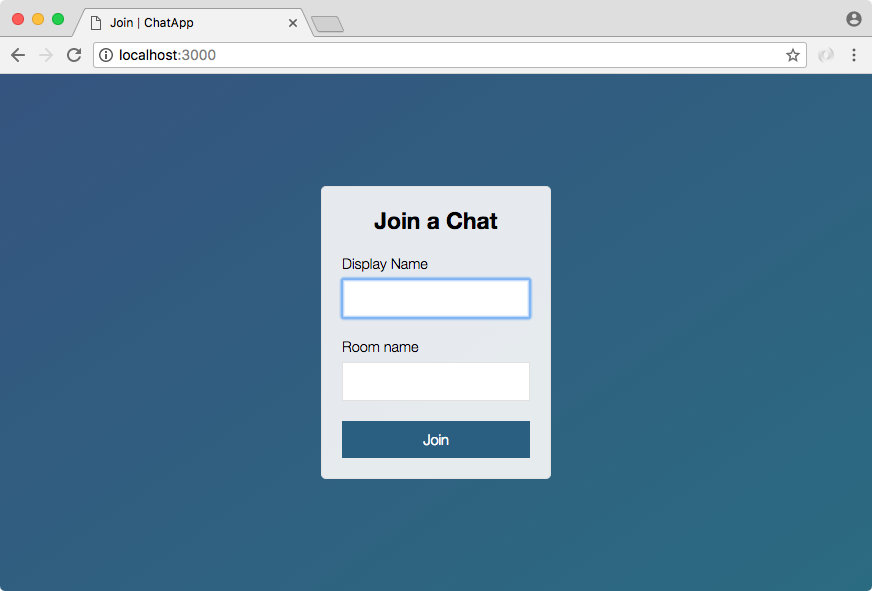
The goal is to set this up to take a name like Andrew, and a room name like Node Course Students:
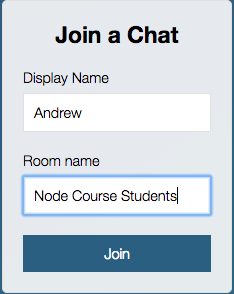
You click Join and it joins you into this room with this name. Now currently, all it's going to do is redirect us to chat.html, but as you'll see it does indeed pass the data along:

Here we have name equal to Andrew and we have room name equal to Node Course Students, just like we specified over inside of index.html. With this in place, we are now ready to start talking about how we can join specific rooms inside Socket.io, making sure the events we emit only go to other people connected to that room. We have the stuff in place to get this done, so we're going to get started with all of that in the next section.
For now we have a pretty great-looking join page, this is where we can join a room. Let's wrap this up with a commit, committing our changes.