
The last case is the happy path, the success case, when everything goes as planned. The ID is valid and we find a document in the Todos collection that has an ID matching the ID passed in. In that case all we're going to do is respond using res.send, sending back the Todo. Now, you could have sent it in like res.todo(todo); this will indeed work, but what I want to do is tweak it just a little bit. Instead of sending back Todo as the body, I'm going to send back an object where the Todo is attached as the todo property using the ES6 object definition, which is identical to this:
res.send({todo: todo});
This gives me a little flexibility down the line. I could always add other properties onto the response, like custom status codes or anything else. It's similar to the technique we used for GET /todos. Right here, res.send({todos}), instead of responding with the array, we responded with an object that has a todos property and that is the array:
Todo.findById(id).then((todo) => {
   if(!todo) {
         return res.status(404).send();
   }
   res.send({todo});
}).catch((e) => {
   res.status(400).send();
});
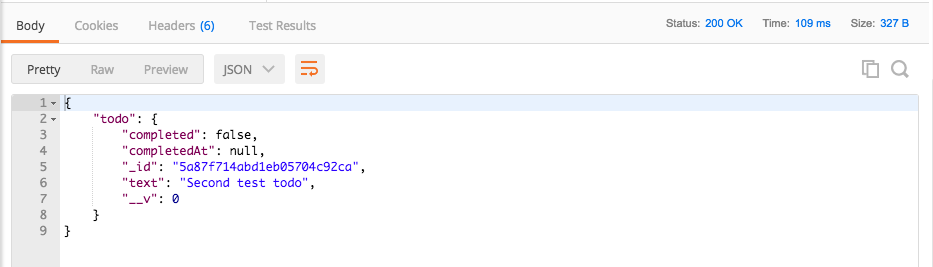
Now that we have this in place we are done and we can test things out. I'm going to save the file, remove all of our comments, add a semicolon where needed, and we're going to grab an ID from Robomongo. Over inside of Robomongo I can grab an ID for one of my Todos. I'm going to go with the second one. I'll edit the document and copy it to the clipboard. Now over in Postman we can go ahead and make the request, setting the ID equal to the ID value we just copied:

I'm going to send it off. We get our object where we have a todo property, and on that todo property we have all of the properties for the document, _id, text, completedAt, and completed:
Now, the last case I want to test is what happens when we request a Todo with a valid ObjectID, but one that just happens to not exist. I'm going to do this by taking the last number in my ID and changing it from a to b:
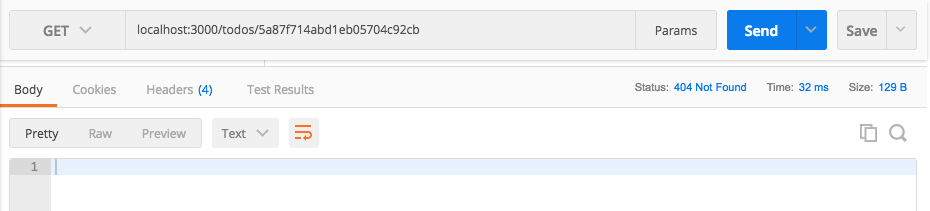
If I send this off we get our 404 response code back, which is fantastic; this is exactly what I expect to happen when I make a request for a Todo. The ObjectID is valid, it's just not in the collection. Now that we've made this request we can actually save this inside of our Todo App collection, so later down the line it's a lot easier to fire off this one. I'm going to save it using Save As:
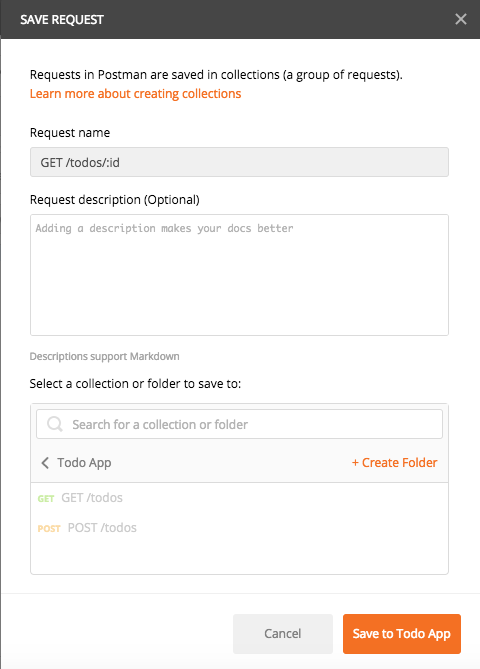
We can leave the Request description empty, and we can change Request Name to GET /todos/:id. I am going to add it to our existing collection, the Todo App collection. Now we have three routes; the only thing left to do for this route is to add some test cases, and that's going to be the topic of the next section.
To wrap this one up, let's commit our changes and push them up to GitHub. I'm going to shut down the server and run git status.
We can see we have our modified file; this means I can run git commit with the -a flag and the -m flag, and then I'm going to provide my commit message. Now, if you're using the -a flag and the -m flag you can actually use a shortcut, the -am flag, which does the exact same thing. It's going to add all of our modified files to the commit; it's also going to give us a place to add a message. A good message for this one would be Add GET /todos/:id:
git commit -am 'Add GET /todos/:id'
With this in place, I'm going to make the commit, push it up to GitHub, and we are done. In the next section, we are going to go ahead and write test cases for this route. It's going to be mostly a challenge like this one was.