
Now that we have this in place, you are ready to make a commit with all of the current uncommitted files. You'll then go into GitHub and create a GitHub repository, where you'll push your local code up. Make sure the code actually gets on GitHub; you can do that by refreshing the GitHub repo page. You should see your directory structure right there on the repo.
The next thing you need to do is create a Heroku application and deploy to it. Once your application is deployed, you should be able to visit the app URL on the browser. You should see the exact same message as the one we have in our localhost:3000. The Welcome to the chat app message should print, but instead of being on localhost:3000, you should be on the actual Heroku app.
Now we have made all the changes necessary inside the project. We have configured the port variable and we have set up our scripts and engines, so you don't have to make any more code changes; you just need to work your wizardry in the browser and the Terminal to get this done.
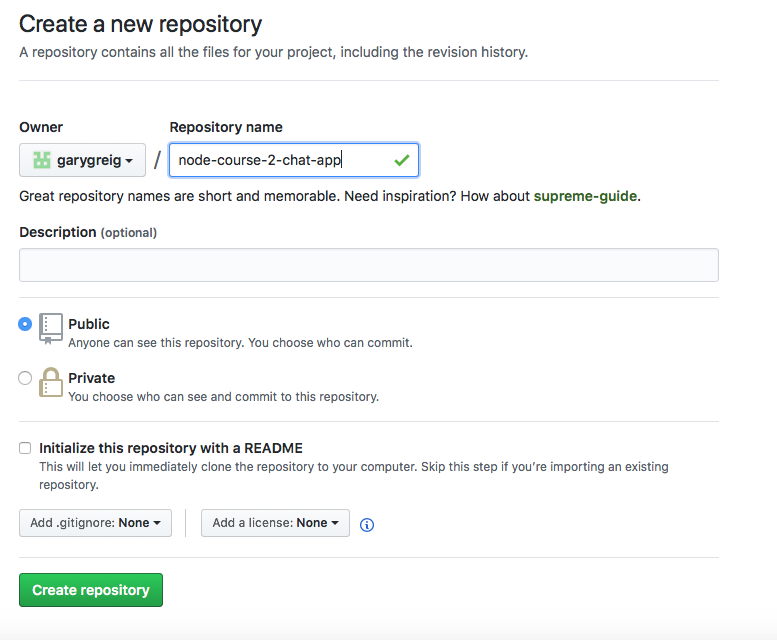
The first step is to make a new GitHub repository. We need a place to push up our code. We can head over to github.com, click on that big green New repository button, and make a new one. I'll call my repository node-course-2-chat-app. I will leave this public and create it:
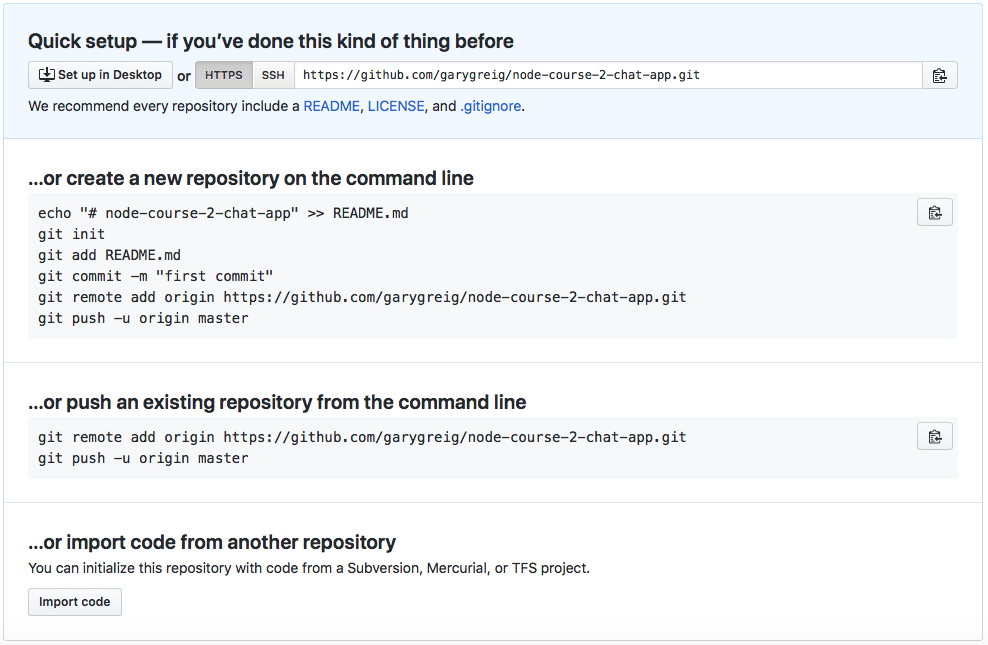
Now that we've created the repository, we have a list of commands we can use. We have an existing repository we want to push, so we can copy these lines:
In the Terminal, before we can actually push anything, we need to make a commit. I'll shut down nodemon and run the git status command:
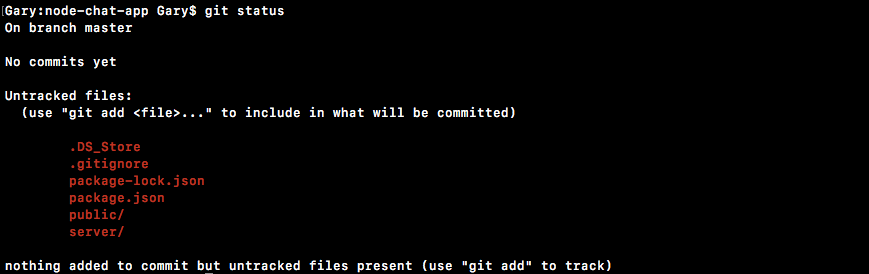
Here, you see we have our expected files, we have the public and server folders, we have .gitignore, and we have package.json. However, node_modules is nowhere in sight. Then, you need to use git add . to add these untracked files to the next commit.
If you run the git status command again, you can see everything does look good:
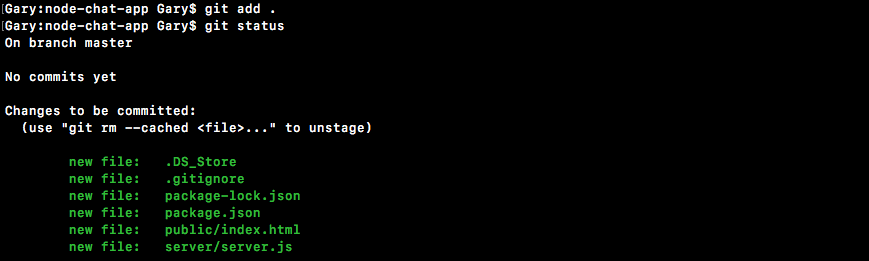
We have four changes to be committed: four new files. I'll run git commit with the -m flag to specify a message. The -a flag is not required, since all of the files are already added. In the quotes, Init commit will get the job done:
git commit -m 'Init commit'
Once you have that commit in place, you can actually push it up to GitHub by running the two lines they gave you. I'll run both of those:
git remote add origin https://github.com/garygreig/node-course-2-chat-app.git

git push -u origin master
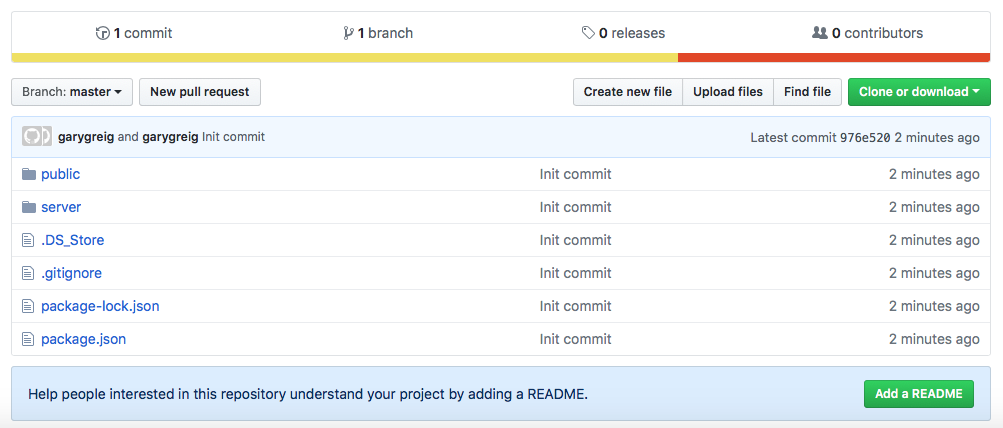
As shown here, it's now up on GitHub. We can confirm that by refreshing the page, and instead of seeing the instructions, we see the files we created:
The next and last thing to do is get the app on Heroku. You don't actually have to go to the Heroku web app to get that done; we can run heroku create inside the Terminal:

Let's go ahead and create the application. We can use the following command to deploy the app. I'm going to go ahead and run that:
git push heroku master
This will take my local code and push it up to Heroku. Heroku will see that new code was pushed, so it will then go ahead and deploy it:
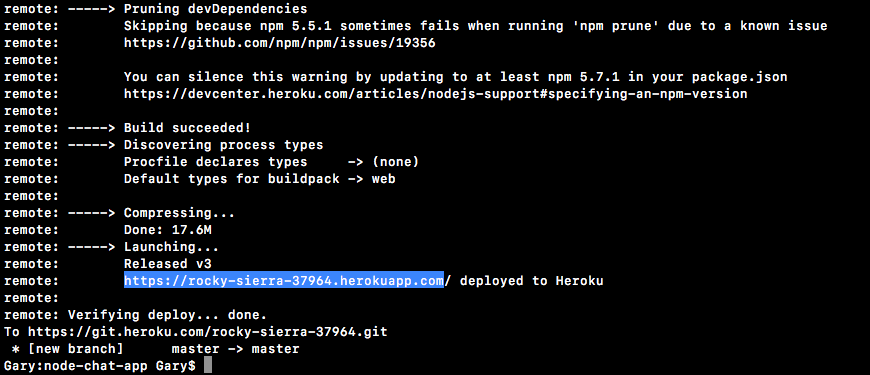
Once it's up, we can use the heroku open command to open up the app URL on the browser. Alternatively, you can always grab the URL from the Terminal. I'll copy the URL, shown in the preceding screenshot, head into the browser, and paste it:
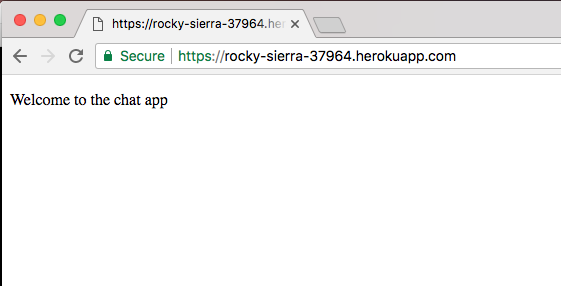
As shown in the preceding screenshot, we should see our app. Welcome to the chat app shows up on the screen, and with this in place, we are done! We have a basic Express server, we have a backend and a frontend, it's up on GitHub, and it's up on Heroku!
We are ready to move on to the next section, where we are actually going to start integrating Socket.io.