
Next, we want to set up a repository. Remember that a repository is the root folder of your project holding all your files and folders. There are two ways to create this repository on GitHub:
- You can push up a local repository—a project folder on your local machine
- You can create a new repository online via GitHub
In this chapter, we will only look at the second way and do everything online.
It makes sense to connect your project to GitHub via the command line if you are working continuously with Git and GitHub. It only requires basic familiarity with the command line, and you can learn more about it at https://help.github.com/articles/adding-an-existing-project-to-github-using-the-command-line/.
After setting up your account, you will be directed to your very own GitHub dashboard, as you can see in the URL:

To create a new repository, click on New repository.
Considering the next screenshot, we will first name our repository. All your repositories will be owned by you, so they will all start with your username. Each repository needs to have a unique name within your list of repositories. For now, you are pretty flexible as this is your first and only repository so far. We’ll appropriately call our repository pink-planets, avoiding any spaces in the name:
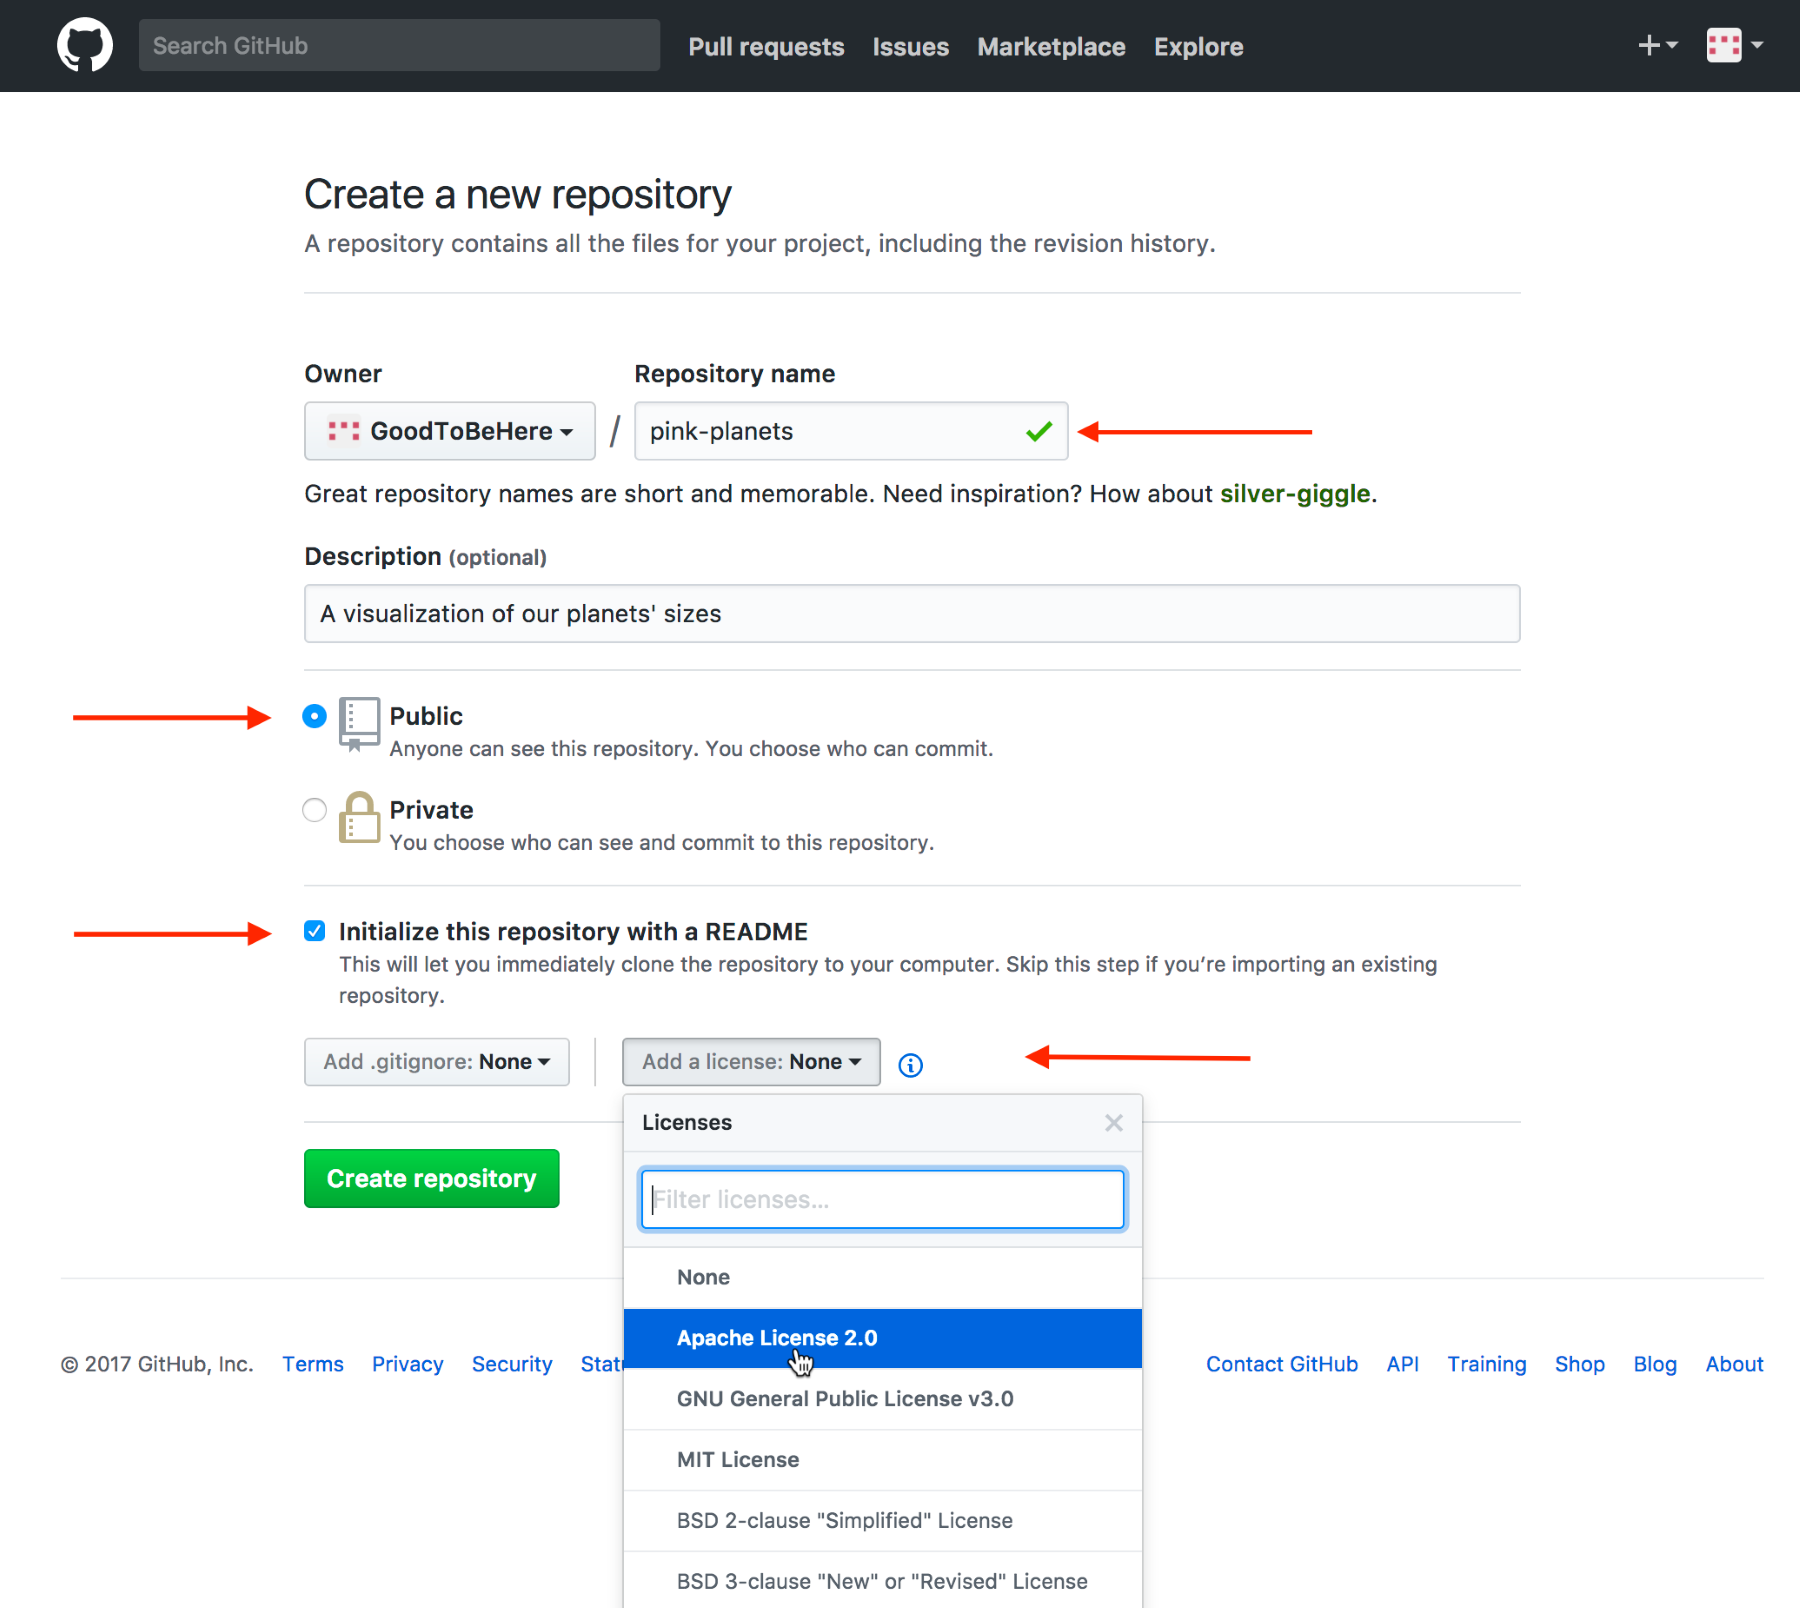
All our repositories will be Public, which means that everyone can see all your code! If you would like or need to keep your code private, you can opt for a paid personal plan.
It’s a good practice to initialize the repository with a README file, which allows a description of your project. Don’t worry about the .gitignore file, we won’t need it here. Lastly, we add a license, in our case, an Apache License 2.0. There are several licenses you can choose from, and it’s a good idea to make yourself acquainted with the options here.
Lastly, we hit the big green Create repository button, which does exactly that and brings us straight to the repository’s page:
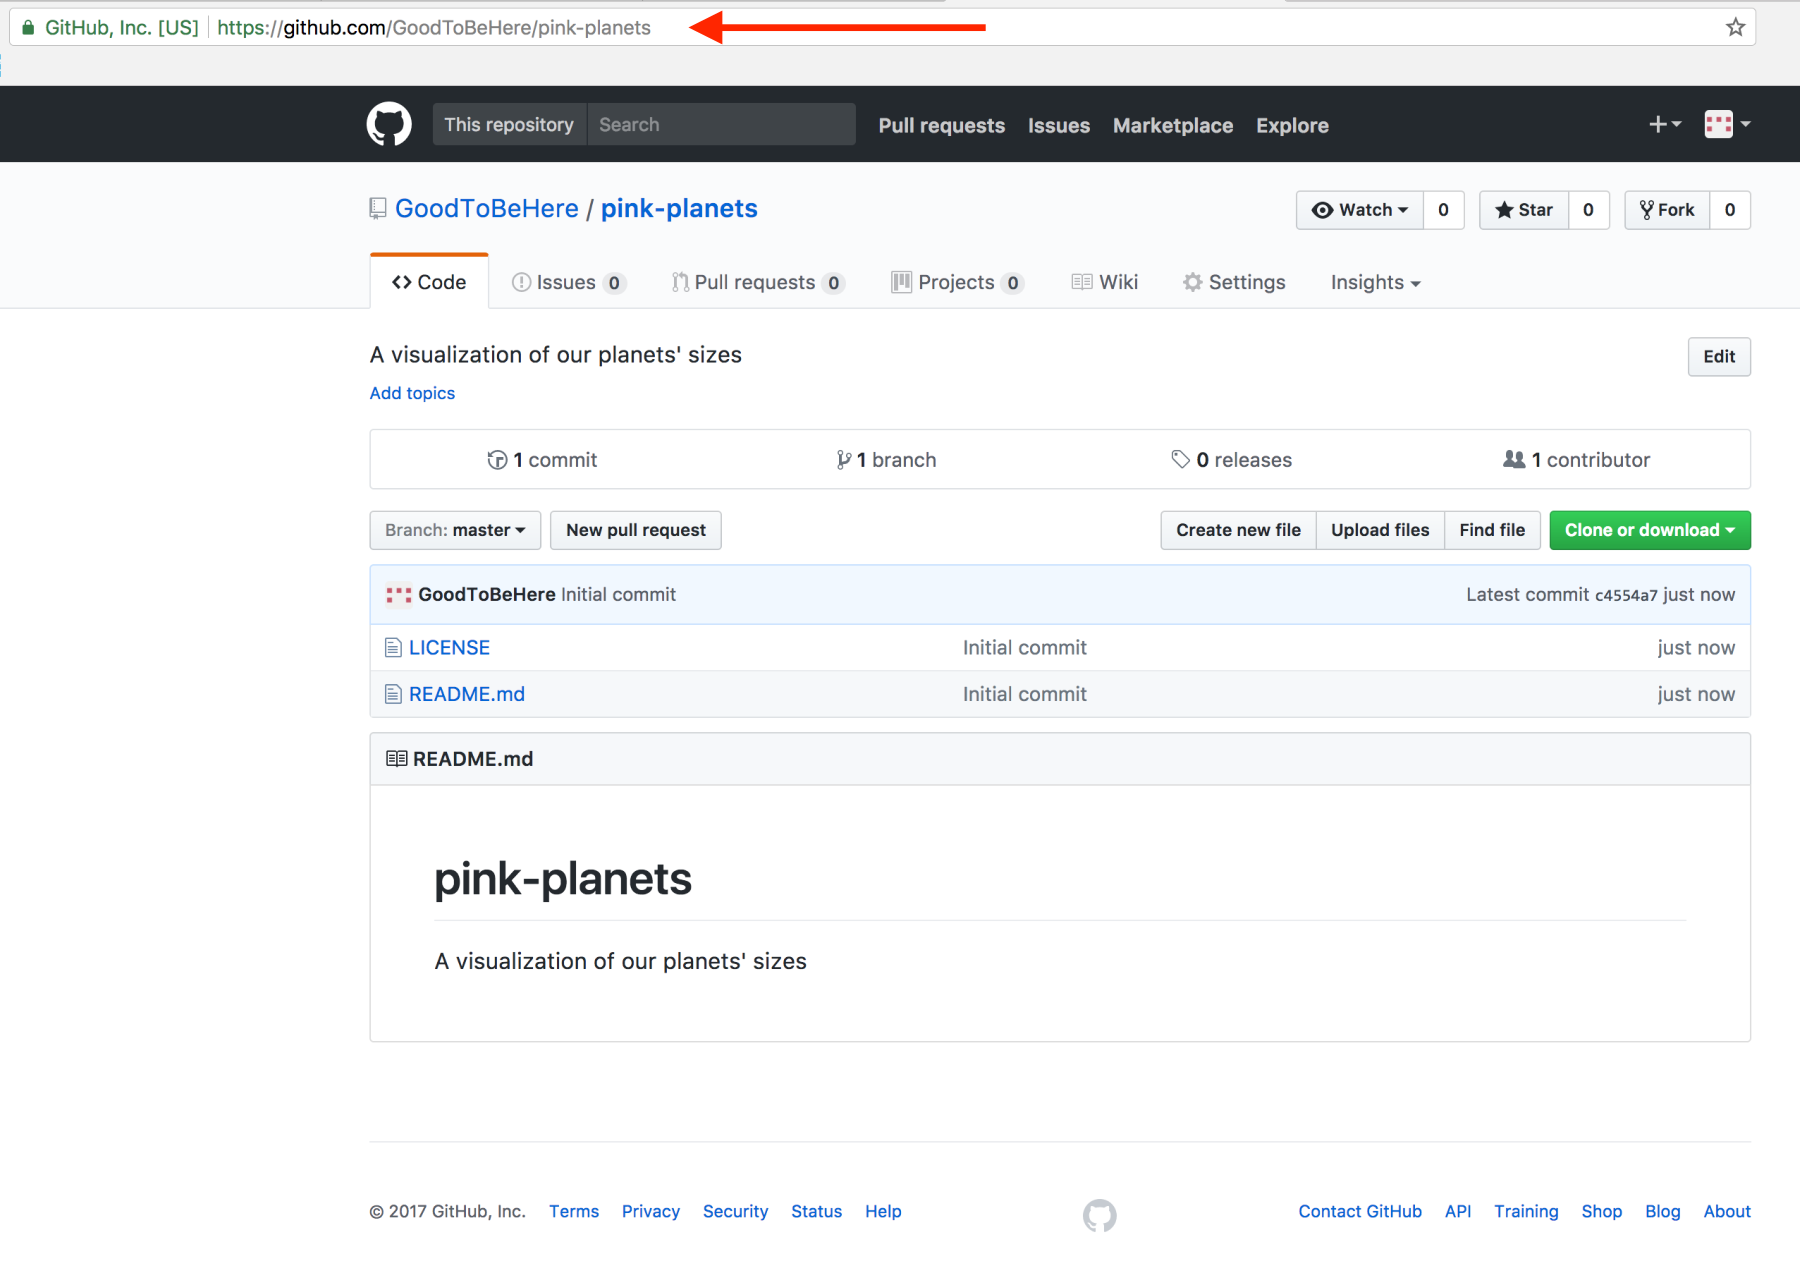
You can see the name of your repository, a control bar with several tabs displaying the contents of the Code tab in focus, and a quick description. Next, there’s a bar showing you some general information such as how many commits (or file saves) have been done, how many branches (or project copies) this repository boasts, how many releases there are, and how many contributors have access to this repository.
After the row of button controls, we have a folder view of all files and folders in our repository. Currently, there are only the two files we just created: the LICENSE and the README.md file; .md stands for markdown, which allows you to format text files with a simple syntax. You can learn the gist of it within a few minutes at, for example, https://guides.github.com/features/mastering-markdown/.
At the bottom, you see the contents of the README file, giving visitors or collaborators a quick summary of what your project is about.
It’s still a little bland, so let’s change it and, at the same time, learn how to edit a file via GitHub.