Table of Contents for
Bootstrap 4 – Responsive Web Design
 Bootstrap 4 – Responsive Web Design
Published by
Packt Publishing, 2017
Bootstrap 4 – Responsive Web Design
Published by
Packt Publishing, 2017
- Cover
- Table of Contents
- Bootstrap 4 – Responsive Web Design
- Bootstrap 4 – Responsive Web Design
- Credits
- Preface
- What you need for this learning path
- Who this learning path is for
- Reader feedback
- Customer support
- 1. Module 1
- 1. Getting Started
- Setting up the framework
- Building our first Bootstrap example
- Optionally using the CDN setup
- Community activity
- Bootstrap and web applications
- Browser compatibility
- Summary
- 2. Creating a Solid Scaffolding
- Building our scaffolding
- Fluid container
- We need some style!
- Manipulating tables
- Like a boss!
- Final thoughts
- Summary
- 3. Yes, You Should Go Mobile First
- Bootstrap and the mobile-first design
- How to debug different viewports at the browser
- Cleaning up the mess
- Creating the landing page for different devices
- Summary
- 4. Applying the Bootstrap Style
- Summary
- 5. Making It Fancy
- Paying attention to your navigation
- Dropping it down
- Making an input grouping
- Getting ready for flexbox!
- Summary
- 6. Can You Build a Web App?
- Adding the navigation
- Do a grid again
- Playing the cards
- Implementing the main content
- Creating breadcrumbs
- Finishing with the right-hand-side content
- Summary
- 7. Of Course, You Can Build a Web App!
- Waiting for the progress bar
- Creating a settings page
- Summary
- 8. Working with JavaScript
- Awesome Bootstrap modals
- Creating our custom modal
- A tool for your tip
- Pop it all over
- Making the menu affix
- Finishing the web app
- Summary
- 9. Entering in the Advanced Mode
- The last navigation bar with flexbox
- Filling the main fluid content
- Filling the main content
- Overhead loading
- Fixing the toggle button for mobile
- Summary
- 10. Bringing Components to Life
- Fixing the mobile viewport
- Learning more advanced plugins
- Summary
- 11. Making It Your Taste
- Working with plugin customization
- The additional Bootstrap plugins
- Creating our Bootstrap plugin
- Defining the plugin methods
- Creating additional plugin methods
- Summary
- 2. Module 2
- 1. Introducing Bootstrap 4
- Summary
- 2. Using Bootstrap Build Tools
- Download the Bootstrap source files
- Setting up the blog project
- Setting up the JSON files
- Creating our first page template
- Summary
- 3. Jumping into Flexbox
- Ordering your Flexbox
- Wrapping your Flexbox
- Setting up the Bootstrap Flexbox layout grid
- Setting up a Flexbox project
- Designing a single blog post
- Summary
- 4. Working with Layouts
- Inserting rows into your layout
- Adding columns to your layout
- Choosing a column class
- Creating a simple three-column layout
- Mixing column classes for different devices
- Coding the blog home page
- Using responsive utility classes
- Summary
- 5. Working with Content
- Learning to use typography
- Customizing headings
- How to style images
- Coding tables
- Summary
- 6. Playing with Components
- Basic button examples
- Creating outlined buttons
- Checkbox and radio buttons
- Coding forms in Bootstrap 4
- Creating an inline form
- Adding validation to inputs
- Using the Jumbotron component
- Adding the Label component
- Using the Alerts component
- Using Cards for layout
- Updating the Blog index page
- How to use the Navs component
- Adding Breadcrumbs to a page
- Using the Pagination component
- How to use the List Group component
- Summary
- 7. Extending Bootstrap with JavaScript Plugins
- Coding Tooltips
- Avoiding collisions with our components
- Using Popover components
- Using the Collapse component
- Coding an Accordion with the Collapse component
- Coding a Bootstrap Carousel
- Summary
- 8. Throwing in Some Sass
- Using Sass in the blog project
- Importing partials in Sass
- Creating a collection of variables
- Customizing components
- Writing a theme
- Summary
- 9. Migrating from Version 3
- Big changes in version 4
- Updating your variables
- Additional global changes
- Other font updates
- Migrating components
- Migrating JavaScript
- Miscellaneous migration changes
- Summary
- 3. Module 3
- 1. Revving Up Bootstrap
- What Bootstrap 4 Alpha 4 has to offer
- Setting up our project
- Summary
- 2. Making a Style Statement
- Image elements
- Responsive utilities
- Helper classes
- Text alignment and transformation
- Summary
- 3. Building the Layout
- Adding Bootstrap components
- Summary
- 4. On Navigation, Footers, Alerts, and Content
- Improving navigation using Scrollspy
- Customizing scroll speed
- Icons
- Using and customizing alerts
- Creating a footer
- Creating and customizing forms
- Form validation
- Progress indicators
- Adding content using media objects
- Figures
- Quotes
- Abbreviations
- Summary
- 5. Speeding Up Development Using jQuery Plugins
- Enhanced pagination using bootpag
- Displaying images using Bootstrap Lightbox
- Improving our price list with DataTables
- Summary
- 6. Customizing Your Plugins
- Customizing plugins
- Writing a custom Bootstrap jQuery plugin
- Summary
- 7. Integrating Bootstrap with Third-Party Plugins
- Hover
- Summary
- 8. Optimizing Your Website
- Minifying CSS and JavaScript
- Introducing Grunt
- Running tasks automatically
- Stripping our website of unused CSS
- JavaScript file concatenation
- Summary
- 9. Integrating with AngularJS and React
- Introducing React
- Summary
- Bibliography
- Index
React is a JavaScript library created by Facebook. While AngularJS positions itself as a framework, React is very clear in its position as a library. React prides itself on being responsible for the visual aspect of the application, "Just the UI", as the React landing page professes. By concerning itself modularly with this single aspect, React is relatively small in size compared to AngularJS and other one-stop-shop frameworks.
React employs a modular approach to the UI, with the idea of components. Components are similar to the directives we used with AngularJS and to the idea of web components. That is, components are reusable pieces of UI functionality, adhering to the "do one thing, do one thing well" ideology. React really pushes the modular approach in how components are usually composed, with tight coupling between styles, HTML, and JavaScript.
Typically, all component specific code is contained within one file. The HTML, the CSS rules, and the JS logic are all included within this file. While at first glance, this approach arguably flies in the face of the approach of separation of concerns, it does totally separate the concerns of components from each other. In other words, making changes to one part of the application should have no impact on another.
React is famously fast when manipulating the DOM, using the virtual DOM approach to figuring out which parts of the UI to update, as opposed to the dirty-checking technique employed by AngularJS. The virtual DOM is essentially the idea of keeping a copy of the real DOM in memory, and updating the copy with necessary changes. The virtual DOM is then periodically compared with the real DOM; any differences then result in that specific piece of the DOM being re-evaluated and re-rendered.
React also promotes the usage of JSX with React applications. JSX is a programming language which compiles into JavaScript, thus requiring a compilation step in the development process. JSX offers a layer of object-oriented style programming on top of JavaScript, such as Java-like class systems and static typing.
Now, let's set up React.
There are several ways of getting setup with React. As the React team maintain a Bower package, we will use Bower as we have done throughout this book. From the terminal, let's pull down React through Bower. We are going to use 0.14.6 version of React:
bower install react#0.14.6
With that, we have a downloaded React to
src/bower_components/react
. Here you will see
react.js
, react-dom.js
, and
react-dom-server.js
, along with their minified versions. Here
react.js
is the core React library,
react-dom.js
takes responsibility for the actual rendering of the React components in the DOM, and
react-dom-server.js
allows for server-side rendering of React components.
Create a copy of
src/index.html
to
src/index-react.html
, and add the minified versions of React and ReactDOM to the
head
of the page:
    <script src="bower_components/react/react.min.js"></script>
    <script src="bower_components/react/react-dom.min.js"></script>
We also need to include Babel, a JavaScript compiler which caters for JSX. Babel does not maintain a Bower package, but it is available on npm. However, Babel maintains a version of its library for browsers on a CDN. Include the following in the
head
of our page:
    <script src="https://cdnjs.cloudflare.com/ajax/libs/babel-core/
    5.8.23/browser.min.js"></script>
The browser.min.js
file will transform any JSX code in HTML, within script tags with a
type
attribute with the value
text/babel
. Let's test it out, to make sure we have everything set up correctly. Above our footer, add a
div
with an id of test:
<div id="test"></div>
Next, let's write the simplest of React components. At the bottom of
index-react.js
, after the footer element, include the following:
    <script type="text/babel">
        ReactDOM.render(
            <div className='container-fluid myphoto-section bg-myphoto-
            dark'>Test</div>,
            document.getElementById('test')
        );
    </script>
Let's walk through what is happening here. First, as we said before, our script tag needs a
type
attribute with the value
text/babel
so that Babel knows to compile it into JavaScript before execution. Within the script tags, we have our first real interaction with React: ReactDOM and its
render
function. The
render
function takes two arguments here: the first is raw HTML, the second is an element selector. What is happening here is pretty self-explanatory: we want React to find the test element, and replace it with the HTML we passed as the first parameter. You may notice that in our HTML, we have a
className
attribute. We use
className
instead of
class
, as class is a reserved word in JavaScript. The
className
attribute is converted to
class
when the component is rendered in the DOM. Open
index-react.html
and check if we now have a Test section in our page:
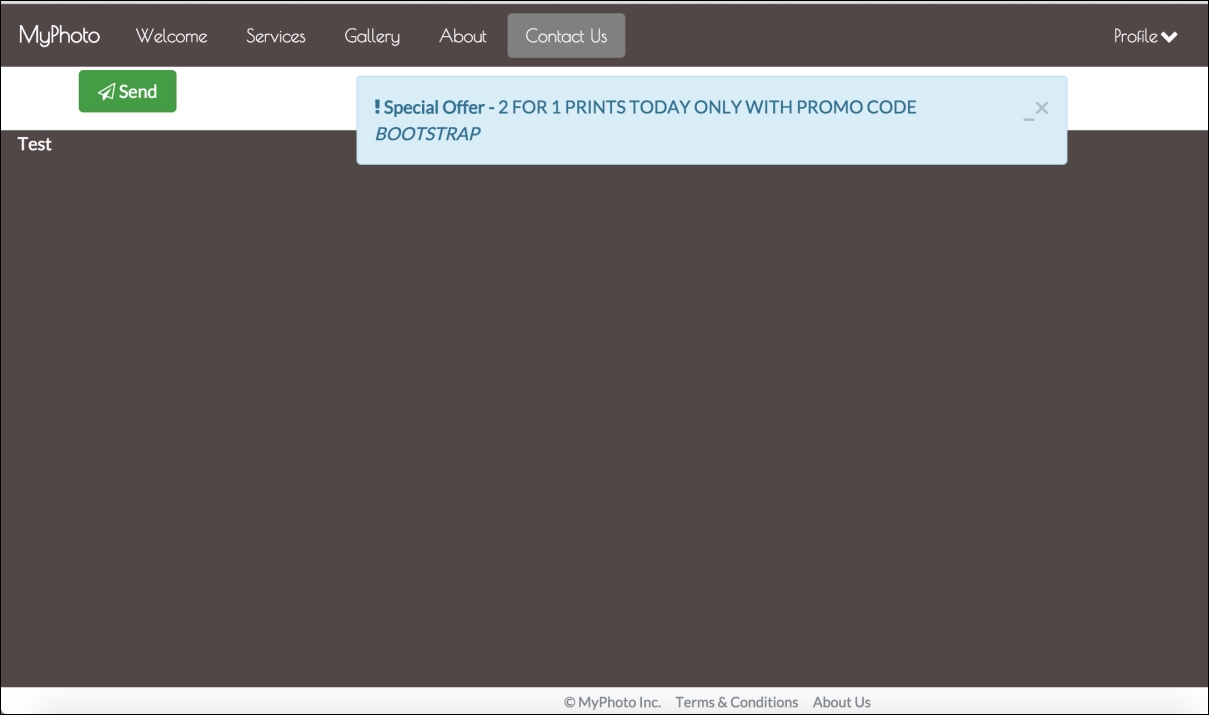
Figure 9.2: The Test section displaying as expected
We are now all set up to integrate React into MyPhoto. Let's do something more substantial. We are going to convert the carousel in the Gallery component into a React component. Before we get to that, remove the test component, both the
div
and the JSX we added.
To understand how we can integrate React with our application, we are going to make a reusable Gallery component using React. The first thing we are going to do is create a new file,
src/app/components/gallery.js
, and include it in the head of
index-react.html
:
<script type="text/babel" src="app/components/gallery.js"></script>
Notice the
type
attribute, again set to
text/babel
, so
gallery.js
will be compiled to JavaScript at runtime. As you can imagine, this is a slow operation. This method is recommended to be used only for development purposes. For production, all JSX should be precompiled into JavaScript. For the purposes of this example, we will continue with the runtime-compile method.
Let's add some code to
gallery.js
. Take the gallery markup, the
div
element with the id gallery-carousel and its nested elements, and add it to
gallery
.
js
as the first argument for
ReactDOM.render
. Make sure to also change the class attributes to
className
. We also need to make sure that we use handlebar expressions when defining inline styles, as React parses the style attribute as an object, rather than a string:
    ReactDOM.render(
        <div id="gallery-carousel" className="carousel slide"
        data-ride="carousel" data-interval="3000">
            <div className="carousel-inner" role="listbox">
                <div style={{height: 400px}} className="carousel-item
                active">
                    <img data-modal-picture="#carouselModal"
                    src="images/brazil.png">
                    <div className="carousel-caption">
                        Brazil
                    </div>
                </div>
                <div style={{height: 400px}} className="carousel-item">
                    <img data-modal-picture="#carouselModal"
                    src="images/datsun.png">
                    <div className="carousel-caption">
                        Datsun 260Z
                    </div>
                </div>
                <div style={{height: 400px}} className="carousel-item">
                    <img data-modal-picture="#carouselModal"
                    src="images/skydive.png">
                    <div className="carousel-caption">
                        Skydive
                    </div>
                </div>
            </div>
            <a className="left carousel-control" href="#gallery-
            carousel" role="button" data-slide="prev">
                <span className="icon-prev" aria-hidden="true"></span>
            </a>
            <a className="right carousel-control" href="#gallery-
            carousel" role="button" data-slide="next">
                <span className="icon-next" aria-hidden="true"></span>
            </a>
            <ol className="carousel-indicators">
            <li data-target="#gallery-carousel" data-slide-to="0"
            className="active"></li>
            <li data-target="#gallery-carousel" data-slide-to="1"></li>
            <li data-target="#gallery-carousel" data-slide-to="2"></li>
            </ol>
        </div>,
            document.getElementById('react-gallery')
    )
The second argument we pass is an element selector, targeting an element with an id of
react-gallery
. Replace the
gallery-carousel
element in
index-react.js
with the target element for the
gallery
.
js
React component:
<div id="react-gallery"></div>
Open
index-react.js
and we should see the Gallery component, but this time it is being generated by React:

Figure 9.3: The React Gallery component
Oh, that isn't what we want. Obviously something has gone wrong here. Let's check out the browser's Developer Console to see if there are any errors reported:

Figure 9.4: Chrome's Developer Console displaying errors
So, Babel has thankfully given us an explicit error, it is expecting a closing tag for the
img
tags in
gallery.js
. Let's make sure all our
img
tags are closed in
gallery.js
:
    <div style={{height: 400px}} className="carousel-item active">
        <img data-modal-picture="#carouselModal" src="images/
        brazil.png"/>
        <div className="carousel-caption">
            Brazil
        </div>
    </div>
    <div style={{height: 400px}} className="carousel-item">
        <img data-modal-picture="#carouselModal" src="images/datsun.png" />
        <div className="carousel-caption">
            Datsun 260Z
        </div>
    </div>
    <div style={{height: 400px}} className="carousel-item">
        <img data-modal-picture="#carouselModal" src="images/skydive.png"
        />
        <div className="carousel-caption">
            Skydive
        </div>
    </div>
Let's give
index-react.js
another go and we should now have our React-powered Gallery tab:

Figure 9.5: The functioning React Gallery component displaying an image of the Botanical Garden in Rio de Janeiro
Great! We now have a functioning React component. But, it isn't exactly reusable in terms of a carousel. If we wanted another carousel elsewhere, we would need to create another component. Let's make the carousel reusable by passing in options to the React component.
To write a reusable component like this, we create the component as a custom React class. This class essentially returns the markup to be rendered by
ReactDOM.render
, but gives us more power to manipulate our template. Like AngularJS directive custom React classes are extensions of the DOM, allowing us to create new DOM tags. For example, we could create a Carousel element. Note that custom React classes always begin with an uppercase letter:
<Carousel></Carousel>
Before we do anything, let's analyze the component we have and understand which values we want to make mutable. In the root element, the
id
and
data-interval
values need to be changeable. The component also needs to allow the images and caption to be set. Ideally, this should be passed to the component as an array. Finally, the component needs to take in the value for
data-modal-picture
.
In all, the component needs to take four values. So, the markup for the component would look something like:
    <Carousel id="<value>" interval="<value>" carousel-modal-
    picture="<value>" carousel-images="<[images]"></Carousel>
In
gallery.js
, we can access component attributes using
this.props
. Wrapping
this.props
with curly braces allows these attribute values to be accessed within the markup of the component code. Add the following to the beginning of
gallery.js
:
    var Carousel = React.createClass({
        render: function () {
            var props = this.props
            return (
                <div id={props.id} className="carousel slide"
                data-ride="carousel" data-interval={props.interval}>
                    <div className="carousel-inner" role="listbox">
                        { props.images.map(function(item, index) {
                            var itemClass;
                            if (index === 0)
                                itemClass = "active"
                            else
                                itemClass = ""
                            return (
                                <div className={ 'carousel-item ' +
                                itemClass }>
                                    <img data-modal-picture={'#' +                                                  props.carouselModalPicture}
                                    src={item.src} />
                            <div className="carousel-caption">
                                {item.caption}
                            </div>
                        </div>
                        )
                    })}
                </div>
                <a className="left carousel-control" href={'#' + props.id }
                role="button" data-slide="prev">
                    <span className="icon-prev" aria-hidden="true"></span>
                </a>
                <a className="right carousel-control" href={'#' + props.id
                }
                role="button" data-slide="next">
                    <span className="icon-next" aria-hidden="true"></span>
                </a>
                <ol className="carousel-indicators">
                    { props.images.map(function(item, index) {
                        var liClass;
                        if (index === 0)
                            liClass = "active"
                        else
                            liClass = ""
                        return (
                            <li data-target={'#' + props.id } data-slide-
                            to={index} className={ liClass }></li>
                        )
                    })
                }
            </ol>
        </div>
        )
      }
    })
We have created a new React class using
React.createClass
, which has a
render
property. The
render
property is simply a function which returns an HTML template. The template is essentially the markup for the gallery-carousel component, except we are accessing some dynamic properties. We have replaced all references to the carousel id with
this.props.id
, all references to the id of the modal window to open up the carousel modal to
this.props.carouselModalPicture, and the
data-interval
to
this.props.interval
. We will come back to the images and the captions later. We assign this custom React class to the variable
Carousel
.
Now that we have this reusable class, we no longer need the template within the
ReactDOM.render
function. Replace the function with the following:
    ReactDOM.render(
        <Carousel id="gallery-carousel" interval="3000"                          carouselModalPicture="carouselModal"></Carousel>,
        document.getElementById('react-gallery')
    )
We are now using the
Carousel
tag in the render method. We are passing three attributes to
Carousel
-
id
,
interval, and
carouselModalPicture
. The values of these attributes will then be used in the template returned by
Carousel
.
render
.
ReactDOM
.
render
will then replace the
react
-
gallery
element in
index
-
react
.
js
with the carousel template, with these defined attributes. Check it out and see if we have a fully functioning carousel in the Gallery tab. Change some of the attribute values and see if the carousel component works as expected.
Now, let's put the images and image captions in as an option. In reality, these values would come from an API, or will be otherwise dynamically generated. For the sake of this example, we are going to create a variable with the array of values. To demonstrate that the values are being passed through as an attribute, we will change the captions slightly. Add the following to the beginning of
gallery.js
:
    var carouselImages = [
        {
            src: "images/brazil.png",
            caption: "Lake in Brazil"
        },
        {
            src: "images/datsun.png",
            caption: "Datsun Fairlady Z"
        },
        {
            src: "images/skydive.png",
            caption: "Team Skydive"
        }
    ]
Now, we can pass
carouselImages
as an attribute of the
Carousel
tag:
    <Carousel id="gallery-carousel" interval="3000"
    carouselModalPicture="carouselModal" images={carouselImages}>
    </Carousel>
In the carousel template, we need to loop through the data passed into the
images
attribute, and create a new slide for each entry, as well as a new indicator in the
carousel-indicators
list. We will loop through the dataset using the
map
function. As
map
creates a closure, we first need to create a reference to
this
.
props
, as this will be different in the context of the closure. At the beginning of the
render
function, assign
this.props
to
props
:
var props = this.props
Next, remove the slides from the
carousel-inner
element and add the following:
    { props.images.map(function(item, index) {
        var itemClass;
        if (index === 0) {
            itemClass = "active"
        } else {
            itemClass = ""
        }
        return (
            <div className={ 'item md ' + itemClass }>
            <img data-modal-picture={'#' + props.carouselModalPicture}
            src={item.src} />
            <div className="carousel-caption">
                {item.caption}
            </div>
        </div>
        )
    })}
We are looping through
props.images
using the
map
function. We want to set the first slide in the array to be the active slide, so we check its index and assign the
itemClass
variable accordingly. We then define the template for the slide. We pass
itemClass
into the
className
attribute to denote the initially active slide, we then use the
item.src
property as the
src
of the
img
element, and
item.caption
as the caption of the slide. Next, remove all the list items from the
carousel-indicators
list, replacing them with the following:
    { props.images.map(function(item, index) {
        var liClass;
        if (index === 0) {
            liClass = "active"
    } else {
        liClass = ""
    }
        return (
            <li data-target={'#' + props.id } data-slide-to
            ={index} className={ liClass }></li>
            )
        })
    }
Similarly, we loop through the images and assign the first slide as the active slide. That is everything our component needs to create our Gallery carousel. Let's check it out:

Figure 9.6: The functioning React Gallery component displaying an image of the Botanical Garden in Rio de Janeiro
As you can see from the caption, the carousel is loading from the
imagesCarousel
array. Now, we have a customizable, reusable, and easily maintainable React-powered carousel component that can be used anywhere across MyPhoto.