Table of Contents for
Mastering PostCSS for Web Design
 Mastering PostCSS for Web Design
Published by
Packt Publishing, 2016
Mastering PostCSS for Web Design
Published by
Packt Publishing, 2016
- Cover
- Table of Contents
- Mastering PostCSS for Web Design
- Mastering PostCSS for Web Design
- Credits
- About the Author
- About the Reviewer
- www.PacktPub.com
- Preface
- What you need for this book
- Who this book is for
- Conventions
- Reader feedback
- Customer support
- 1. Introducing PostCSS
- Introducing PostCSS
- Setting up a development environment
- Creating a simple example using PostCSS
- Linting code using plugins
- Exploring how PostCSS works
- Summary
- 2. Creating Variables and Mixins
- Creating a hover effect example
- Transitioning to using PostCSS
- Adding variable support to PostCSS
- Updating our hover effect demo
- Setting the order of plugins
- Creating mixins with PostCSS
- Looping content with PostCSS
- Summary
- 3. Nesting Rules
- Navigating through pages
- Transitioning to using PostCSS plugins
- Exploring the pitfalls of nesting
- Making the switch to BEM
- Exploring our changes in more detail
- Summary
- 4. Building Media Queries
- Exploring custom media queries in PostCSS
- Making images responsive
- Adding responsive text support
- Optimizing media queries
- Retrofitting support for older browsers
- Moving away from responsive design
- Taking things further with CSS4
- Summary
- 5. Managing Colors, Images, and Fonts
- Managing fonts with PostCSS
- Creating image sprites
- Working with SVG in PostCSS
- Adding support for WebP images
- Manipulating colors and color palettes
- Creating color functions with PostCSS
- Summary
- 6. Creating Grids
- Creating an example with Bourbon Neat
- Exploring the grid plugins in PostCSS
- Transitioning to using PostCSS-Neat
- Creating a site using Neat and PostCSS
- Adding responsive capabilities
- Summary
- 7. Animating Elements
- Moving away from jQuery
- Making use of pre-built libraries
- Switching to using SASS
- Making the switch to PostCSS
- Exploring plugin options within PostCSS
- Updating code to use PostCSS
- Creating a demo in PostCSS
- Optimizing our animations
- Using our own animation plugin
- Summary
- 8. Creating PostCSS Plugins
- Dissecting the architecture of a standard plugin
- Creating an transition plugin
- Building a custom font plugin
- Simplifying the development process
- Guidelines for plugin building
- Making the plugin available for use
- Summary
- 9. Working with Shortcuts, Fallbacks, and Packs
- Exploring plugin packs for PostCSS
- Adding shortcuts with Rucksack
- Linting and optimizing your code
- Providing fallback support
- Summary
- 10. Building a Custom Processor
- Exploring our processor
- Dissecting issues with our processor
- Optimizing the output
- Adding reload capabilities
- Extending our processor further
- Testing the final pre-processor
- Getting started with some hints and tips
- Introducing the CSStyle library
- Summary
- 11. Manipulating Custom Syntaxes
- Preparing our environment
- Implementing custom syntax plugins
- Parsing CSS
- Formatting the output with the API
- Highlighting our syntax code
- Summary
- 12. Mixing Preprocessors
- Exploring the conversion process
- Introducing the Pleeease library
- Compiling with other preprocessors
- Using the PreCSS library
- Converting a WordPress installation
- Setting up our environment
- Considering the conversion process
- Making changes to our code
- Compiling and testing the changes
- Summary
- 13. Troubleshooting PostCSS Issues
- Exploring some common issues
- Getting help from others
- Summary
- 14. Preparing for the Future
- Converting CSS4 styles for use
- Supporting future syntax with cssnext
- Creating plugins to provide extra CSS4 support
- Summary
- Index
Throughout many of our demos, we've concentrated on using plugins, with minimal changes required to configure the code for use. There is nothing wrong with this, but as always, we can do better. How about installing support for highlighting?
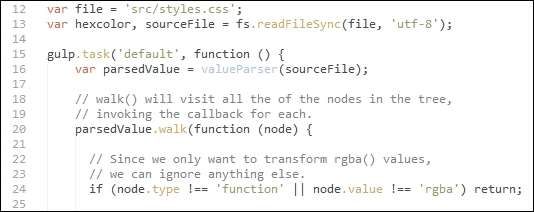
This is an easy way to make it easier to read our code, indeed, we should have installed something like this a long time ago! That aside, it's easy enough to fix; support is available for a wide variety of editors. For the purposes of this chapter, I will assume you are using Sublime Text; this is an example of how it might look (the screenshot shows the Twilight Light theme in use):
Let's dive in and take a look at how to get this set up, using Sublime Text's package manager.
Adding theme support is a cinch when using an editor such as Sublime Text. Let's work through the steps:
- We'll start by opening a command prompt session. Go ahead and add this command, then press Enter:
cd %APPDATA%\Sublime Text 3\Packages\User - Next, enter this command, then press Enter:
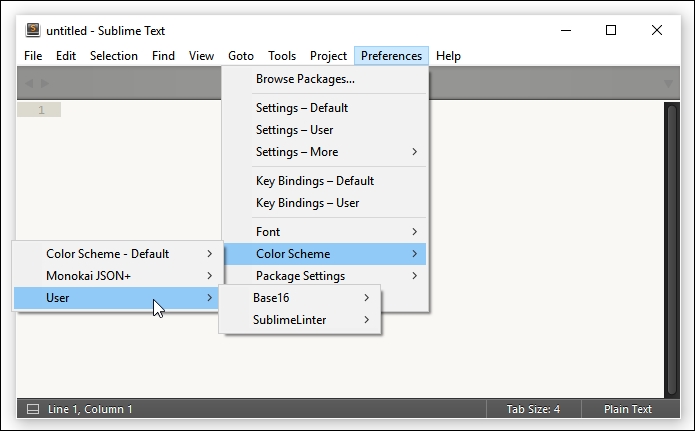
git clone git://github.com/chriskempson/base16-textmate.git Base16 - Open Sublime Text. If all is well, we should see a new menu entry if we click on Preferences | Color Scheme | User:
An easy change to make, but a useful one; nevertheless, it's only part of what we can do! To really go to town (figuratively speaking), we can apply similar styling to our CSS styles. This makes it easier to read if we want to document our styles online. After all, color is clearly easier to read than black and white! Let's take a moment to explore what is required to apply a color theme to our documented code.
A part of developing code is the need to document it. This is not only for our sanity, but also for future changes, should someone else need to alter our code! Creating printed documentation is now old hat, a better method is to create it online, where we can easily update it without too much fuss. At the same time, we can add some color to it, to make it visually more appealing and provide a more consistent format to our efforts.
We could create this code manually, but that is a resource-heavy process that is prone to error! Instead, we can use the Midas library (available from http://midasjs.com) to automate the creation of the basis for our documentation, and we can style it using one of the base16 themes we covered in the previous exercise.
Let's make a start on installing that support:
- We'll start by firing up a NodeJS command prompt, then changing the working folder to our project area.
- At the prompt, enter this command, then press Enter:
npm install midas --save-dev - Once it has finished installing, go ahead and extract the
srcfolder and thegulpfile.jsandpackage.jsonfiles from theT63 – incorporating midasfolder, then save them to the root of our project area. - Revert to the NodeJS command prompt, then enter
gulpand press Enter. - Gulp will go away and compile a HTML-based extract of our code as
styles.html, which has been properly formatted with extra markup. The file will appear in thedestfolder within our project area.
At this point, if we were to view the contents of that file, it will look very plain; this is easy to fix! To do this, we will use the Brewer theme by Timothée Poisot, available from https://github.com/chriskempson/base16-builder/blob/master/schemes/brewer.yml; there are a few steps involved to make this happen:
- Browse to https://github.com/ben-eb/midas/blob/master/templates/template-light.css, then save this as a CSS file within the
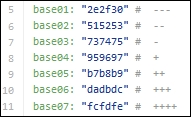
destfolder of our project area. - Open it in a text editor; it contains a series of placeholders for the base16 themes that are available for use. We would normally use Ruby to generate the CSS for one of these themes, but this isn't entirely necessary; instead, use your editor's search and replace to match up each placeholder with the appropriate color:
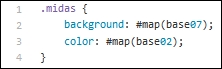
- Save the result; to make it work, we need to adjust the contents of the
styles.htmlfile to reference the new style sheet, so that it has the proper HTML structure. Once done, it will look something like this: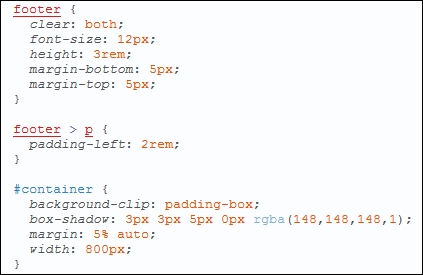
This looks far more appealing, I think you'll agree! Although it requires some work to create the initial theme, this will be a one-off process for each theme that you create. Any changes made to the CSS rules or declarations can be generated automatically, and the HTML result updates accordingly.