Table of Contents for
Mastering PostCSS for Web Design
 Mastering PostCSS for Web Design
Published by
Packt Publishing, 2016
Mastering PostCSS for Web Design
Published by
Packt Publishing, 2016
- Cover
- Table of Contents
- Mastering PostCSS for Web Design
- Mastering PostCSS for Web Design
- Credits
- About the Author
- About the Reviewer
- www.PacktPub.com
- Preface
- What you need for this book
- Who this book is for
- Conventions
- Reader feedback
- Customer support
- 1. Introducing PostCSS
- Introducing PostCSS
- Setting up a development environment
- Creating a simple example using PostCSS
- Linting code using plugins
- Exploring how PostCSS works
- Summary
- 2. Creating Variables and Mixins
- Creating a hover effect example
- Transitioning to using PostCSS
- Adding variable support to PostCSS
- Updating our hover effect demo
- Setting the order of plugins
- Creating mixins with PostCSS
- Looping content with PostCSS
- Summary
- 3. Nesting Rules
- Navigating through pages
- Transitioning to using PostCSS plugins
- Exploring the pitfalls of nesting
- Making the switch to BEM
- Exploring our changes in more detail
- Summary
- 4. Building Media Queries
- Exploring custom media queries in PostCSS
- Making images responsive
- Adding responsive text support
- Optimizing media queries
- Retrofitting support for older browsers
- Moving away from responsive design
- Taking things further with CSS4
- Summary
- 5. Managing Colors, Images, and Fonts
- Managing fonts with PostCSS
- Creating image sprites
- Working with SVG in PostCSS
- Adding support for WebP images
- Manipulating colors and color palettes
- Creating color functions with PostCSS
- Summary
- 6. Creating Grids
- Creating an example with Bourbon Neat
- Exploring the grid plugins in PostCSS
- Transitioning to using PostCSS-Neat
- Creating a site using Neat and PostCSS
- Adding responsive capabilities
- Summary
- 7. Animating Elements
- Moving away from jQuery
- Making use of pre-built libraries
- Switching to using SASS
- Making the switch to PostCSS
- Exploring plugin options within PostCSS
- Updating code to use PostCSS
- Creating a demo in PostCSS
- Optimizing our animations
- Using our own animation plugin
- Summary
- 8. Creating PostCSS Plugins
- Dissecting the architecture of a standard plugin
- Creating an transition plugin
- Building a custom font plugin
- Simplifying the development process
- Guidelines for plugin building
- Making the plugin available for use
- Summary
- 9. Working with Shortcuts, Fallbacks, and Packs
- Exploring plugin packs for PostCSS
- Adding shortcuts with Rucksack
- Linting and optimizing your code
- Providing fallback support
- Summary
- 10. Building a Custom Processor
- Exploring our processor
- Dissecting issues with our processor
- Optimizing the output
- Adding reload capabilities
- Extending our processor further
- Testing the final pre-processor
- Getting started with some hints and tips
- Introducing the CSStyle library
- Summary
- 11. Manipulating Custom Syntaxes
- Preparing our environment
- Implementing custom syntax plugins
- Parsing CSS
- Formatting the output with the API
- Highlighting our syntax code
- Summary
- 12. Mixing Preprocessors
- Exploring the conversion process
- Introducing the Pleeease library
- Compiling with other preprocessors
- Using the PreCSS library
- Converting a WordPress installation
- Setting up our environment
- Considering the conversion process
- Making changes to our code
- Compiling and testing the changes
- Summary
- 13. Troubleshooting PostCSS Issues
- Exploring some common issues
- Getting help from others
- Summary
- 14. Preparing for the Future
- Converting CSS4 styles for use
- Supporting future syntax with cssnext
- Creating plugins to provide extra CSS4 support
- Summary
- Index
As an afterthought to the previous exercise, I posed the question, "How many times have you seen forms that display labels above, or to the right of, fields?" If I were to collect a dime for each answer, I suspect I would be off on some exotic island, rich, and without a care in the world—I've lost count of the number of times I've seen such forms, let alone anyone else who uses the Internet!
There is no excuse for plain, boring forms. To prove this, we're going to create a simple demo using the postcss-transform-shortcut plugin by Jonathan Neal, available from https://github.com/jonathantneal/postcss-transform-shortcut. It's a straightforward plugin that allows us to specify single properties, which the plugin combines into a single line of code within our style sheet. Let's quickly install it:
- First, go ahead and fire up a Node.js command prompt session, then change the working folder to our project area.
- At the prompt, enter this command, then press Enter:
npm install postcss-transform-shortcut --save-dev - Node will now install the plugin—it will return back to a flashing prompt when this is complete.
There is no need to configure it, although there is a small task we have to complete before we can use it.
While researching for this book, I came across an issue in the current release (1.0.0), whereby style sheets weren't compiling properly if they had multiple rules within; there are occasions when plugins may or may not work for your environment, and this is one of them!
Thankfully, this is an easy fix—if we take a look within the postcss-transform-shortcut folder within the node_modules folder in our project area, we should see this:
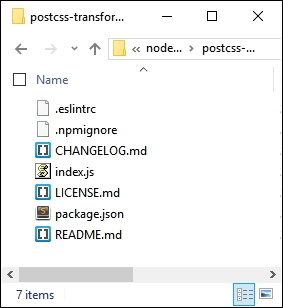
Simply copy the contents of the file at https://raw.githubusercontent.com/pc035860/postcss-transform-shortcut/07af8a78d1fb5e7fdeebc8c7f56c0c9ecdd83efb/index.js and paste straight over the top of index.js; this should resolve the issue.
Note
This has been logged as an issue in the developer's GitHub site, at https://github.com/jonathantneal/postcss-transform-shortcut/issues/4, if you would like to see more details about the issue.
Now that we have our updated plugin in place, we can get on with building our demo! The next exercise will take the form of a simple credit card form—I don't suggest you use it in a production environment, as it is purely designed to show the animation effects only, and does not have any security attached to the form!
That aside, here's a screenshot of what we're going to produce, using PostCSS:
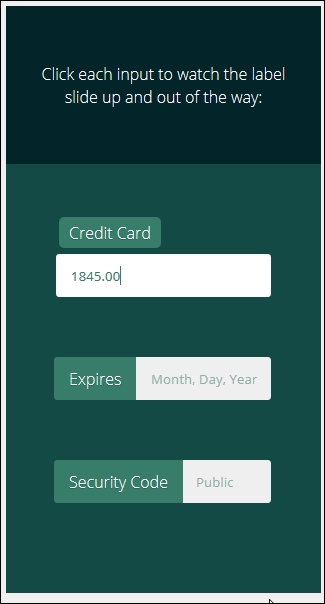
It's a simple demo, based on a codepen created by Michael Arestad, which you can view at http://codepen.io/MichaelArestad/pen/ohLIa—I've simplified and reworked the demo to illustrate how we can use PostCSS to compile the code into valid CSS styles.
Okay, let's make a start with setting up our demo:
- We'll start by extracting a copy of the
T40 – Creating a demo in PostCSSfolder from the code download that accompanies this book; save it to our project area. - From within the folder, move the
package.jsonandgulpfile.jsfiles up a level to the root of our project area. - In the
css – completed versionsfolder, copystyle – pre-compile version.cssto thesrcfolder, and rename asstyle.css. - Next, fire up a Node.js command prompt session, then change the working folder to our project area.
- At the prompt, enter gulp, then press Enter—PostCSS will go away and compile our code; if all is well, we should see our compiled style sheet files and
source mapsappear in thedestfolder. - Copy the contents of the
destfolder to thecssfolder within the originalT40 – Creating a demo in PostCSSfolder. - Go ahead and preview the results—if all is well, we should see something akin to the screenshot shown at the start of our exercise.
It's a simple demo, but it shows off how we can use animations perfectly—it adds a subtle effect to the label, and doesn't spoil the overall use of our form. The use of the plugin does raise a couple of useful points, so let's take a moment to explore what we've just created in more detail.
The key to a successful plugin in PostCSS is one that follows the 1:1 principle—one plugin for one task. The postcss-transform-shortcut plugin is no exception: it takes the various elements that make up a transition rule, and puts them together in the right order. To see what we mean, take a look at these lines from within our style sheet before it is compiled:
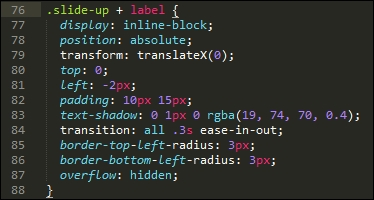
Where's our transform: statement? Well, when using this plugin, it's not needed—instead, we can simply specify the various attributes, thus:
.transform {
  transform: skewX(25deg);
  rotate: 180deg;
  scale: 2 2;
  translate: 10px 10px;
}
The plugin is set to recognize these four attributes and compile them into one single rule, as shown in this code excerpt:
.transform {
  transform: skewX(25deg) rotate3d(180deg,0,1) scale3d(2,2,1) translate3d(10px,10px,0px);
}
Any gaps in the attributes will be automatically filled in with default values from within the plugin. We can even use this plugin as the basis for an equivalent for transitions—we will do this toward the end of the next chapter.