Table of Contents for
Mastering PostCSS for Web Design
 Mastering PostCSS for Web Design
Published by
Packt Publishing, 2016
Mastering PostCSS for Web Design
Published by
Packt Publishing, 2016
- Cover
- Table of Contents
- Mastering PostCSS for Web Design
- Mastering PostCSS for Web Design
- Credits
- About the Author
- About the Reviewer
- www.PacktPub.com
- Preface
- What you need for this book
- Who this book is for
- Conventions
- Reader feedback
- Customer support
- 1. Introducing PostCSS
- Introducing PostCSS
- Setting up a development environment
- Creating a simple example using PostCSS
- Linting code using plugins
- Exploring how PostCSS works
- Summary
- 2. Creating Variables and Mixins
- Creating a hover effect example
- Transitioning to using PostCSS
- Adding variable support to PostCSS
- Updating our hover effect demo
- Setting the order of plugins
- Creating mixins with PostCSS
- Looping content with PostCSS
- Summary
- 3. Nesting Rules
- Navigating through pages
- Transitioning to using PostCSS plugins
- Exploring the pitfalls of nesting
- Making the switch to BEM
- Exploring our changes in more detail
- Summary
- 4. Building Media Queries
- Exploring custom media queries in PostCSS
- Making images responsive
- Adding responsive text support
- Optimizing media queries
- Retrofitting support for older browsers
- Moving away from responsive design
- Taking things further with CSS4
- Summary
- 5. Managing Colors, Images, and Fonts
- Managing fonts with PostCSS
- Creating image sprites
- Working with SVG in PostCSS
- Adding support for WebP images
- Manipulating colors and color palettes
- Creating color functions with PostCSS
- Summary
- 6. Creating Grids
- Creating an example with Bourbon Neat
- Exploring the grid plugins in PostCSS
- Transitioning to using PostCSS-Neat
- Creating a site using Neat and PostCSS
- Adding responsive capabilities
- Summary
- 7. Animating Elements
- Moving away from jQuery
- Making use of pre-built libraries
- Switching to using SASS
- Making the switch to PostCSS
- Exploring plugin options within PostCSS
- Updating code to use PostCSS
- Creating a demo in PostCSS
- Optimizing our animations
- Using our own animation plugin
- Summary
- 8. Creating PostCSS Plugins
- Dissecting the architecture of a standard plugin
- Creating an transition plugin
- Building a custom font plugin
- Simplifying the development process
- Guidelines for plugin building
- Making the plugin available for use
- Summary
- 9. Working with Shortcuts, Fallbacks, and Packs
- Exploring plugin packs for PostCSS
- Adding shortcuts with Rucksack
- Linting and optimizing your code
- Providing fallback support
- Summary
- 10. Building a Custom Processor
- Exploring our processor
- Dissecting issues with our processor
- Optimizing the output
- Adding reload capabilities
- Extending our processor further
- Testing the final pre-processor
- Getting started with some hints and tips
- Introducing the CSStyle library
- Summary
- 11. Manipulating Custom Syntaxes
- Preparing our environment
- Implementing custom syntax plugins
- Parsing CSS
- Formatting the output with the API
- Highlighting our syntax code
- Summary
- 12. Mixing Preprocessors
- Exploring the conversion process
- Introducing the Pleeease library
- Compiling with other preprocessors
- Using the PreCSS library
- Converting a WordPress installation
- Setting up our environment
- Considering the conversion process
- Making changes to our code
- Compiling and testing the changes
- Summary
- 13. Troubleshooting PostCSS Issues
- Exploring some common issues
- Getting help from others
- Summary
- 14. Preparing for the Future
- Converting CSS4 styles for use
- Supporting future syntax with cssnext
- Creating plugins to provide extra CSS4 support
- Summary
- Index
With a Gulp task file and associated package.json file in place, we should be good to go, right? Well, not quite—yes, our processor has been used on demos throughout the book to great effect. But there is more that we can do: our Gulp file should never be static; we should always look to review it periodically, to ensure it is working at optimal efficiency.
Our Gulp file does have a few issues we need to address, so let's look at these now:
- Some of our tasks are not correctly named—for example, the styles task could be renamed to better reflect that we're using Rucksack in this task.
- There is a question about the use of source maps; so far we've used a dedicated source map plugin to create them. An upcoming change in Gulp 4 will reduce the need for a plugin—support for creating them is being added to Gulp core, so a separate plugin won't be required so often!
- In the rename task, we've hard-coded a
style.min.cssfilename as the output; this isn't going to suit all requirements, so we should change this to make it dynamic. - Staying with the rename task—we're combining two tasks, when they should be split into two separate processes.
- Take a look at the processor list within the styles task at line 16; this isn't too bad now, but over time it could become long and awkward to read! Instead, we need to change it so that at the point of calling PostCSS, we can use an array instead to provide the names.
- When creating source maps, our current setup provides both a full fat and minified version; is this really necessary? The issue comes from
cssnano, which is compressing every.cssfile it sees; this isn't necessary, so needs to be changed. - The use of
cssnanothat should be run as a task within PostCSS is causing issues—even though it would make sense to run it this way, it needs to be run independently, to satisfy our needs. - We should make a decision on whether we use a dedicated plugin for providing vendor prefix support, or rely on the use of other plugins that may have this built in already.
- When compiling source files, our processor is producing two minified files; one is correctly named, but the other is meant to be the uncompressed version for development purposes.
Over the next few pages, we will explore ways of fixing and improving our Gulp task file—it's key to understand that whilst many of these changes are specific to our task file, they are ones that may crop up for your future projects. Above all, it is essential that we should continually review our production process to ensure it is working as needed.
Let's begin the process of fixing and improving our Gulp file before we put it to test on a sample site.
It has to be said that there are a few issues we need to resolve—the key here is that none of them will stop our compilation process; we should consider them more as rough edges on a diamond, which need polishing to make our process sparkle (pun intended!).
Okay, let's get cracking: there are a few changes to make, so we will start with the key task, which compiles the source file:
- For this process, we need a copy of the
gulpfile.jsfile from theT48 – existing processorfolder within the code download that accompanies this book; go ahead and save it asgulpfile.jsat the root of our project area. - The first change we need to make is to enable
autoprefixersupport in the file—you should find it there but commented out on line 5; go ahead and remove the comment. - On or around line 16, look for this line:
.pipe(postcss([ rucksack({ fallbacks: true, autoprefixer: true }) ]))We're not going to include fallback support, and will take care of
autoprefixerseparately, so for now, alter it as shown:.pipe(postcss([ rucksack(), autoprefixer() ]))
- Our next change is in the lint-styles task—two changes are required here; first, add this block at line 13, below the declaration for Rucksack:
var stylerules = { "color-no-invalid-hex": 2, "declaration-colon-space-before": [2, "never"], "indentation": [2, 2], "number-leading-zero": [2, "always"] }; - Next, go ahead and replace the entire lint-styles task with this:
gulp.task('lint', ['styles'], function() { return gulp.src("dest/*.css") .pipe(postcss([ stylelint({ "rules": stylerules }), reporter({ clearMessages: true }) ])) }); - In the rename task, we have three changes to make—first, remove the
cssnanoline at line 38; we're splitting the task into two, and this will be handled in a new task. - This task has a prerequisite, which we've renamed—go ahead and change line 36 to this:
gulp.task('rename', ['lint'], function () { - Next, alter the rename command as indicated—this is on line 39:
.pipe(rename(renameFunction)) - In the next task,
sourcemap, we have one alteration to make—on or around line 47, change this line as shown:gulp.task('sourcemap', ['rename'], function () { return gulp.src(sourceMapLocation) - We've talked about splitting out the minification task—go ahead and add this below the
sourcemaptask:gulp.task('minifyCSS', ['sourcemap'], function () { return gulp.src('dest/*.min.css') .pipe(cssnano({ autoprefixer: false })) .pipe(gulp.dest("dest/")); }); - We've made changes to the task names, so we need to update the default task and watch facility—look for the string of names in square brackets on or around lines 50 and 52. Replace it with this string:
['styles', 'lint' , 'rename' , 'sourcemap', 'minifyCSS']
- Our watch task can also be put on a diet—there is no need to specify all of the tasks twice! Instead, go ahead and change the code as indicated—when changes are made, the watch facility will run the default task, which already has the requisite tasks:
gulp.task('default', ['styles', 'lint' , 'rename' , 'minifyCSS', 'sourcemap']); var watcher = gulp.watch('src/*.css', ['default']); watcher.on('change', function(event) { - We're almost done—there are some additional declarations we need to add at the top of our file, to ensure everything works as expected. Below the
stylerulesdeclaration added in step 4, go ahead and add these extra lines:var renameFunction = function (path) { path.extname = ".min.css"; return path; }; var sourceMapLocation = ['dest/*.css', '!dest/*.min.css'];
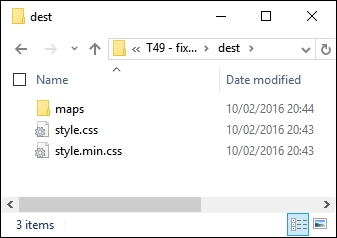
We now have an updated Gulp task file—we now need to copy the style.css from the src folder under T49 – fixing issues in Gulpfile to the src folder at the root of our project area. If all is well, we should have something akin to this in the dest folder of our project area when we compile our file, and a file named style.css.map in the maps folder:
At this point, I am sure you will have a few questions about some of the changes we've made—the demo highlights a few key points, so it's worth taking time out to explore these in more detail.
Throughout the course of our demo, we made a number of changes to our Gulp task file—the key thing to note is that none of them are compulsory. Our task file worked perfectly well prior to making the changes, so if they aren't compulsory, why are we making them?
The answer to this is simple—using a task runner such as Gulp is about automating processes so that you arrive at just the content you need. We had that, but the task runner produced extra files, didn't compress them as expected, and our Gulp file contained tasks that had multiple steps within the same task. The work we completed was about adding polish to the process—although our Gulp task file worked, we explored how we could improve on it by tweaking some of the processes.
We kicked off with changes to how vendor prefixes were added—our existing task completed this as part of compiling using the Rucksack plugin. The Rucksack plugin was to provide fallback support—I'm not a fan of working with older browsers, so we don't need it. This makes it less beneficial to incorporate vendor prefix support from such a large plugin, thus support is not enabled.
Note
There is another plugin available for PostCSS that handles vendor prefixes—doiuse, available at https://github.com/anandthakker/doiuse. Just another option to try!
The lint-styles task worked well—the changes we made focus on making the code easier to read in the task file. We moved the configuration block to the start of the file, and rearranged the format of the task; this means that we should not have to change the task, even though we may change the configuration!
Most of the remaining changes focus on splitting multiple roles into single tasks, and correcting some anomalies in the output. Our compilation process produced a minified file with the right extension, but also minified the original source file. We also had two source map files produced in a similar fashion—this is clearly not ideal! The changes we made now mean that our original source file is not minified, but only one minified file is produced, and that we have a single uncompressed style sheet created during the process.
Perfect, we now have a polished compilation process, which is producing the right files at the appropriate point; what next? Well, we can now add additional functionality to our compilation process. Using a task runner such as Gulp is about automating menial tasks, so let's explore what we might achieve in more detail.