Table of Contents for
Mastering PostCSS for Web Design
 Mastering PostCSS for Web Design
Published by
Packt Publishing, 2016
Mastering PostCSS for Web Design
Published by
Packt Publishing, 2016
- Cover
- Table of Contents
- Mastering PostCSS for Web Design
- Mastering PostCSS for Web Design
- Credits
- About the Author
- About the Reviewer
- www.PacktPub.com
- Preface
- What you need for this book
- Who this book is for
- Conventions
- Reader feedback
- Customer support
- 1. Introducing PostCSS
- Introducing PostCSS
- Setting up a development environment
- Creating a simple example using PostCSS
- Linting code using plugins
- Exploring how PostCSS works
- Summary
- 2. Creating Variables and Mixins
- Creating a hover effect example
- Transitioning to using PostCSS
- Adding variable support to PostCSS
- Updating our hover effect demo
- Setting the order of plugins
- Creating mixins with PostCSS
- Looping content with PostCSS
- Summary
- 3. Nesting Rules
- Navigating through pages
- Transitioning to using PostCSS plugins
- Exploring the pitfalls of nesting
- Making the switch to BEM
- Exploring our changes in more detail
- Summary
- 4. Building Media Queries
- Exploring custom media queries in PostCSS
- Making images responsive
- Adding responsive text support
- Optimizing media queries
- Retrofitting support for older browsers
- Moving away from responsive design
- Taking things further with CSS4
- Summary
- 5. Managing Colors, Images, and Fonts
- Managing fonts with PostCSS
- Creating image sprites
- Working with SVG in PostCSS
- Adding support for WebP images
- Manipulating colors and color palettes
- Creating color functions with PostCSS
- Summary
- 6. Creating Grids
- Creating an example with Bourbon Neat
- Exploring the grid plugins in PostCSS
- Transitioning to using PostCSS-Neat
- Creating a site using Neat and PostCSS
- Adding responsive capabilities
- Summary
- 7. Animating Elements
- Moving away from jQuery
- Making use of pre-built libraries
- Switching to using SASS
- Making the switch to PostCSS
- Exploring plugin options within PostCSS
- Updating code to use PostCSS
- Creating a demo in PostCSS
- Optimizing our animations
- Using our own animation plugin
- Summary
- 8. Creating PostCSS Plugins
- Dissecting the architecture of a standard plugin
- Creating an transition plugin
- Building a custom font plugin
- Simplifying the development process
- Guidelines for plugin building
- Making the plugin available for use
- Summary
- 9. Working with Shortcuts, Fallbacks, and Packs
- Exploring plugin packs for PostCSS
- Adding shortcuts with Rucksack
- Linting and optimizing your code
- Providing fallback support
- Summary
- 10. Building a Custom Processor
- Exploring our processor
- Dissecting issues with our processor
- Optimizing the output
- Adding reload capabilities
- Extending our processor further
- Testing the final pre-processor
- Getting started with some hints and tips
- Introducing the CSStyle library
- Summary
- 11. Manipulating Custom Syntaxes
- Preparing our environment
- Implementing custom syntax plugins
- Parsing CSS
- Formatting the output with the API
- Highlighting our syntax code
- Summary
- 12. Mixing Preprocessors
- Exploring the conversion process
- Introducing the Pleeease library
- Compiling with other preprocessors
- Using the PreCSS library
- Converting a WordPress installation
- Setting up our environment
- Considering the conversion process
- Making changes to our code
- Compiling and testing the changes
- Summary
- 13. Troubleshooting PostCSS Issues
- Exploring some common issues
- Getting help from others
- Summary
- 14. Preparing for the Future
- Converting CSS4 styles for use
- Supporting future syntax with cssnext
- Creating plugins to provide extra CSS4 support
- Summary
- Index
At the heart of writing any custom syntax is the ability to parse content—it doesn't matter whether this is CSS, JavaScript, or something else; we clearly need to understand what we're working with, before we can make changes! At a basic level, these are the steps we must take to transform our CSS when working with PostCSS:

We begin with our source CSS (which comes with or without a source map), which we parse only once, but then put through any number of specified plugins (the example shows two, but we can easily use more). We then convert the output to a string using a stringifier; at this point, we can view the contents on screen or save them to disk.
Let's for a moment take a look at parsing some example code. For this next example, we will use a single CSS rule and parse it using the postcss-value-parser plugin (from https://github.com/TrySound/postcss-value-parser); the reason for this will become clear shortly:
- From the code download that accompanies this book, extract and save copies of the
gulpfile.jsandpackage.jsonfiles from theT60 – parsing color valuesfolder to the root of our project area; if you want to save any existing files from there, then please do so first. - Fire up a NodeJS command prompt session then change the working folder to the root of our project area.
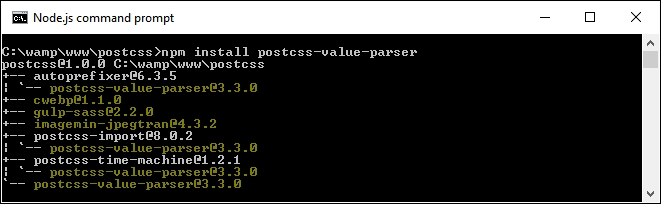
- We need to install the
postcss-value-parserplugin, so at the prompt, enter this command and press Enter:npm install postcss-value-parser --save-devNPM will now install the plugin; keep the session open when it has finished:
- At the prompt, type
gulpthen press Enter; gulp will now go away and display the contents, which will look something like this: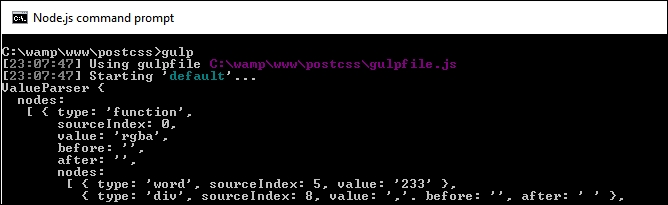
Yikes! What does that all mean? Don't worry, it looks worse than it really is; this is an example of an AST, which we discussed earlier in this chapter. This gives us in-depth information on the contents of our CSS, such as the values, types of values, and where they appear in the tree.
The great thing, though, is that once we have all of this content, then we are free to query and manipulate the content at will. Once we have manipulated the content, we then need to convert it to string format, so it can be displayed on screen in a more intelligent format, or saved to disk.
For this demo, we used the postcss-value-parser plugin to create our AST; we can also try using the postcss-safe-
parser plugin (from https://github.com/postcss/postcss-safe-parser), or the postcss-selector-parser plugin (from https://github.com/postcss/postcss-selector-parser), to achieve similar effects.
And the reason why we only used one line of CSS code in our demo? Well, parsing CSS code can get very complex. The example shown in our demo is relatively straightforward; just imagine what it will be like with 2,000+ lines of code!
Let's develop this theme further, and use it to replace some example RGBA values with equivalent HEX-based colors. We can easily do this through the use of the postc
ss-unrgba plugin (from https://github.com/jonathantneal/postcss-unrgba), but it weighs in at almost 60 lines; our Gulp file is 43 lines, and a lot of that is comments!
Our next example is a relatively straightforward search and replace; it is a perfect example of how it isn't always necessary to use plugins, and that we can parse our code directly to achieve the same effect. Let's make a start:
- We'll start by extracting a copy of the
T61 – changing colorsfolder from the downloaded code that accompanies this book; save the folder to the root of our project area. - Copy the
gulpfile.jsandpackage.jsonfiles from theT61 – changing colorsfolder to the root of our project area. - Copy the
srcfolder from theT61 – changing colorsfolder to the root of our project area. - Next, fire up a NodeJS command prompt session then change the working folder to the root of our project area.
- We now need to install an additional plugin,
color-convert(available from https://github.com/qix-/color-convert), which we will use to change the color once we've sucked out the details from within the AST. For this, go ahead and fire up a NodeJS command prompt, then change the working folder to the root of our project area. - At the prompt, enter
npm install color-convert --save-devand press Enter. - When the plugin has finished installing, go ahead and enter
gulp, then press Enter. If all is well, we should see the, by now, familiar transformed style sheet appear in our destination folder: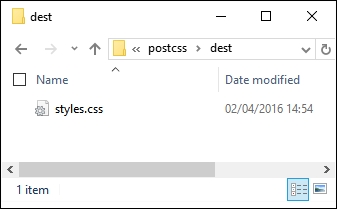
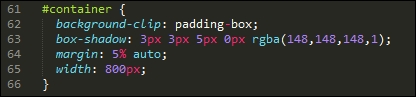
At this point, our style sheet has been transformed. If we preview the results in a text editor, we can confirm that HEX-equivalent values have indeed replaced the original RGBA colors, as shown in the following screenshot:
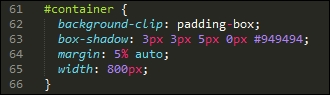
Not convinced? Take a look at the same rule within the source file; here it shows the original RGBA value:
See how easy that was? There is one thing note; if we take a look at the Gulp file, it might at first glance look like we still have a few plugins in use. The key here is that three of these are part of Node (fs, path, and util), so we haven't had to install any new ones, over and above the value-parser and color-convert examples.
It's worth taking the time to consider this code in more detail. This contains some useful techniques that will help get you started on the road to creating custom syntaxes, starting with retrieving the values we need.
We begin with reading the contents of our style sheet file, before parsing it through the postcss-value-parser plugin. We walk through each node within the AST, ignoring any that contain a node.type of function or a node.value of rgba. For any that remain, we collect any that have a node type of word, before mapping them into a single array value which we convert to a number.
This is then transformed from a function node to a word node, before we finally convert the value from an RGBA to HEX color. The contents are converted to a string, and saved to disk in the destination folder, with the same file name.
Okay, let's move on: the key basis for working with custom syntaxes is to understand the content we need to work with; crack this and you are part of the way to transforming your styles into valid CSS. To help with the process, though, we will need to convert our content to a format that can be saved to disk. It's time to take a look at how, using the PostCSS API.