Table of Contents for
Mastering PostCSS for Web Design
 Mastering PostCSS for Web Design
Published by
Packt Publishing, 2016
Mastering PostCSS for Web Design
Published by
Packt Publishing, 2016
- Cover
- Table of Contents
- Mastering PostCSS for Web Design
- Mastering PostCSS for Web Design
- Credits
- About the Author
- About the Reviewer
- www.PacktPub.com
- Preface
- What you need for this book
- Who this book is for
- Conventions
- Reader feedback
- Customer support
- 1. Introducing PostCSS
- Introducing PostCSS
- Setting up a development environment
- Creating a simple example using PostCSS
- Linting code using plugins
- Exploring how PostCSS works
- Summary
- 2. Creating Variables and Mixins
- Creating a hover effect example
- Transitioning to using PostCSS
- Adding variable support to PostCSS
- Updating our hover effect demo
- Setting the order of plugins
- Creating mixins with PostCSS
- Looping content with PostCSS
- Summary
- 3. Nesting Rules
- Navigating through pages
- Transitioning to using PostCSS plugins
- Exploring the pitfalls of nesting
- Making the switch to BEM
- Exploring our changes in more detail
- Summary
- 4. Building Media Queries
- Exploring custom media queries in PostCSS
- Making images responsive
- Adding responsive text support
- Optimizing media queries
- Retrofitting support for older browsers
- Moving away from responsive design
- Taking things further with CSS4
- Summary
- 5. Managing Colors, Images, and Fonts
- Managing fonts with PostCSS
- Creating image sprites
- Working with SVG in PostCSS
- Adding support for WebP images
- Manipulating colors and color palettes
- Creating color functions with PostCSS
- Summary
- 6. Creating Grids
- Creating an example with Bourbon Neat
- Exploring the grid plugins in PostCSS
- Transitioning to using PostCSS-Neat
- Creating a site using Neat and PostCSS
- Adding responsive capabilities
- Summary
- 7. Animating Elements
- Moving away from jQuery
- Making use of pre-built libraries
- Switching to using SASS
- Making the switch to PostCSS
- Exploring plugin options within PostCSS
- Updating code to use PostCSS
- Creating a demo in PostCSS
- Optimizing our animations
- Using our own animation plugin
- Summary
- 8. Creating PostCSS Plugins
- Dissecting the architecture of a standard plugin
- Creating an transition plugin
- Building a custom font plugin
- Simplifying the development process
- Guidelines for plugin building
- Making the plugin available for use
- Summary
- 9. Working with Shortcuts, Fallbacks, and Packs
- Exploring plugin packs for PostCSS
- Adding shortcuts with Rucksack
- Linting and optimizing your code
- Providing fallback support
- Summary
- 10. Building a Custom Processor
- Exploring our processor
- Dissecting issues with our processor
- Optimizing the output
- Adding reload capabilities
- Extending our processor further
- Testing the final pre-processor
- Getting started with some hints and tips
- Introducing the CSStyle library
- Summary
- 11. Manipulating Custom Syntaxes
- Preparing our environment
- Implementing custom syntax plugins
- Parsing CSS
- Formatting the output with the API
- Highlighting our syntax code
- Summary
- 12. Mixing Preprocessors
- Exploring the conversion process
- Introducing the Pleeease library
- Compiling with other preprocessors
- Using the PreCSS library
- Converting a WordPress installation
- Setting up our environment
- Considering the conversion process
- Making changes to our code
- Compiling and testing the changes
- Summary
- 13. Troubleshooting PostCSS Issues
- Exploring some common issues
- Getting help from others
- Summary
- 14. Preparing for the Future
- Converting CSS4 styles for use
- Supporting future syntax with cssnext
- Creating plugins to provide extra CSS4 support
- Summary
- Index
It goes without saying that linting code should be part of any developer's workflow. There are lots of different ways to achieve this, depending on the tools you use. The beauty of PostCSS is that we can easily add a suitable linting capability to our processor, using the stylelint plugin for PostCSS (available from http://stylelint.io/).
Why would we do this? Easy: we can get a single consistent result throughout. This becomes essential if you work as part of a team; instead as different team members using inconsistent settings, we can set up a central point for processing, to retain a consistent output. Moving the linting process to our central workflow means the server can do the grunt work for us, and provide a consistent result anytime for anyone running the process.
With this in mind, let's take a look at how we can set up our linting capability:
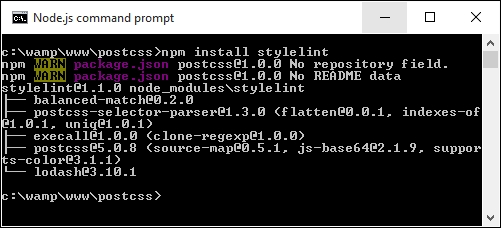
- We start as always by installing our plugin. For this, fire up a Node.js command prompt, then change to the root of our project area.
- At the command prompt, enter this command, followed by Enter:
npm install stylelintIf all is well, we should see this appear at the prompt:
- Next up, we need to install a second plugin—there is a reporter function within
stylelintthat posts any messages to console (or in this case, screen). The plugin ispostcss-reporter, and is available at https://github.com/postcss/postcss-reporter. We can install it thus:
- With the plugins installed, we need to update our
gulpfile; add the following lines immediately below the lastvarline shown:var cssnano = require('cssnano'); var stylelint = require('stylelint'); var reporter = require('postcss-reporter'); - Immediately, below the rename task in the Gulp file, add this task—this takes care of linting our code, and flagging any errors on-screen:
gulp.task("lint-styles", function() { return gulp.src("src/*.css") .pipe(postcss([ stylelint({ "rules": { "color-no-invalid-hex": 2, "declaration-colon-space-before": [2, "never"], "indentation": [2, 2], "number-leading-zero": [2, "always"] } }), reporter({ clearMessages: true, }) ])) }); - Open a copy of
example.cssfrom the root area of our project folder and change thecolorto#fff1az. - Back in the Node.js command prompt, enter this command and press Enter:
gulp - Gulp will begin to process our code; if all is well, it should flag a warning:
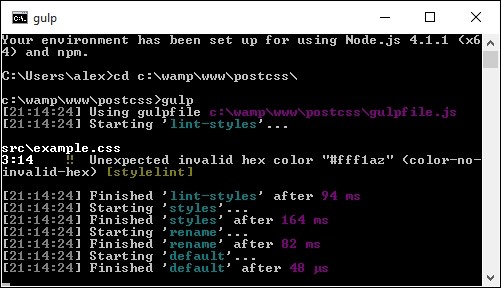
It shouldn't take much effort to spot that #fff1az is clearly not a valid number! Stylelint has correctly identified it, using the highlighted rule from our configuration:
    .pipe(postcss([ stylelint({
        "rules": {
          "color-no-invalid-hex": true,
          …
        }
      }),
Let's explore how this plugin works for a moment—the great thing about it is that there are simply dozens of rules available (which you can see at https://cdn.rawgit.com/stylelint/stylelint/1.0.0/docs/rules.md). It works by concatenating together what is being checked (in this case, color) and the check being run against it (in our case, -no-invalid-hex, or checking for invalid hex numbers). We can apply any number of rules in our configuration object, to ensure that the output is consistent for all projects.
Tip
If you would like to get a feel for how the rules can be put together, then check out the user guide at https://cdn.rawgit.com/stylelint/stylelint/1.0.0/docs/user-guide.md, with more examples of rules available at https://cdn.rawgit.com/stylelint/stylelint/1.0.0/docs/rules.md.
Okay, let's move on: we will begin to look at compiling code in more detail from the next chapter, but for now, let's take a look at how PostCSS works in more detail, and how we can begin to make the move from our existing processor to PostCSS.