Table of Contents for
Mastering PostCSS for Web Design
 Mastering PostCSS for Web Design
Published by
Packt Publishing, 2016
Mastering PostCSS for Web Design
Published by
Packt Publishing, 2016
- Cover
- Table of Contents
- Mastering PostCSS for Web Design
- Mastering PostCSS for Web Design
- Credits
- About the Author
- About the Reviewer
- www.PacktPub.com
- Preface
- What you need for this book
- Who this book is for
- Conventions
- Reader feedback
- Customer support
- 1. Introducing PostCSS
- Introducing PostCSS
- Setting up a development environment
- Creating a simple example using PostCSS
- Linting code using plugins
- Exploring how PostCSS works
- Summary
- 2. Creating Variables and Mixins
- Creating a hover effect example
- Transitioning to using PostCSS
- Adding variable support to PostCSS
- Updating our hover effect demo
- Setting the order of plugins
- Creating mixins with PostCSS
- Looping content with PostCSS
- Summary
- 3. Nesting Rules
- Navigating through pages
- Transitioning to using PostCSS plugins
- Exploring the pitfalls of nesting
- Making the switch to BEM
- Exploring our changes in more detail
- Summary
- 4. Building Media Queries
- Exploring custom media queries in PostCSS
- Making images responsive
- Adding responsive text support
- Optimizing media queries
- Retrofitting support for older browsers
- Moving away from responsive design
- Taking things further with CSS4
- Summary
- 5. Managing Colors, Images, and Fonts
- Managing fonts with PostCSS
- Creating image sprites
- Working with SVG in PostCSS
- Adding support for WebP images
- Manipulating colors and color palettes
- Creating color functions with PostCSS
- Summary
- 6. Creating Grids
- Creating an example with Bourbon Neat
- Exploring the grid plugins in PostCSS
- Transitioning to using PostCSS-Neat
- Creating a site using Neat and PostCSS
- Adding responsive capabilities
- Summary
- 7. Animating Elements
- Moving away from jQuery
- Making use of pre-built libraries
- Switching to using SASS
- Making the switch to PostCSS
- Exploring plugin options within PostCSS
- Updating code to use PostCSS
- Creating a demo in PostCSS
- Optimizing our animations
- Using our own animation plugin
- Summary
- 8. Creating PostCSS Plugins
- Dissecting the architecture of a standard plugin
- Creating an transition plugin
- Building a custom font plugin
- Simplifying the development process
- Guidelines for plugin building
- Making the plugin available for use
- Summary
- 9. Working with Shortcuts, Fallbacks, and Packs
- Exploring plugin packs for PostCSS
- Adding shortcuts with Rucksack
- Linting and optimizing your code
- Providing fallback support
- Summary
- 10. Building a Custom Processor
- Exploring our processor
- Dissecting issues with our processor
- Optimizing the output
- Adding reload capabilities
- Extending our processor further
- Testing the final pre-processor
- Getting started with some hints and tips
- Introducing the CSStyle library
- Summary
- 11. Manipulating Custom Syntaxes
- Preparing our environment
- Implementing custom syntax plugins
- Parsing CSS
- Formatting the output with the API
- Highlighting our syntax code
- Summary
- 12. Mixing Preprocessors
- Exploring the conversion process
- Introducing the Pleeease library
- Compiling with other preprocessors
- Using the PreCSS library
- Converting a WordPress installation
- Setting up our environment
- Considering the conversion process
- Making changes to our code
- Compiling and testing the changes
- Summary
- 13. Troubleshooting PostCSS Issues
- Exploring some common issues
- Getting help from others
- Summary
- 14. Preparing for the Future
- Converting CSS4 styles for use
- Supporting future syntax with cssnext
- Creating plugins to provide extra CSS4 support
- Summary
- Index
For our next demo, we're not going to build something original, but start with adapting an existing plugin that is already available for PostCSS. The plugin we will use is postcss-fontpath by Seane King (available from https://github.com/seaneking/postcss-fontpath); we're going to incorporate an autocomplete facility that automatically adds the relevant font stack, based on the name provided, and using the lists available at http://www.cssfontstack.com/.
"Why do this", I hear you ask? To prove a point—it isn't always necessary to re-invent the wheel; sometimes it is preferable to simply adapt something that exists, which doesn't quite fit our requirements. In this instance, the code we're adding will make it more useful; it will need some further development to allow for error-checking, but nonetheless still serves a purpose.
Okay, that aside, let's get stuck in and start developing our plugin:
- We'll start by creating a folder within the root of our project area—go ahead and name this folder
postcss-custom-fonts. - Next, we need to set up the folder as a Node module, so fire up a Node.js command prompt and change the working folder to our plugin folder.
At the prompt, enter
npm initto start the process of creating apackage.jsonfile—use the details shown in this screenshot, at the appropriate prompt:
- With the prompt still open, go ahead and enter these commands, then press Enter—the first one is needed to install PostCSS as a dependency for our plugin, with the second installing
underscore.js, as a second dependency (it's used for the extend method):npm install postcss --save npm install underscore --save
Keep the session open—we will need it towards the end of this exercise.
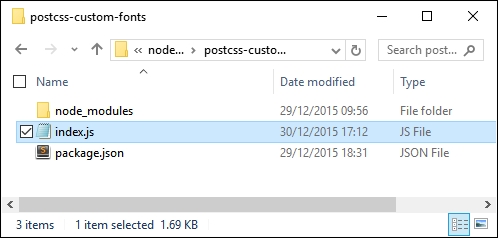
- From the code download that accompanies this book, we need to extract a copy of
index.js—copy this to the plugin folder. - If all is well, we should see something akin to this screenshot when browsing the contents of our plugin folder:
- With our plugin in place, let's test it out. For this, we need a couple of files from the code download that accompanies this book. Go ahead and extract copies of
gulpfile.jsandpackage.jsonfrom theT42 – Building a custom fontplugin folder (and not the plugin one!), then save them to the root of our project area. - In a new file, add the following CSS styles, saving it as
style.cssin thesrcfolder in our project area:@font-face { font-family: 'robotoregular'; font-path: '/fonts/Roboto-Regular-webfont'; font-weight: normal; font-style: normal; } h1 { font-family: robotoregular, fontstack("Extra Stack"); } - Revert back to the Node.js command prompt session we had open at the start of this exercise. Make sure the working folder is set to our project area before continuing.
- At the prompt, enter
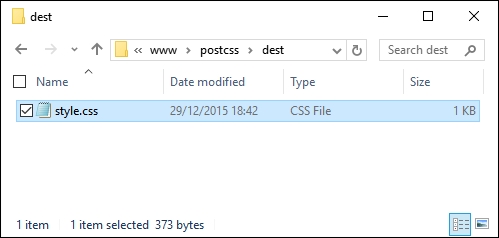
gulpthen press Enter—PostCSS will go away and compile the source style sheet. If all is well, we should see the compiled results of our style sheet in thedestfolder of our project area:
At this stage, we now have a working plugin—even though this is not an original creation, it still highlights a number of key concepts around construction of PostCSS plugins. Let's take a moment to explore the functionality of our plugin in more detail.
At first glance, the code for our plugin may look complex, but in reality it is relatively straightforward to follow—let's go through it in sections, beginning with defining instances of the postcss object and a fontstacks_config object we will use in the plugin:
var postcss = require('postcss');
var _ = require('underscore');

// Font stacks from http://www.cssfontstack.com/
var fontstacks_config = {
  'Arial': 'Arial, "Helvetica Neue", Helvetica, sans-serif',
  'Times New Roman': 'TimesNewRoman, "Times New Roman", Times,
  Baskerville, Georgia, serif'
}
Next up, we add a simple helper function—this is used to convert font names into title case; the names listed in fontstacks_config are case sensitive, and will fail if they don't match:
// Credit for this function: http://stackoverflow.com/a/196991
function toTitleCase(str) {
  return str.replace(/\w\S*/g, function(txt){
    return txt.charAt(0).toUpperCase() + txt.substr(1).toLowerCase();
  });
}
This is the start of the plugin—the first two lines are the obligatory initialization to make the plugin available for use, followed by defining an options object. We then use _.extend to extend the predefined values in our chosen font stack with those added to the configuration object when running the plugin:
module.exports = postcss.plugin('customfonts', function (options) {
  return function (css) {

    options = options || {};
    fontstacks_config = _.extend(fontstacks_config, options.fontstacks);
We then walk through each rule and node, working out if they first contain a font declaration, then if they contain a font name that matches one in the predefined font stacks. If there is a match, then the font name is converted to the appropriate font stack and inserted with any additional fonts specified, but which don't match our font stacks:
    css.walkRules(function (rule) {
      rule.walkDecls(function (decl, i) {
        var value = decl.value;
        if (value.indexOf( 'fontstack(' ) !== -1) {
          var fontstack_requested = value.match(/\(([^)]+)\)/)[1].replace(/["']/g, "");
          fontstack_requested = toTitleCase(fontstack_requested);

          var fontstack = fontstacks_config[fontstack_requested];
          var first_font =  value.substr(0, value.indexOf('fontstack('));

          var new_value = first_font + fontstack;
          decl.value = first_font + fontstack;
        }
      });
    });
In the second half of the plugin, we perform a simpler task—we work our way through each rule and declaration, looking for any instances of @font-face in the code. We then define a fontpath variable that removes any quotes from the supplied values, and a format array to manage the different font formats available for use:
    css.walkAtRules('font-face', function(rule) {
      rule.walkDecls('font-path', function(decl) {
        var fontPath = decl.value.replace(/'/g, ''),
        src = '',
        formats = [
          { type: 'woff', ext: '.woff' },
          { type: 'truetype', ext: '.ttf' },
          { type: 'svg', ext: '.svg' }
        ];
We then build up the relevant statement for each font type, before assembling the custom font declaration and inserting it back into the appropriate point in our style sheet:
        formats.forEach(function(format, index, array) {
          if (index === array.length - 1){
            src += 'url("' + fontPath + format.ext + '")
        format(\'' + format.type + '\')';
          } else {
            src += 'url("' + fontPath + format.ext + '")
        format(\'' + format.type + '\'),\n ';
          }
        });

        decl.cloneBefore({ prop: 'src', value: src });
        decl.remove();
      });
    });
  }
});
Our plugin has exposed some key concepts in PostCSS plugin design—the main ones are the use of .WalkDecls and .WalkRu
les (or .WalkAtRules). I would strongly recommend familiarizing yourself with the API documentation at https://github.com/postcss/postcss/blob/master/docs/api.md, which outlines all of the commands available within the API, and gives a brief description of their purpose.
Despite creating what should be a useful plugin, it isn't one that I would recommend releasing into the wild. At this point you may think I have completely lost the plot, but as I always say, "there's method in the madness"—there are good reasons for not publishing this plugin, so let's take a moment to explore why it might not be a sensible move to release this plugin in its current format.
Over the last few pages, we've created what should be a useful plugin to manipulate custom fonts—it automatically builds up the right font stack based on pre-defined settings, and will fill in the appropriate @font-face code for us. At this point we should have a plugin that can be released into the wild, for anyone to use…surely?
Well yes, and no—even though this plugin serves a purpose, it is not one that I would recommend making available…at least not yet! There are a few reasons why, which also help to illustrate the benefits of using the boilerplate code we covered earlier in this chapter:
- The plugin doesn't have a
test.jsfile or configuration associated with it—one of the requirements for releasing plugins is that each be tested, using atest.jsfile. Ideally we might use a service such as Travis CI to help with this, but this really only works if you use a Unix-based environment for development. - The plugin itself performs two different roles, which is not recommended—best practice for PostCSS plugins is to try where possible to limit the role to one task only. The benefits of this can be seen when using a task runner—we can pick and choose which plugins to use, without introducing too much extra unwanted functionality.
- The architecture of our code is not optimal—this is primarily due to the use of
css.WalkRules(line 16), andcss.WalkAtRules(line 28). These two commands parse each node within the container, and call the callback function for each rule node and at-rule node. The difference here is thatcss.WalkRulesworks on every rule;css.WalkAtRuleswill only work on@-rules (such as@font-face). They are not interchangeable, which makes it very inefficient at compilation. - If we don't use the plugin boilerplate, then most of the files required for publishing code will not be present—these either have to be created by hand, or created as part of submitting to GitHub. If we use the boilerplate, then this will be done for us automatically, along with configuring the
package.jsonfile for us—all we need to do is add a suitable task runner such as Gulp or Grunt.
One might ask why we would even consider this route, if it is likely to throw up issues during development—the simple answer is that it helps us understand something of how plugins should be built. If we're building a plugin for personal use only, then there is no need for some of the files or processes that we have to use when releasing plugins for general use.