Table of Contents for
Mastering PostCSS for Web Design
 Mastering PostCSS for Web Design
Published by
Packt Publishing, 2016
Mastering PostCSS for Web Design
Published by
Packt Publishing, 2016
- Cover
- Table of Contents
- Mastering PostCSS for Web Design
- Mastering PostCSS for Web Design
- Credits
- About the Author
- About the Reviewer
- www.PacktPub.com
- Preface
- What you need for this book
- Who this book is for
- Conventions
- Reader feedback
- Customer support
- 1. Introducing PostCSS
- Introducing PostCSS
- Setting up a development environment
- Creating a simple example using PostCSS
- Linting code using plugins
- Exploring how PostCSS works
- Summary
- 2. Creating Variables and Mixins
- Creating a hover effect example
- Transitioning to using PostCSS
- Adding variable support to PostCSS
- Updating our hover effect demo
- Setting the order of plugins
- Creating mixins with PostCSS
- Looping content with PostCSS
- Summary
- 3. Nesting Rules
- Navigating through pages
- Transitioning to using PostCSS plugins
- Exploring the pitfalls of nesting
- Making the switch to BEM
- Exploring our changes in more detail
- Summary
- 4. Building Media Queries
- Exploring custom media queries in PostCSS
- Making images responsive
- Adding responsive text support
- Optimizing media queries
- Retrofitting support for older browsers
- Moving away from responsive design
- Taking things further with CSS4
- Summary
- 5. Managing Colors, Images, and Fonts
- Managing fonts with PostCSS
- Creating image sprites
- Working with SVG in PostCSS
- Adding support for WebP images
- Manipulating colors and color palettes
- Creating color functions with PostCSS
- Summary
- 6. Creating Grids
- Creating an example with Bourbon Neat
- Exploring the grid plugins in PostCSS
- Transitioning to using PostCSS-Neat
- Creating a site using Neat and PostCSS
- Adding responsive capabilities
- Summary
- 7. Animating Elements
- Moving away from jQuery
- Making use of pre-built libraries
- Switching to using SASS
- Making the switch to PostCSS
- Exploring plugin options within PostCSS
- Updating code to use PostCSS
- Creating a demo in PostCSS
- Optimizing our animations
- Using our own animation plugin
- Summary
- 8. Creating PostCSS Plugins
- Dissecting the architecture of a standard plugin
- Creating an transition plugin
- Building a custom font plugin
- Simplifying the development process
- Guidelines for plugin building
- Making the plugin available for use
- Summary
- 9. Working with Shortcuts, Fallbacks, and Packs
- Exploring plugin packs for PostCSS
- Adding shortcuts with Rucksack
- Linting and optimizing your code
- Providing fallback support
- Summary
- 10. Building a Custom Processor
- Exploring our processor
- Dissecting issues with our processor
- Optimizing the output
- Adding reload capabilities
- Extending our processor further
- Testing the final pre-processor
- Getting started with some hints and tips
- Introducing the CSStyle library
- Summary
- 11. Manipulating Custom Syntaxes
- Preparing our environment
- Implementing custom syntax plugins
- Parsing CSS
- Formatting the output with the API
- Highlighting our syntax code
- Summary
- 12. Mixing Preprocessors
- Exploring the conversion process
- Introducing the Pleeease library
- Compiling with other preprocessors
- Using the PreCSS library
- Converting a WordPress installation
- Setting up our environment
- Considering the conversion process
- Making changes to our code
- Compiling and testing the changes
- Summary
- 13. Troubleshooting PostCSS Issues
- Exploring some common issues
- Getting help from others
- Summary
- 14. Preparing for the Future
- Converting CSS4 styles for use
- Supporting future syntax with cssnext
- Creating plugins to provide extra CSS4 support
- Summary
- Index
The first step on our journey is to get PostCSS installed—this runs from Node.js; we can use any one of several task runner plugins to install it. For the purpose of the exercises throughout this book, we will use Gulp; if you prefer, alternatives such as Grunt or Broccoli can be used.
Let's make a start with installing Node and Gulp:
- We first need to install Node.js; this is available at http://nodejs.org. Make sure you select the right version that is appropriate for your platform:
When installing, accept all defaults; this will be sufficient for the exercises throughout this book.
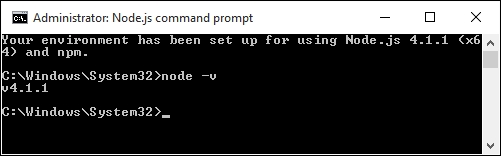
- Next, bring up a Node.js command prompt, enter the following command, and press Enter:
node –vThe output shown is the version of Node that is installed; this is a quick check to ensure Node.js has indeed been installed correctly:
- Now that Node is installed, we need to create a
package.jsonfile to store our dependencies for projects. Run this command at the command prompt, and press Enter:npm init - Node will prompt for information when creating the
package.jsonfile; enter the details as shown in the screenshot, or press Enter to accept the given default (shown in brackets, after each question):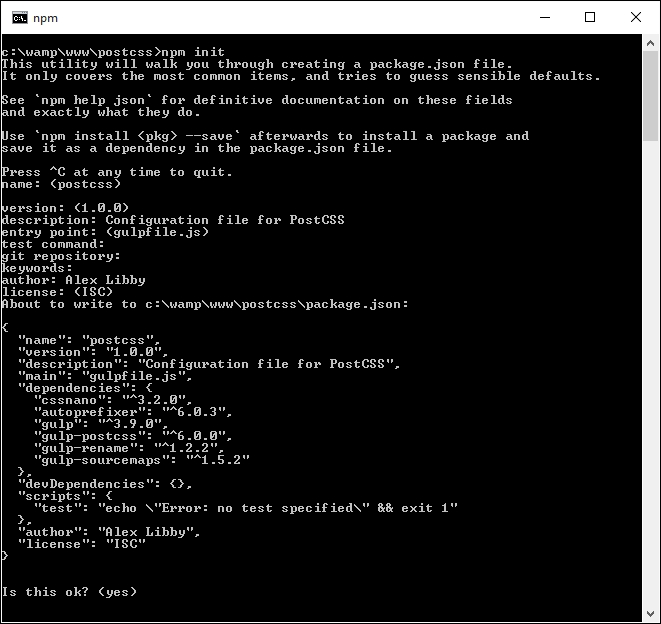
We now have Node configured and an empty package.json file in place, so let's add our dependencies. We will start by adding Gulp first:
- Revert back to the Node.js command prompt (or bring up a new one if you closed off the previous session).
- Go ahead and change the working directory to
c:\wamp\www\postcss. - At the command prompt, enter the following command, then press Enter. This installs Gulp globally and makes it available for use:
npm install --global gulp - Once done, we need to install Gulp for use in our project area—go ahead and run this command, which will add an entry to the
package.jsonfile we created earlier in step 3 and step 4:npm install --save-dev gulp
Once completed, Gulp is now ready for use; we can go ahead and install PostCSS.
We're at the interesting stage now—installing PostCSS. PostCSS is available from https://github.com/postcss/postcss, and can be installed into Node using a Gulp plugin. Let's do that now:
- We'll start by reverting back to the Node.js command prompt session we've just used (or a new one, if the previous one is closed).
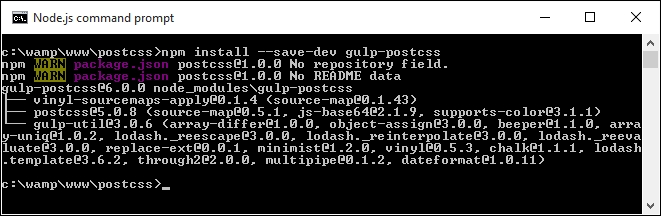
- At the prompt, go ahead and enter this command, then press Enter:
npm install --save-dev gulp-postcssIf all is well, we should see something akin to this screenshot:
On its own, PostCSS doesn't do anything; to make it more useful, we are going to install three plugins. We will explore using plugins in greater detail later in the book, but for now, don't worry too much about what is happening:
- Enter these commands one by one on the Node.js command prompt, pressing Enter after each one:
npm install --save-dev autoprefixer - Let's check our
package.jsonfile; if all is well, we should see something akin to this screenshot: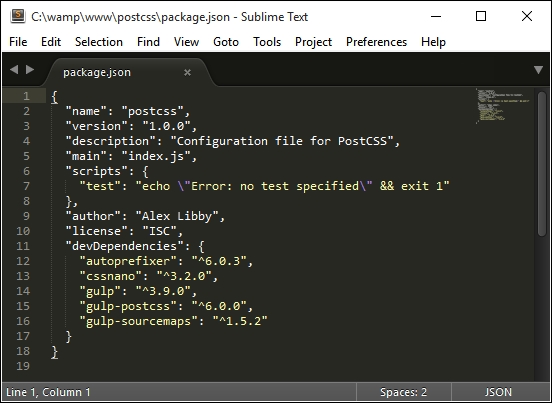
Tip
To make it easier to view JSON files in Sublime Text, try installing and activating a custom theme, such as MonokaiJSON Plus, available to install from https://github.com/ColibriApps/MonokaiJsonPlus.
PostCSS is now installed for use, but if we try to use it, we probably won't get very far, as it needs to be configured for use! Let's take a look at doing that now, by creating a simple example that will add vendor prefixes to some sample CSS rules, and automatically minify the results.