Table of Contents for
Mastering PostCSS for Web Design
 Mastering PostCSS for Web Design
Published by
Packt Publishing, 2016
Mastering PostCSS for Web Design
Published by
Packt Publishing, 2016
- Cover
- Table of Contents
- Mastering PostCSS for Web Design
- Mastering PostCSS for Web Design
- Credits
- About the Author
- About the Reviewer
- www.PacktPub.com
- Preface
- What you need for this book
- Who this book is for
- Conventions
- Reader feedback
- Customer support
- 1. Introducing PostCSS
- Introducing PostCSS
- Setting up a development environment
- Creating a simple example using PostCSS
- Linting code using plugins
- Exploring how PostCSS works
- Summary
- 2. Creating Variables and Mixins
- Creating a hover effect example
- Transitioning to using PostCSS
- Adding variable support to PostCSS
- Updating our hover effect demo
- Setting the order of plugins
- Creating mixins with PostCSS
- Looping content with PostCSS
- Summary
- 3. Nesting Rules
- Navigating through pages
- Transitioning to using PostCSS plugins
- Exploring the pitfalls of nesting
- Making the switch to BEM
- Exploring our changes in more detail
- Summary
- 4. Building Media Queries
- Exploring custom media queries in PostCSS
- Making images responsive
- Adding responsive text support
- Optimizing media queries
- Retrofitting support for older browsers
- Moving away from responsive design
- Taking things further with CSS4
- Summary
- 5. Managing Colors, Images, and Fonts
- Managing fonts with PostCSS
- Creating image sprites
- Working with SVG in PostCSS
- Adding support for WebP images
- Manipulating colors and color palettes
- Creating color functions with PostCSS
- Summary
- 6. Creating Grids
- Creating an example with Bourbon Neat
- Exploring the grid plugins in PostCSS
- Transitioning to using PostCSS-Neat
- Creating a site using Neat and PostCSS
- Adding responsive capabilities
- Summary
- 7. Animating Elements
- Moving away from jQuery
- Making use of pre-built libraries
- Switching to using SASS
- Making the switch to PostCSS
- Exploring plugin options within PostCSS
- Updating code to use PostCSS
- Creating a demo in PostCSS
- Optimizing our animations
- Using our own animation plugin
- Summary
- 8. Creating PostCSS Plugins
- Dissecting the architecture of a standard plugin
- Creating an transition plugin
- Building a custom font plugin
- Simplifying the development process
- Guidelines for plugin building
- Making the plugin available for use
- Summary
- 9. Working with Shortcuts, Fallbacks, and Packs
- Exploring plugin packs for PostCSS
- Adding shortcuts with Rucksack
- Linting and optimizing your code
- Providing fallback support
- Summary
- 10. Building a Custom Processor
- Exploring our processor
- Dissecting issues with our processor
- Optimizing the output
- Adding reload capabilities
- Extending our processor further
- Testing the final pre-processor
- Getting started with some hints and tips
- Introducing the CSStyle library
- Summary
- 11. Manipulating Custom Syntaxes
- Preparing our environment
- Implementing custom syntax plugins
- Parsing CSS
- Formatting the output with the API
- Highlighting our syntax code
- Summary
- 12. Mixing Preprocessors
- Exploring the conversion process
- Introducing the Pleeease library
- Compiling with other preprocessors
- Using the PreCSS library
- Converting a WordPress installation
- Setting up our environment
- Considering the conversion process
- Making changes to our code
- Compiling and testing the changes
- Summary
- 13. Troubleshooting PostCSS Issues
- Exploring some common issues
- Getting help from others
- Summary
- 14. Preparing for the Future
- Converting CSS4 styles for use
- Supporting future syntax with cssnext
- Creating plugins to provide extra CSS4 support
- Summary
- Index
The rapidly increasing use of mobile devices makes creating responsive content a must; the traditional route is using something akin to max-width: 100% to control the size of an element on screen.
A better alternative is to use SVG—this maintains quality, even when resized; standard image formats will become pixelated if resized to an excessive size. For those of you who have previously used SASS, then there isn't any in-built support for SVG as such; the most we can hope to achieve is efficient nesting within our style sheet.
An example of what we might use can be found in the sass folder within the Tutorial22 folder in the code download that accompanies this book.
If we're a regular user of SVG images within SASS, then it is likely we would use a library such as sass-svg, from https://github.com/davidkpiano/sass-svg. Moving away from SASS to PostCSS is easy; the PostCSS ecosystem has a number of plugins we can use to manipulate images. Let's take a look at how, using the postcss-svg plugin.
We'll use the
postcss-svg plugin (from https://github.com/Pavliko/postcss-svg), to manipulate some icons from the Evil Icon package (available from https://github.com/outpunk/gulp-evil-icons), as part of the next demo:
- We'll begin by extracting a copy of the
Tutorial22folder from the code download that accompanies this book. Save it to the root of our project area. - From within the
Tutorial22folder, extract copies of thegulpfile.jsandpackage.jsonfiles, and use them to replace any that are currently stored at the root of our project area. - Go ahead and extract a copy of
style – pre-compile.cssfrom the same folder; save this asstyle.csswithin thesrcfolder. Do the same for theindex.htmlfile as well. - In a break to previous demos, we need an additional
cssfolder—go ahead and create one within thedestfolder. - Next, fire up a Node.js command prompt, and change the working folder to that of our project area.
- We need to install the
postcss-svgplugin, so at the command prompt, enter this command, then press Enter:npm install postcss-svg --save-dev - Once completed, enter
gulpat the command prompt, then press Enter. - If all is well, we should see the usual two style sheets appear in the
/dest/cssfolder, along with a sourcemapfolder. The HTML markup file will appear in thedestfolder.If you don't see the source map or minified versions appear, then rerun
gulp—sometimes these files will only appear if a compiledstyle.cssfile is present. - Copy the contents of the
destfolder to thecssfolder within theTutorial22folder—if all is well, we should see these icons appear when previewing the results in a browser:
Although this is a simple demo, we've covered some useful tips and tricks within; it's worth taking some time to explore how the demo was put together in more detail.
There are several key elements to this exercise that are worthy of attention, the use of a CDN link and Node to provide the style sheet and icons for Evil Icons, the compiled HTML file and the references to use within our custom style sheet. We will cover all of these, but first let's explore the gulp file in more detail.
We begin with these two lines:
var evilIcons = require("gulp-evil-icons");
var postcssSVG = require('postcss-svg')
You should not be surprised to see the latter, but the former is present as the Evil Icons library can be installed using the gulp-evil-icons package. There are a number of different options available for installing, but as we're already using Gulp, it makes sense to continue using the task runner.
Next, we spread our work over two tasks—the first compiles the HTML code to assign the relevant icon image to our <icon> statements within our markup:
gulp.task('icons', function () {
  return gulp.src('src/index.html')
.pipe(evilIcons())
    .pipe(gulp.dest('dest/'));
});
To change the colors requires the use of the postcss-svg plugin, here referenced by postcssSVG:
gulp.task('changecolor', ['icons'], function() {
  gulp.src('src/style.css')
  .pipe(postcss([ postcssSVG() ]))
    .pipe(gulp.dest('dest/'));
});
We of course had to update our default task, if we simply call gulp at the command line, then it will know to run all of these tasks in turn:
gulp.task('default', ['icons', 'changecolor', 'lint-styles' , 'rename', 'sourcemap' ]);The last step also applies a similar update to our watch facility:
var watcher = gulp.watch('src/*.*', ['default', 'icons', 'changecolor', 'lint-styles', 'rename', 'sourcemap']);If we then take a look within the HTML markup, we can see a link to the Evil Icons library that was installed using Node.js:
<link rel="stylesheet" href="../node_modules/gulp-evil-icons/node_modules/evil-icons/assets/evil-icons.css">
We then put our customizations into a separate style sheet:
<link rel="stylesheet" type="text/css" href="css/style.css">
These look something like this:
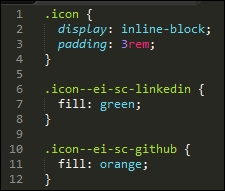
At this stage, the CSS styles may look simple, but the HTML markup is anything but; the postcss-svg plugin has added an in-line version of our icons to the HTML markup, with the appropriate edits made from our custom style sheet:

Sometimes, it is easy to wonder if using SVG is worth the extra markup, the main benefit being that if it is added in-line, then we reduce the number of calls to external resources; any content that requires altering can be done, without sacrificing the quality of our images.
We concentrated on using the postcss-svg plugin throughout our exercise, as a start to manipulating SVG images within the PostCSS system; there are some more options available, which may be of interest:
postcss-write-svg: This plugin (available at https://github.com/jonathantneal/postcss-write-svg) allows us to write inline SVGs in CSS.postcss-inline-svg: Another plugin (from https://github.com/TrySound/postcss-inline-svg), which in-lines SVG images and allows us to customize their styles.postcss-svgo: This plugin (available at https://github.com/ben-eb/postcss-svgo) processes inline SVG using the SVG Optimizer Tool for Node.
If you have a need to provide a fall-back position for SVG files, then you can try the postcss-svg-fallback plugin, available from https://github.com/justim/postcss-svg-fallback— we will use this plugin later, in Chapter 8, Creating PostCSS Plugins.
Okay, let's change tack: using SVG images can be a little heavy handed if all we need is a straightforward format for displaying images, right? Well, we could use standard formats, or one which has superior quality while maintaining smaller sizes. I'm talking about the lesser-known WebP format from Google—let's dig in and find out more about this format, and why it deserves more attention.