Table of Contents for
Mastering PostCSS for Web Design
 Mastering PostCSS for Web Design
Published by
Packt Publishing, 2016
Mastering PostCSS for Web Design
Published by
Packt Publishing, 2016
- Cover
- Table of Contents
- Mastering PostCSS for Web Design
- Mastering PostCSS for Web Design
- Credits
- About the Author
- About the Reviewer
- www.PacktPub.com
- Preface
- What you need for this book
- Who this book is for
- Conventions
- Reader feedback
- Customer support
- 1. Introducing PostCSS
- Introducing PostCSS
- Setting up a development environment
- Creating a simple example using PostCSS
- Linting code using plugins
- Exploring how PostCSS works
- Summary
- 2. Creating Variables and Mixins
- Creating a hover effect example
- Transitioning to using PostCSS
- Adding variable support to PostCSS
- Updating our hover effect demo
- Setting the order of plugins
- Creating mixins with PostCSS
- Looping content with PostCSS
- Summary
- 3. Nesting Rules
- Navigating through pages
- Transitioning to using PostCSS plugins
- Exploring the pitfalls of nesting
- Making the switch to BEM
- Exploring our changes in more detail
- Summary
- 4. Building Media Queries
- Exploring custom media queries in PostCSS
- Making images responsive
- Adding responsive text support
- Optimizing media queries
- Retrofitting support for older browsers
- Moving away from responsive design
- Taking things further with CSS4
- Summary
- 5. Managing Colors, Images, and Fonts
- Managing fonts with PostCSS
- Creating image sprites
- Working with SVG in PostCSS
- Adding support for WebP images
- Manipulating colors and color palettes
- Creating color functions with PostCSS
- Summary
- 6. Creating Grids
- Creating an example with Bourbon Neat
- Exploring the grid plugins in PostCSS
- Transitioning to using PostCSS-Neat
- Creating a site using Neat and PostCSS
- Adding responsive capabilities
- Summary
- 7. Animating Elements
- Moving away from jQuery
- Making use of pre-built libraries
- Switching to using SASS
- Making the switch to PostCSS
- Exploring plugin options within PostCSS
- Updating code to use PostCSS
- Creating a demo in PostCSS
- Optimizing our animations
- Using our own animation plugin
- Summary
- 8. Creating PostCSS Plugins
- Dissecting the architecture of a standard plugin
- Creating an transition plugin
- Building a custom font plugin
- Simplifying the development process
- Guidelines for plugin building
- Making the plugin available for use
- Summary
- 9. Working with Shortcuts, Fallbacks, and Packs
- Exploring plugin packs for PostCSS
- Adding shortcuts with Rucksack
- Linting and optimizing your code
- Providing fallback support
- Summary
- 10. Building a Custom Processor
- Exploring our processor
- Dissecting issues with our processor
- Optimizing the output
- Adding reload capabilities
- Extending our processor further
- Testing the final pre-processor
- Getting started with some hints and tips
- Introducing the CSStyle library
- Summary
- 11. Manipulating Custom Syntaxes
- Preparing our environment
- Implementing custom syntax plugins
- Parsing CSS
- Formatting the output with the API
- Highlighting our syntax code
- Summary
- 12. Mixing Preprocessors
- Exploring the conversion process
- Introducing the Pleeease library
- Compiling with other preprocessors
- Using the PreCSS library
- Converting a WordPress installation
- Setting up our environment
- Considering the conversion process
- Making changes to our code
- Compiling and testing the changes
- Summary
- 13. Troubleshooting PostCSS Issues
- Exploring some common issues
- Getting help from others
- Summary
- 14. Preparing for the Future
- Converting CSS4 styles for use
- Supporting future syntax with cssnext
- Creating plugins to provide extra CSS4 support
- Summary
- Index
The PostCSS ecosystem contains over 100 plugins at last count; this is on the increase. These plugins will all serve different needs, but will have one thing in common: the process they use to transform our code.
Now, we should be clear that this similarity is at a very high level; we are not referring to the technical details of each plugin! This aside, when creating our own custom syntax, we must follow a three-step process:
- We first put our code through a parser.
- We then transform it using anyone of a number of plugins.
- We finally stringify it, or convert it to valid CSS in string format.
We already have a handful of plugins that allow us to work with other syntaxes within a PostCSS environment; these include languages such as less or JavaScript:
|
Name of plugin |
Purpose of plugin |
|---|---|
|
|
This plugin is an indent-based syntax like SASS or Stylus. Plugin is available from https://github.com/postcss/sugarss. |
|
|
We can use this plugin to transform less into valid CSS. Note: it does not compile code. Plugin is available from https://github.com/webschik/postcss-less. |
|
|
Anyone working with JavaScript can use this plugin to write styles in JS or transform React Inline Styles, Radium, or JSS. Plugin is available from https://github.com/postcss/postcss-js. |
|
|
For those of you using SASS, this plugin is perfect for working with SASS code; it does not compile code to CSS. Plugin is available from https://github.com/postcss/postcss-scss. |
|
|
This plugin is perfect for finding and fixing CSS syntax errors.It's available to download from https://github.com/postcss/postcss-safe-parser. |
|
|
We can use this plugin to transform styles created using the Stylus library into valid CSS. Note: it does not compile code. Plugin is available from https://github.com/seaneking/poststylus. |
Although all of these plugins serve a different purpose, they all follow the same principle: they parse the code and transform it, before converting it to a format that can be saved to file as a valid style sheet output.
Leaving aside which parser we use, there is one question though: why would we want to manipulate our code directly? There are a few reasons for needing to alter the code directly; here are a few:
- We may want to create a report that details facts and figures about our code for reference purposes; it is true that there will be plugins or scripts available to do this already, but PostCSS can get us the basics during compilation, and not as a separate process.
- How about this for an idea? If you happen to use an application such as Adobe Color CC, then we can consider using the API to directly transform specific colors into valid RGB(A) or HEX equivalent values. We could use a plugin to achieve this, but performing this directly using the API allows us to retain flexibility with our choice of colors.
- There is nothing stopping us from dissecting existing plugins, and rebasing the tasks they perform into something that we could add to a task runner file, and then adapt to our needs. We might ultimately consider creating a plugin, but if the steps required are very specific to our needs, then a plugin may not be a useful addition.
- There are occasions when error handling can be lacking. The API contains some useful functionality that allows us to add suitably formatted messages on screen, if our process fails.
These are just a few ideas to get started, in addition to manipulating existing non-PostCSS styles (such as those created using SASS, for example).
Enough talking, I feel a demo coming! We've met some of the plugins available, so it's time to put them to good use; two of particular interest are the postcss-scss and postcss-safe-parser plugins. Let's dive in and take a look at them in more detail, beginning with postcss-safe-parser.
Over the next few pages, we'll touch on using a couple of parser plugins, to show how easy it is to transform our code. We will take a look at a plugin that removes the need for SASS (at least at a basic level); before we do so, let's first explore using the postcss-safe-parser plugin.
The postcss-safe-parser
plugin, available from https://github.com/postcss/postcss-safe-parser, is perfect for finding and fixing CSS errors. It's a simple plugin to use and install; let's make a start:
- We'll start by installing the plugin, so go ahead, and fire up a Node.js command prompt session, then change the working directory to the root of our project area.
- At the prompt, enter this command, then press Enter to install the plugin:
npm install postcss-safe-parser --save-dev - Next, go ahead and extract a copy of the
T58 – parsing invalid contentfolder from the code download that accompanies this book; save it to the root of our project area. - Copy the
package.jsonandgulpfile.jsfiles from it to the root of our project area. - Switch back to the NodeJS command prompt session, then at the prompt, enter
gulpand press Enter.
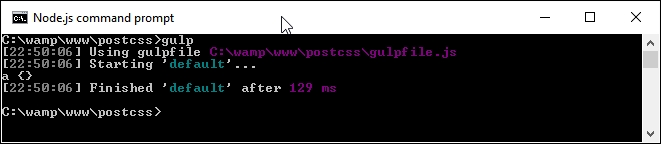
If all is well, we should see a successful compilation: a file marked output.css will be created at the root of our project area.
Go ahead and open it. Even though our example only contained one malformed selector, the file contains the same selector, but this time with the missing closing parenthesis added. We can also see the results appear in the console log at the same time as seen in the following screenshot:
So what's going on here? Well, some of this will be familiar. We're using a standard format task in our Gulp file, along with references to some of the plugins that we've already met, such as autoprefixer.
The content that is of interest to us though, is in the default Gulp task as seen in the following screenshot:
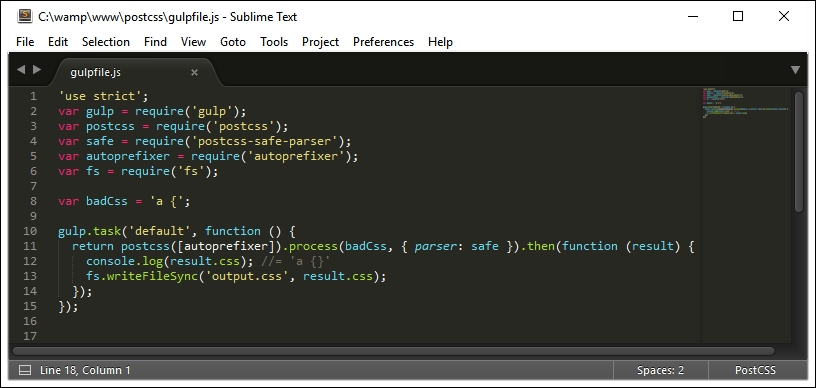
The task may seem a little complex, but in reality, we're parsing our CSS, prior to manipulating it. We start by defining a postcss object (into which feeds a request to run autoprefixer). This then processes our CSS into an AST, using a parser to find and fix any issues, before piping it out on screen and into a file named output.css in our project area.
Okay, our example was very simplistic, but this was intended to show you how the principle works. In this next example, the same principle has been used to convert standard SCSS code to valid CSS; note, though, that we're not calling SASS (as we have done before), but converting the SCSS code to valid CSS styles.
In our previous demo, we explored the use of PostCSS to parse our CSS and added the missing closing bracket as a fix for our code. It was a simplistic example; perfect if you're working with standard CSS, but what if your projects are using SASS?
Well, as part of our next example, we'll prove that using a compiler is now old hat; we'll use the postcss-scss plugin (from https://github.com/postcss/postcss-scss) to directly transform our SASS code, before unwrapping the nesting styles using the postcss-nested plugin (available from https://github.com/postcss/postcss-nested):
- We'll start by installing the
postcss-scssplugin. Go ahead and fire up a NodeJS command prompt session, then change the working directory to the root of our project area. - At the prompt, enter this command, then press Enter:
npm install postcss-scss --save-devKeep the session open when the plugin has completed installation:

- From the downloaded code that accompanies this book, go ahead and extract a copy of the
package.jsonfile from theT59 – Parsing SCSS contentfolder. Save this to the root of our project area. - From the same
T59 – Parsing SCSScontent folder, copy the contents of thesrcfolder to thesrcfolder at the root of our project area. - In a new file, add the following code and save it as
gulpfile.jsin thesrcfolder at the root of our project area:'use strict'; var gulp = require('gulp'); var postcss = require('postcss'); var fs = require('fs') var autoprefixer = require('autoprefixer'); var nested = require('postcss-nested'); var scss = fs.readFileSync('src/styles.scss', 'utf-8'); gulp.task('default', function () { var syntax = require('postcss-scss'); postcss([ autoprefixer, nested() ]).process(scss, { syntax: syntax }).then(function (result) { fs.writeFileSync('dest/styles.css', result.content); }); });
The keen-eyed amongst you will spot the reference to postcss-nested. We cannot call PostCSS without specifying something, so we'll use this plugin to unwrap the nested statements in our code:
- Revert back to the NodeJS command prompt session, then add this command and press Enter:
npm install postcss-nested --save-dev - Once Node has completed installing the plugin, enter
gulpat the prompt then press Enter: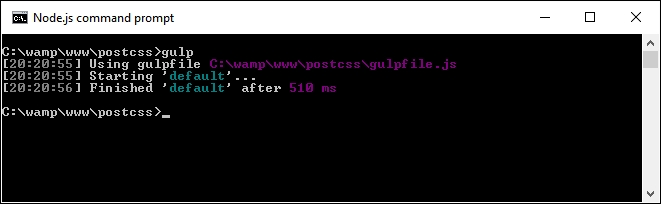
- If all is well, we will see a compiled file appear in the
destfolder:
But hold on a moment: this is a valid CSS file, right? Absolutely. But…we've so far had to use a compiler to produce valid CSS code; how come we haven't needed to add one now?
Well, the answer lies in the conversion process—traditionally we would have had to compile our code, even though standard SASS files are a superset of current CSS. Instead, we've simply rewritten our code using a syntax that translates a standard SCSS file to valid CSS.
If we take a look at our Gulp file in more detail, we can see references to the standard gulp-postcss plugin, along with declared instances of the fs, autoprefixer, postcss-nested, and postcss-scss plugins. The key for this demo starts on line 10, where we declare an instance of the scss variable, and use the file system (fs) plugin for Node to read the contents of the file into this variable.
Once into the task, we create an instance of PostCSS as an object, before feeding it the autoprefixer and nested() plugins (as variables). We then process our SASS code using the syntax that comes with the postcss-scss plugin, before piping out the contents as a file into the dest folder in our project area.
See? Nice and easy; not a SASS compiler in sight! This simple change removes the need for any dependency on a compiler, after all, SCSS files are just standard CSS text files, so why use a compiler? With all of this talk of parsing CSS (or SCSS for that matter), it's worth spending some time exploring what we mean by this, and how it is important to the whole process.