Table of Contents for
Mastering PostCSS for Web Design
 Mastering PostCSS for Web Design
Published by
Packt Publishing, 2016
Mastering PostCSS for Web Design
Published by
Packt Publishing, 2016
- Cover
- Table of Contents
- Mastering PostCSS for Web Design
- Mastering PostCSS for Web Design
- Credits
- About the Author
- About the Reviewer
- www.PacktPub.com
- Preface
- What you need for this book
- Who this book is for
- Conventions
- Reader feedback
- Customer support
- 1. Introducing PostCSS
- Introducing PostCSS
- Setting up a development environment
- Creating a simple example using PostCSS
- Linting code using plugins
- Exploring how PostCSS works
- Summary
- 2. Creating Variables and Mixins
- Creating a hover effect example
- Transitioning to using PostCSS
- Adding variable support to PostCSS
- Updating our hover effect demo
- Setting the order of plugins
- Creating mixins with PostCSS
- Looping content with PostCSS
- Summary
- 3. Nesting Rules
- Navigating through pages
- Transitioning to using PostCSS plugins
- Exploring the pitfalls of nesting
- Making the switch to BEM
- Exploring our changes in more detail
- Summary
- 4. Building Media Queries
- Exploring custom media queries in PostCSS
- Making images responsive
- Adding responsive text support
- Optimizing media queries
- Retrofitting support for older browsers
- Moving away from responsive design
- Taking things further with CSS4
- Summary
- 5. Managing Colors, Images, and Fonts
- Managing fonts with PostCSS
- Creating image sprites
- Working with SVG in PostCSS
- Adding support for WebP images
- Manipulating colors and color palettes
- Creating color functions with PostCSS
- Summary
- 6. Creating Grids
- Creating an example with Bourbon Neat
- Exploring the grid plugins in PostCSS
- Transitioning to using PostCSS-Neat
- Creating a site using Neat and PostCSS
- Adding responsive capabilities
- Summary
- 7. Animating Elements
- Moving away from jQuery
- Making use of pre-built libraries
- Switching to using SASS
- Making the switch to PostCSS
- Exploring plugin options within PostCSS
- Updating code to use PostCSS
- Creating a demo in PostCSS
- Optimizing our animations
- Using our own animation plugin
- Summary
- 8. Creating PostCSS Plugins
- Dissecting the architecture of a standard plugin
- Creating an transition plugin
- Building a custom font plugin
- Simplifying the development process
- Guidelines for plugin building
- Making the plugin available for use
- Summary
- 9. Working with Shortcuts, Fallbacks, and Packs
- Exploring plugin packs for PostCSS
- Adding shortcuts with Rucksack
- Linting and optimizing your code
- Providing fallback support
- Summary
- 10. Building a Custom Processor
- Exploring our processor
- Dissecting issues with our processor
- Optimizing the output
- Adding reload capabilities
- Extending our processor further
- Testing the final pre-processor
- Getting started with some hints and tips
- Introducing the CSStyle library
- Summary
- 11. Manipulating Custom Syntaxes
- Preparing our environment
- Implementing custom syntax plugins
- Parsing CSS
- Formatting the output with the API
- Highlighting our syntax code
- Summary
- 12. Mixing Preprocessors
- Exploring the conversion process
- Introducing the Pleeease library
- Compiling with other preprocessors
- Using the PreCSS library
- Converting a WordPress installation
- Setting up our environment
- Considering the conversion process
- Making changes to our code
- Compiling and testing the changes
- Summary
- 13. Troubleshooting PostCSS Issues
- Exploring some common issues
- Getting help from others
- Summary
- 14. Preparing for the Future
- Converting CSS4 styles for use
- Supporting future syntax with cssnext
- Creating plugins to provide extra CSS4 support
- Summary
- Index
Constructing a site using Bourbon Neat is a simple process, it does not require any special markup on our web page; the effort is all within the compiled style sheet.
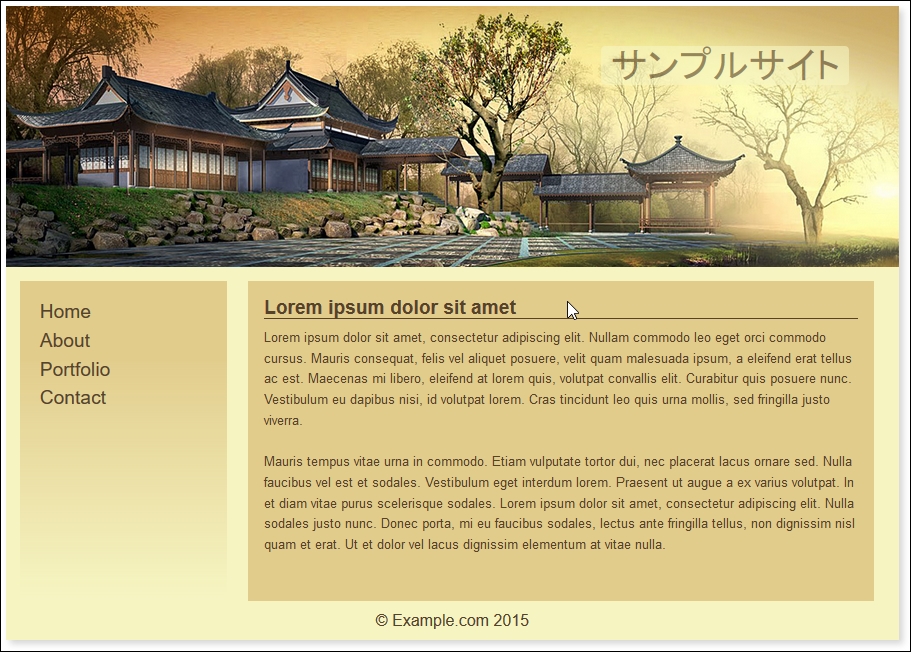
To prove this, we'll construct a simple web page that could easily be part of any website—I've used a Japanese theme as the basis for my page, but the principles we will use can apply to any site. You'll see that (with the exception of the standard SASS style of code used) there are only three instances where we have used Bourbon Neat-specific code.
Let's make a start:
- From the code download that accompanies this book, go ahead and extract a copy of
Tutorial30, and save it to the root of our project area. - Copy the contents of the
sample site – pre-compilefrom within theTutorial30folder to thesrcfolder within our project area. Go ahead and rename it assample.scss. - Next, fire up a Node.js command prompt, then change the working folder to our project area.
- At the prompt, enter
gulp, then press Enter—Node.js will compile the code; if all is well, we should see two compiled style sheets and a source map in thedestfolder. - Go ahead and copy the contents of the
destfolder into thecssfolder at the root of theTutorial30folder.
If we try previewing the results of our work, we should see a stylish page appear, with our Japanese theme:
The demo covers a couple of key points and useful tricks, so let's dive in and work through them in more detail.
At this point, be surprised to hear that, our first tip is not directly related to SASS or even Bourbon Neat, but to the color scheme!
"Why", I hear you ask, "are we talking about the color scheme first?" There is a good reason for this: we've used variables to reference our colors, but could equally have used SASS functions to create the values. We've already covered this back in Chapter 5, Managing Colors, Images and Fonts, where we covered the use of the postcss-color-function plugin to build these values; we will use it again later in this chapter.
The real tip here, though, is using a nifty applet by Lokesh Dhakar, called Color Thief (hosted at http://lokeshdhakar.com/projects/color-thief/). We can simply drag and drop our header image in and get a full swatch of suitable colors:
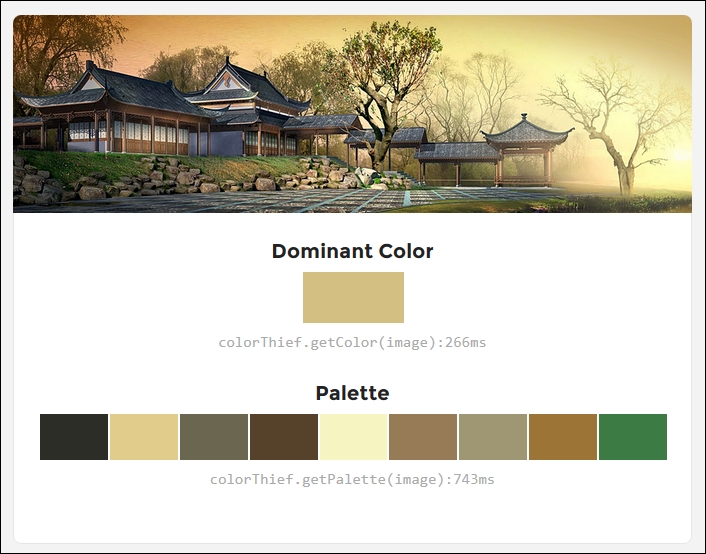
The only downside is that it doesn't provide the color values; we can get these from the page's source instead.
Note
If your preference is to use RGB(A) colors instead, then a site such as Color Hexa (http://colorhexa.com) will be a great help.
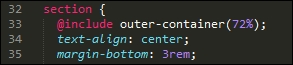
The key to our demo is at lines 33, 63 and 69-these are Bourbon Neat mixins that control the format of the outer container (line 33):
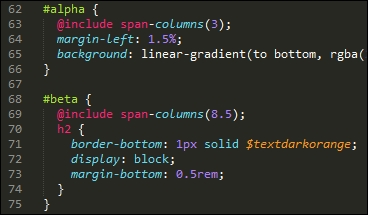
They also control the format of each of the two content areas within (lines 63 and 69):
When compiled, the outer-container mixin adds a max-width of 72% to the .wrapper class controlling the main section, while the span-columns() mixins add float, display, width, and margin-right attributes to each element, like this:
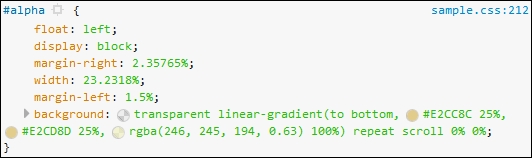
In addition to the outer-container() and span-columns() mixins, the demo uses percentage values as much as possible, where rem or pixel values have been specified, then maintaining a cohesive design when resizing these elements is less critical.
We will, however, make some improvements later in this chapter, when we improve the responsive capabilities of our demo. For now, let's continue with our transition, and introduce the use of PostCSS plugins into our process.