Table of Contents for
Mastering PostCSS for Web Design
 Mastering PostCSS for Web Design
Published by
Packt Publishing, 2016
Mastering PostCSS for Web Design
Published by
Packt Publishing, 2016
- Cover
- Table of Contents
- Mastering PostCSS for Web Design
- Mastering PostCSS for Web Design
- Credits
- About the Author
- About the Reviewer
- www.PacktPub.com
- Preface
- What you need for this book
- Who this book is for
- Conventions
- Reader feedback
- Customer support
- 1. Introducing PostCSS
- Introducing PostCSS
- Setting up a development environment
- Creating a simple example using PostCSS
- Linting code using plugins
- Exploring how PostCSS works
- Summary
- 2. Creating Variables and Mixins
- Creating a hover effect example
- Transitioning to using PostCSS
- Adding variable support to PostCSS
- Updating our hover effect demo
- Setting the order of plugins
- Creating mixins with PostCSS
- Looping content with PostCSS
- Summary
- 3. Nesting Rules
- Navigating through pages
- Transitioning to using PostCSS plugins
- Exploring the pitfalls of nesting
- Making the switch to BEM
- Exploring our changes in more detail
- Summary
- 4. Building Media Queries
- Exploring custom media queries in PostCSS
- Making images responsive
- Adding responsive text support
- Optimizing media queries
- Retrofitting support for older browsers
- Moving away from responsive design
- Taking things further with CSS4
- Summary
- 5. Managing Colors, Images, and Fonts
- Managing fonts with PostCSS
- Creating image sprites
- Working with SVG in PostCSS
- Adding support for WebP images
- Manipulating colors and color palettes
- Creating color functions with PostCSS
- Summary
- 6. Creating Grids
- Creating an example with Bourbon Neat
- Exploring the grid plugins in PostCSS
- Transitioning to using PostCSS-Neat
- Creating a site using Neat and PostCSS
- Adding responsive capabilities
- Summary
- 7. Animating Elements
- Moving away from jQuery
- Making use of pre-built libraries
- Switching to using SASS
- Making the switch to PostCSS
- Exploring plugin options within PostCSS
- Updating code to use PostCSS
- Creating a demo in PostCSS
- Optimizing our animations
- Using our own animation plugin
- Summary
- 8. Creating PostCSS Plugins
- Dissecting the architecture of a standard plugin
- Creating an transition plugin
- Building a custom font plugin
- Simplifying the development process
- Guidelines for plugin building
- Making the plugin available for use
- Summary
- 9. Working with Shortcuts, Fallbacks, and Packs
- Exploring plugin packs for PostCSS
- Adding shortcuts with Rucksack
- Linting and optimizing your code
- Providing fallback support
- Summary
- 10. Building a Custom Processor
- Exploring our processor
- Dissecting issues with our processor
- Optimizing the output
- Adding reload capabilities
- Extending our processor further
- Testing the final pre-processor
- Getting started with some hints and tips
- Introducing the CSStyle library
- Summary
- 11. Manipulating Custom Syntaxes
- Preparing our environment
- Implementing custom syntax plugins
- Parsing CSS
- Formatting the output with the API
- Highlighting our syntax code
- Summary
- 12. Mixing Preprocessors
- Exploring the conversion process
- Introducing the Pleeease library
- Compiling with other preprocessors
- Using the PreCSS library
- Converting a WordPress installation
- Setting up our environment
- Considering the conversion process
- Making changes to our code
- Compiling and testing the changes
- Summary
- 13. Troubleshooting PostCSS Issues
- Exploring some common issues
- Getting help from others
- Summary
- 14. Preparing for the Future
- Converting CSS4 styles for use
- Supporting future syntax with cssnext
- Creating plugins to provide extra CSS4 support
- Summary
- Index
We've seen that adapting code to use nesting is a simple principle, but the real art is getting the balance right, many developers fall into the trap of nesting everything in their code when using the technique for the first time.
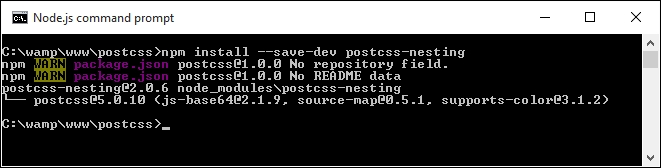
With this in mind, let's explore how we can convert our code to using PostCSS. We'll start by installing the postcss-nesting plugin, which will perform most of the work for us:
- Fire up a Node.js command prompt, then change the working directory to our project area.
- At the command prompt, enter the following command, then press Enter:
npm install --save-dev postcss-nesting - Node.js will go away and install the plugin—it is ready for use when we see something akin to this screenshot:
- With the plugin installed, we need to configure PostCSS to use it—open up a copy of
gulpfile.jsfrom the project area, ready for editing. - We need to make a few changes—the first is to assign a variable that references the plugin. Add the highlighted line in immediately below the last variable statement:
var cssnano = require('cssnano'); var nesting = require('postcss-nesting'); - The
autoprefixertask needs to be altered—this time around, we will start with compiling our nested code and adding the appropriate vendor prefixes. Alter the first line of this task, as indicated:gulp.task('autoprefixer', function() { return gulp.src('src/*.css') - Next, add in the nesting configuration call:
.pipe(postcss([ autoprefixer, nesting({ /* options */ }) ])) - SASS normally compresses any code on compilation by default—as we're no longer using it, we need to provide an alternative. For this, we will reuse the
cssnanoplugin from Chapter 2, Creating Variables and Mixins. Go ahead and add this at line 20:.pipe(postcss([ cssnano() ]))
- The lint-styles task should then run once the vendor prefixes have been added; to make this happen, add the constraint as shown:
gulp.task("lint-styles", ['autoprefixer'], function() { - We no longer have any need for the
sasstask, so go ahead and remove it in its entirety, and from the default task entry—we should be left with this:gulp.task('default', ['lint-styles', 'autoprefixer', 'rename']); - Last, but by no means least, go ahead and switch the order of the rename task. Instead of running it immediately after the
autoprefixertask, we'll run it once the lint-styles task has been completed:gulp.task('rename', ['lint-styles'], function () {
At this stage, our gulp task file is now ready for use. We can begin to convert our style sheet to use PostCSS nesting as a replacement for SASS. Let's make a start on converting it, as part of the next exercise.
Altering our code to use PostCSS is very simple. Even if it requires a few changes, the format does not change significantly when compared to processors such as SASS; let's take a look at what is involved:
- We'll begin by opening a copy of
style.scssfrom theTutorial6Afolder in the code download that accompanies this book—save it to thesrcfolder of our project area. Rename it tostyle.css. - On line 19, add
@nestimmediately before&:, as indicated—this is required to allow thepostcss-nestingplugin to correctly compile each nesting statement:@nest &:before, &:after { - On line 53, add
@nest &immediately beforeh2, as shown:@nest & h2 { - On line 61, add
@nestimmediately before&., as shown:@nest &.page1 {Repeat step 4 for lines 65, 69 and 73.
- On line 119, add
@nestimmediately before&., as shown:@nest &.invisible { - On line 123, add
@nestimmediately beforeul, as shown:@nest & ul { - On line 125, add
@nestimmediately before& li, as shown:@nest & li { - On line 136, add
@nestimmediately before&., as shown:@nest &:after {Repeat the same process for lines 150 and 155.
- On lines 179, add
@nestimmediately before&., as shown:@nest&.up {Repeat the same process for lines 183 and 187, then save the file.
Our style sheet is now converted; to prove it works, we need to run it through PostCSS, so let's do that now as part of the next exercise.
With the changes made to our code, we need to compile it—let's go ahead and do that now, using the same process we saw back in Chapter 2, Creating Variables and Mixins:
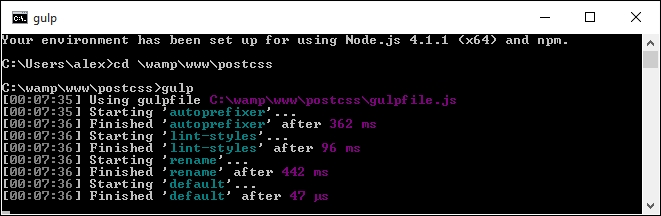
- Fire up a Node.js command prompt session, or use the one from earlier if you still have it open, and change the working folder to the project area.
- At the prompt, enter this command, then press Enter:
gulp - If all is well, we should see something akin to this screenshot:
- A quick peek in the
destfolder of our project area should reveal the relevant compiled CSS and source map files, produced by PostCSS. - At this point, we need to extract a copy of the
Tutorial7folder from the code download that accompanies this book—save this to our project area. - Copy the contents of the
destfolder from our project area to thecssfolder underTutorial7—if all is well, our demo should continue to work, but without the dependency of SASS.
Try previewing the results in a browser—if all is well, we should see the same results appear as before, but this time using PostCSS, and without the dependency on SASS. We can now apply the same techniques to any project, safe in the knowledge that using the postcss-nesting plugin will allow us to compile to valid CSS code—or will it?