Table of Contents for
Mastering PostCSS for Web Design
 Mastering PostCSS for Web Design
Published by
Packt Publishing, 2016
Mastering PostCSS for Web Design
Published by
Packt Publishing, 2016
- Cover
- Table of Contents
- Mastering PostCSS for Web Design
- Mastering PostCSS for Web Design
- Credits
- About the Author
- About the Reviewer
- www.PacktPub.com
- Preface
- What you need for this book
- Who this book is for
- Conventions
- Reader feedback
- Customer support
- 1. Introducing PostCSS
- Introducing PostCSS
- Setting up a development environment
- Creating a simple example using PostCSS
- Linting code using plugins
- Exploring how PostCSS works
- Summary
- 2. Creating Variables and Mixins
- Creating a hover effect example
- Transitioning to using PostCSS
- Adding variable support to PostCSS
- Updating our hover effect demo
- Setting the order of plugins
- Creating mixins with PostCSS
- Looping content with PostCSS
- Summary
- 3. Nesting Rules
- Navigating through pages
- Transitioning to using PostCSS plugins
- Exploring the pitfalls of nesting
- Making the switch to BEM
- Exploring our changes in more detail
- Summary
- 4. Building Media Queries
- Exploring custom media queries in PostCSS
- Making images responsive
- Adding responsive text support
- Optimizing media queries
- Retrofitting support for older browsers
- Moving away from responsive design
- Taking things further with CSS4
- Summary
- 5. Managing Colors, Images, and Fonts
- Managing fonts with PostCSS
- Creating image sprites
- Working with SVG in PostCSS
- Adding support for WebP images
- Manipulating colors and color palettes
- Creating color functions with PostCSS
- Summary
- 6. Creating Grids
- Creating an example with Bourbon Neat
- Exploring the grid plugins in PostCSS
- Transitioning to using PostCSS-Neat
- Creating a site using Neat and PostCSS
- Adding responsive capabilities
- Summary
- 7. Animating Elements
- Moving away from jQuery
- Making use of pre-built libraries
- Switching to using SASS
- Making the switch to PostCSS
- Exploring plugin options within PostCSS
- Updating code to use PostCSS
- Creating a demo in PostCSS
- Optimizing our animations
- Using our own animation plugin
- Summary
- 8. Creating PostCSS Plugins
- Dissecting the architecture of a standard plugin
- Creating an transition plugin
- Building a custom font plugin
- Simplifying the development process
- Guidelines for plugin building
- Making the plugin available for use
- Summary
- 9. Working with Shortcuts, Fallbacks, and Packs
- Exploring plugin packs for PostCSS
- Adding shortcuts with Rucksack
- Linting and optimizing your code
- Providing fallback support
- Summary
- 10. Building a Custom Processor
- Exploring our processor
- Dissecting issues with our processor
- Optimizing the output
- Adding reload capabilities
- Extending our processor further
- Testing the final pre-processor
- Getting started with some hints and tips
- Introducing the CSStyle library
- Summary
- 11. Manipulating Custom Syntaxes
- Preparing our environment
- Implementing custom syntax plugins
- Parsing CSS
- Formatting the output with the API
- Highlighting our syntax code
- Summary
- 12. Mixing Preprocessors
- Exploring the conversion process
- Introducing the Pleeease library
- Compiling with other preprocessors
- Using the PreCSS library
- Converting a WordPress installation
- Setting up our environment
- Considering the conversion process
- Making changes to our code
- Compiling and testing the changes
- Summary
- 13. Troubleshooting PostCSS Issues
- Exploring some common issues
- Getting help from others
- Summary
- 14. Preparing for the Future
- Converting CSS4 styles for use
- Supporting future syntax with cssnext
- Creating plugins to provide extra CSS4 support
- Summary
- Index
Creating a PostCSS plugin is a straightforward process—the beauty of PostCSS is that we as developers are free to design and construct any plugin we desire; it does mean that not every plugin will be of the same quality as others!
This aside, the recommended way to construct any PostCSS plugin is to use the boilerplate code, which is available from https://github.com/postcss/postcss-plugin-boilerplate; we can see an example of it in this screenshot:
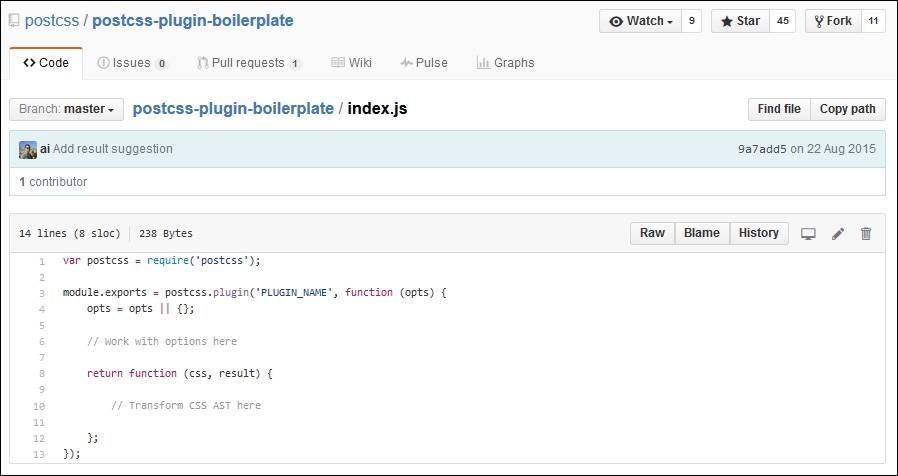
If we explore the source code for any PostCSS plugin hosted in GitHub, there will be a host of different files present; not all of them will be the same for each different plugin!
Nonetheless, if we delve in deeper, there are some files we would expect to see as part of the architecture of any plugin; they are as follows:
Let's explore these in more detail, beginning with index.js.
The crux of any plugin centers around index.js—we start with a reference to PostCSS (as a dependency for our plugin); this is followed by the exports function, which exposes functionality to anyone using the plugin:
var postcss = require('postcss');

module.exports = postcss.plugin('myplugin', function(options) {

  return function (css) {
    options = options || {};

    // Processing code will be added here
  }
});Next up, we have package.json—this is used to configure and manage locally installed Node packages; given that PostCSS is based on Node.js, we will see something akin to this for any plugin installed as part of the PostCSS ecosystem:
{
  "name": "PLUGIN_NAME",
  "version": "0.0.0",
  "description": "PostCSS plugin PLUGIN_DESC",
  "keywords": [
    "postcss",
    "css",
    "postcss-plugin"KEYWORDS
  ],
The first section contains some basic details about the plugin name, description, and version. If we look through the package.json file, it's not difficult to spot a number of keywords in capitals—at first glance, one might be mistaken for thinking that it renders as invalid JSON.
There is a reason for this—one of the steps for using this boilerplate plugin is to run a script that will replace these keywords with information; the script will transform this into valid JSON. This is something we will cover in more detail later, in the Creating a transition plugin section. For now, assume that this file will be converted to valid JSON during the build process.
Moving on, we then store the name of the author, the plugin's license, and where we can get the source or file bugs relating to the plugin:
  "author": "AUTHOR_NAME <AUTHOR_EMAIL>",
  "license": "MIT",
  "repository": "GITHUB_NAME/PLUGIN_NAME",
  "bugs": {
    "url": "https://github.com/GITHUB_NAME/PLUGIN_NAME/issues"
},
"homepage": "https://github.com/GITHUB_NAME/PLUGIN_NAME",
This section is the most critical—the dependencies section stores details of any dependencies, when used in production; the devDependencies section takes care of dependencies when working in a development environment:
  "dependencies": {
    "postcss": "^5.0.10"
  },
  "devDependencies": {
    "ava": "^0.7.0",
    "eslint": "^1.10.2"
  },
  "scripts": {
    "test": "ava && eslint *.js"
  }
}
A key guideline given by the PostCSS team is that every plugin should be tested—this should always be a given, to help ensure we are creating something that is solid and not likely to cause issues for our users. A part of the boilerplate code contains a suitable test script for this purpose, so let's take a quick look at it now.
The third element that is key to any plugin is the test—this should be stored in test.js, and will look similar to this:
import postcss from 'postcss';
import test from 'ava';

import plugin from './';

function run(t, input, output, opts = { }) {
  return postcss([ plugin(opts) ]).process(input)
    .then( result => {
      t.same(result.css, output);
      t.same(result.warnings().length, 0);
    });
}

/* Write tests here
test('does something', t => {
  return run(t, 'a{ }', 'a{ }', { });
});
*/
We will cover this part in more detail later in this chapter, in the Testing and submitting a plugin section—for now, let's get stuck in to creating a PostCSS-based plugin. We'll start with a quick look at the API, before diving into creating a plugin that applies a specific font stack based on a chosen font, and adds updated declarations if one of those fonts needs to be imported into our site.
With the framework in place, we can then build up our plugin using the PostCSS API; this contains a number of classes, modules, and methods that we can use. The key function in the API is of course postcss—this is the main entry point for PostCSS and is required for all plugins:
var postcss = require('postcss');Let's take a quick look through what else is available in the API, beginning with the Vendor module.
This module contains helpers for working with vendor prefixes—we can initiate it using this object:
var vendor = postcss.vendor;
The module contains two methods, as shown in the table:
This module contains helpers to safely split lists of CSS values, whilst preserving parentheses and quotes. We can initiate it using this object:
var list = postcss.list;
The module contains two methods, as shown in the table:
Once the PostCSS object has been defined as a dependency in our plugin, we can begin to manipulate its contents—for this purpose, there are a number of classes available to assist, as shown in this table:
|
Name of class |
Role within plugin |
|---|---|
|
|
Creates a Processor instance, initializes any plugins, then uses this instance on CSS files as specified in the configuration. |
|
|
Acts as a promise proxy for the result of PostCSS transformations. Promises are a key part of working with Node.js—if you are not familiar with this concept, take a look at https://www.promisejs.org/ for a detailed explanation. |
|
| |
|
| |
|
|
Allows a user to retrieve any errors for broken CSS, generated by the CSS parser. |
|
|
Represents the source CSS being manipulated by PostCSS plugins. |
Of course, we cannot manipulate content from within a PostCSS plugin without having access to each CSS node—the API contains a group of useful nodes to help with parsing and manipulating content:
A key role of a plugin is to navigate through each node to help determine if it should perform some action; the API contains a number of methods to assist with parsing nodes:
|
Method group |
Purpose |
|---|---|
|
Nodes |
These methods are for working with each CSS node—this includes methods such as the following:
More details are available at https://github.com/postcss/postcss/blob/master/docs/api.md#nodes-common-methods |
|
Containers |
These methods contain methods for working with children in a container node—this includes methods such as the following:
More details are available at https://github.com/postcss/postcss/blob/master/docs/api.md#containers-common-methods |
The main site contains details and examples of all of the methods and classes available within the API—it is worth taking time to familiarize yourself with the options available.
Tip
Details for each method or class are available on the PostCSS API page at https://github.com/postcss/postcss/blob/master/docs/api.md
Okay, enough with theory: on we go! Let's change tack and put some of what we've just learnt to good use by constructing a couple of plugins for PostCSS. These will use a real mix of the API commands that we've briefly looked at earlier in this chapter; our first demo centers around a shorthand plugin for creating transition statements within CSS rules in a style sheet, so let's get stuck in and see how it works.