Table of Contents for
Mastering PostCSS for Web Design
 Mastering PostCSS for Web Design
Published by
Packt Publishing, 2016
Mastering PostCSS for Web Design
Published by
Packt Publishing, 2016
- Cover
- Table of Contents
- Mastering PostCSS for Web Design
- Mastering PostCSS for Web Design
- Credits
- About the Author
- About the Reviewer
- www.PacktPub.com
- Preface
- What you need for this book
- Who this book is for
- Conventions
- Reader feedback
- Customer support
- 1. Introducing PostCSS
- Introducing PostCSS
- Setting up a development environment
- Creating a simple example using PostCSS
- Linting code using plugins
- Exploring how PostCSS works
- Summary
- 2. Creating Variables and Mixins
- Creating a hover effect example
- Transitioning to using PostCSS
- Adding variable support to PostCSS
- Updating our hover effect demo
- Setting the order of plugins
- Creating mixins with PostCSS
- Looping content with PostCSS
- Summary
- 3. Nesting Rules
- Navigating through pages
- Transitioning to using PostCSS plugins
- Exploring the pitfalls of nesting
- Making the switch to BEM
- Exploring our changes in more detail
- Summary
- 4. Building Media Queries
- Exploring custom media queries in PostCSS
- Making images responsive
- Adding responsive text support
- Optimizing media queries
- Retrofitting support for older browsers
- Moving away from responsive design
- Taking things further with CSS4
- Summary
- 5. Managing Colors, Images, and Fonts
- Managing fonts with PostCSS
- Creating image sprites
- Working with SVG in PostCSS
- Adding support for WebP images
- Manipulating colors and color palettes
- Creating color functions with PostCSS
- Summary
- 6. Creating Grids
- Creating an example with Bourbon Neat
- Exploring the grid plugins in PostCSS
- Transitioning to using PostCSS-Neat
- Creating a site using Neat and PostCSS
- Adding responsive capabilities
- Summary
- 7. Animating Elements
- Moving away from jQuery
- Making use of pre-built libraries
- Switching to using SASS
- Making the switch to PostCSS
- Exploring plugin options within PostCSS
- Updating code to use PostCSS
- Creating a demo in PostCSS
- Optimizing our animations
- Using our own animation plugin
- Summary
- 8. Creating PostCSS Plugins
- Dissecting the architecture of a standard plugin
- Creating an transition plugin
- Building a custom font plugin
- Simplifying the development process
- Guidelines for plugin building
- Making the plugin available for use
- Summary
- 9. Working with Shortcuts, Fallbacks, and Packs
- Exploring plugin packs for PostCSS
- Adding shortcuts with Rucksack
- Linting and optimizing your code
- Providing fallback support
- Summary
- 10. Building a Custom Processor
- Exploring our processor
- Dissecting issues with our processor
- Optimizing the output
- Adding reload capabilities
- Extending our processor further
- Testing the final pre-processor
- Getting started with some hints and tips
- Introducing the CSStyle library
- Summary
- 11. Manipulating Custom Syntaxes
- Preparing our environment
- Implementing custom syntax plugins
- Parsing CSS
- Formatting the output with the API
- Highlighting our syntax code
- Summary
- 12. Mixing Preprocessors
- Exploring the conversion process
- Introducing the Pleeease library
- Compiling with other preprocessors
- Using the PreCSS library
- Converting a WordPress installation
- Setting up our environment
- Considering the conversion process
- Making changes to our code
- Compiling and testing the changes
- Summary
- 13. Troubleshooting PostCSS Issues
- Exploring some common issues
- Getting help from others
- Summary
- 14. Preparing for the Future
- Converting CSS4 styles for use
- Supporting future syntax with cssnext
- Creating plugins to provide extra CSS4 support
- Summary
- Index
A question: how often have you come across instances where you have a number of very similar images that share styles, but at the same time need to have individual styles applied? Sound familiar?
I am of course talking about instances such as list items, grid layouts, and the classic social media icons we see littered all over the Internet. We can of course simply write rules to cover each image, but as I am sure you will agree, it's not the smartest approach! Instead, we can use the power of the @each statement to iterate through each item and apply each style using string interpolation.
The @each plugin, by Alexander Madyankin, is one of two ways to incorporate a facility to loop through content; the source for this plugin is available from https://github.com/outpunk/postcss-each. The other plugin, postcss-for (available from https://github.com/antyakushev/postcss-for), takes a different approach—the difference between the two is that the former works on objects, while the latter must use a range of numbers to apply styles.
If we take the second plugin for a moment, we have to loop through a consecutive range of numbers in order to produce our result. So, something akin to this:
@for $x from 1 to 3 {
  .grid-$x { width: $(x)px; }
}
…would produce this, when compiled:
.grid-1 {
  width: 1px
}
.grid-2 {
  width: 2px
}
.grid-3 {
  width: 3px
}
Seems pretty straightforward, right? Here comes the rub, though: unlike SASS, we can't use variables to define that range by default; this plugin must be defined before any instance of postcss-nested and postcss-simple-vars plugins. In PostCSS, we iterate through all of the values inclusively (that is, one to three in our example), which is not the same as in SASS.
It's in cases like this that we must decide between using this plugin on its own, or with postcss-custom-properties and postcss-for-variables. This is why it is key to fully understand what you need to achieve, and the capabilities of plugins available, so that we can choose the most effective combination to suit our needs. The great thing about PostCSS is its flexibility, speed, and modular design; this modularity and flexibility can also be seen as its Achilles heel, as tweaking the choice and order of plugins can have a real impact on our code!
Note
We can of course change completely, and use a separate fork of the postcss-for plugin, available from https://github.com/xori/postcss-for. This caters for dollar variables.
Let's put some of this into practice. Before we get stuck in to nesting with PostCSS in the next chapter, we'll round out this one with a simple demo that uses a group of social media icons and PostCSS to set up styling automatically for us.
Staying with the looping theme, but on a different tack, in place of using the for statement, we can achieve similar effects with @each, but only if the target is an element on the page.
I am of course talking about elements such as buttons or menu items; these elements will share the same styling, but require unique IDs to allow us to interact with them. It goes without saying that we could simply create a shared base class and add multiple classes for each element…
But we can do better than that: most preprocessors have in-built functionality that allows us to iterate through elements and apply CSS styling to each element. Thankfully, PostCSS is no different; we can achieve the same result using the postcss-each plugin, available from https://github.com/outpunk/postcss-each. It's a cinch to install, and we can use it to add elements such as social media icons to the foot of a page, and style them. I feel a demo coming on, so let's dive in and take a look:
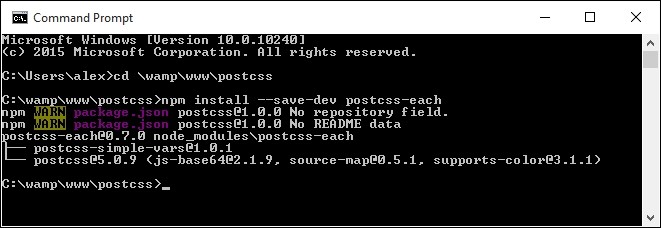
- We'll start with installing the plugin, so go ahead and fire up a NodeJS command prompt, and change the working directory to our project area.
- At the prompt, enter this command to install the
postcss-eachplugin, then press Enter:npm install --save-dev postcss-each - If all is well, we should see the customary confirmation that the plugin is installed:
With the plugin now in place, let's move on and update our gulp file:
- We need to make three changes to our gulp file, so go ahead and open a copy from the project area in your usual text editor.
- First, go ahead and remove lines 9 to 11; they contain the variable declarations for the
postcss-css-variablesandpostcss-mixinsplugins. - On or around what is now line 8, we should see the variable declaration for
postcss-calc. Immediately, below, add the following line:var eachloop = require('postcss-each'); - In the main
autoprefixertask, we need to alter thepostcsscall; remove this from line 13:cssvariables(/* options */), cssmixins(/* options */), calc(/*options*/),
We should be left with this (changes have been highlighted):
.pipe(postcss([ autoprefixer, cssnano(), foreach(/*options*/) ]))
At this point, we can save the file. It is now ready for us to process the CSS required for our next demo. For this next exercise, we will need to avail ourselves of some suitable social media icons. I've used the ones by Nathan Brown, available at http://wegraphics.net/downloads/free-stained-and-faded-social-media-icons/. We'll use the Twitter, LinkedIn, and YouTube images.
Let's make a start:
- We'll start with a look at the SASS version of this demo. It's a simple example, but illustrates perfectly how we can use the
@eachfunction to iterate through each image and apply the appropriate style:$social: twitter, linkedin, youtube; .social-icon { // shared information here background: 50% no-repeat; background-size: 100%; float: left; height: 50px; width: 50px; // unique information loops here @each $network in $social { &.#{$network} { background-image: url("../img/#{$network}.png"); } } } - To compile the code, go ahead and copy the
Tutorial4folder to our project area. - Replace the existing
gulpfile.jswith a copy from theTutorial1Afolder—this contains the appropriate commands to compile the code—we need to use the original version built to compile SASS code, not PostCSS, hence the change. - Take a copy of
style.scssfrom thesrcfolder of theTutorial4folder, then drop it into thesrcfolder of our project area. - Next, fire up a NodeJS command prompt window, then change the working folder to our project area.
- At the prompt, enter this command, then press Enter:
gulpKeep the command prompt window open for now, we will use it again shortly.
- Once the code has compiled, copy the contents of the
destfolder back to thecssfolder in theTutorial4folder.
If all is well, we should have three icons showing, when previewing the results in a browser. Nothing outrageous here: we have the base rule that applies to all of the icons, which is followed by the individual classes required to handle each icon itself:
.social-icon {
  background: 50% no-repeat;
  background-size: 100%;
  float: left;
  height: 50px;
  width: 50px;
}

.social-icon.twitter {
  background-image: url("../img/twitter.png");
}

.social-icon.linkedin {
  background-image: url("../img/linkedin.png");
}

.social-icon.youtube {
  background-image: url("../img/youtube.png");
}
So, how would this look in PostCSS? Well, surprising as it may be, there isn't a great deal of change needed.
We only need to change it in two places within our CSS file. I've also separated the nested code, to make it easier to view:
.social-icon {
  // shared information here
  background: 50% no-repeat;
  background-size: 100%;
  float: left;
  height: 50px;
  width: 50px;
}
The changes we need to make are highlighted in this block of code:
@each $media in twitter, linkedin, youtube {
  . $(img) {
    background: url('../img/$(media).png');
  }
}
Our gulp file also needs to change. Let's work through the steps involved to make the switch to PostCSS:
- We first need to replace the gulp file—go ahead and delete the copy at the root of the project area, then replace it with a copy from the
Tutorial4folder in the code download. - From the code download that accompanies this book, extract a copy of
style—pre compile.css, and rename it asstyle.css. Drop it in thesrcfolder of our project area. - Revert back to the command prompt, then enter
gulpat the prompt and press Enter. - If all is well, we should see the compiled style sheets appear in the
destfolder, along with the source maps. - Copy the contents of the
destfolder in project area to thecssfolder within our local copy of theTutorial4folder. - Try previewing the results in a browser; if all is working as expected, we should see these icons appear:

Granted, it is a simple exercise, but then I've always been a fan of keeping things simple! Anyone can write CSS styles, but for me the "step up" is knowing that quantity does not always beat quality, and that there is something to be said for following the KISS principle, Keep It Simple… Yes, you get the idea!
But, just to show how flexible this plugin is, try this as an exercise:
- Browse to http://dataurl.net/, then upload each of the icons in turn, and use the site to generate data-URI equivalent code for each image.
- In the CSS, remove the existing background-image links, and replace them with the code from the
dataurl.netsite. - Go ahead and compile the code using the same principles we've used throughout this chapter. Looks identical, doesn't it? We've removed the need to pull in separate resources, as we're using a pure CSS solution...
But, there is a catch: when the file has been compiled, check the file size. It should tell you that it is significantly larger than the one which doesn't contain data-URI equivalent code. This is to be expected: it's the trade-off between sizes versus the number of resources we call. It only shows how critical the order of our PostCSS plugins would be, to get the desired results!