Table of Contents for
Mastering PostCSS for Web Design
 Mastering PostCSS for Web Design
Published by
Packt Publishing, 2016
Mastering PostCSS for Web Design
Published by
Packt Publishing, 2016
- Cover
- Table of Contents
- Mastering PostCSS for Web Design
- Mastering PostCSS for Web Design
- Credits
- About the Author
- About the Reviewer
- www.PacktPub.com
- Preface
- What you need for this book
- Who this book is for
- Conventions
- Reader feedback
- Customer support
- 1. Introducing PostCSS
- Introducing PostCSS
- Setting up a development environment
- Creating a simple example using PostCSS
- Linting code using plugins
- Exploring how PostCSS works
- Summary
- 2. Creating Variables and Mixins
- Creating a hover effect example
- Transitioning to using PostCSS
- Adding variable support to PostCSS
- Updating our hover effect demo
- Setting the order of plugins
- Creating mixins with PostCSS
- Looping content with PostCSS
- Summary
- 3. Nesting Rules
- Navigating through pages
- Transitioning to using PostCSS plugins
- Exploring the pitfalls of nesting
- Making the switch to BEM
- Exploring our changes in more detail
- Summary
- 4. Building Media Queries
- Exploring custom media queries in PostCSS
- Making images responsive
- Adding responsive text support
- Optimizing media queries
- Retrofitting support for older browsers
- Moving away from responsive design
- Taking things further with CSS4
- Summary
- 5. Managing Colors, Images, and Fonts
- Managing fonts with PostCSS
- Creating image sprites
- Working with SVG in PostCSS
- Adding support for WebP images
- Manipulating colors and color palettes
- Creating color functions with PostCSS
- Summary
- 6. Creating Grids
- Creating an example with Bourbon Neat
- Exploring the grid plugins in PostCSS
- Transitioning to using PostCSS-Neat
- Creating a site using Neat and PostCSS
- Adding responsive capabilities
- Summary
- 7. Animating Elements
- Moving away from jQuery
- Making use of pre-built libraries
- Switching to using SASS
- Making the switch to PostCSS
- Exploring plugin options within PostCSS
- Updating code to use PostCSS
- Creating a demo in PostCSS
- Optimizing our animations
- Using our own animation plugin
- Summary
- 8. Creating PostCSS Plugins
- Dissecting the architecture of a standard plugin
- Creating an transition plugin
- Building a custom font plugin
- Simplifying the development process
- Guidelines for plugin building
- Making the plugin available for use
- Summary
- 9. Working with Shortcuts, Fallbacks, and Packs
- Exploring plugin packs for PostCSS
- Adding shortcuts with Rucksack
- Linting and optimizing your code
- Providing fallback support
- Summary
- 10. Building a Custom Processor
- Exploring our processor
- Dissecting issues with our processor
- Optimizing the output
- Adding reload capabilities
- Extending our processor further
- Testing the final pre-processor
- Getting started with some hints and tips
- Introducing the CSStyle library
- Summary
- 11. Manipulating Custom Syntaxes
- Preparing our environment
- Implementing custom syntax plugins
- Parsing CSS
- Formatting the output with the API
- Highlighting our syntax code
- Summary
- 12. Mixing Preprocessors
- Exploring the conversion process
- Introducing the Pleeease library
- Compiling with other preprocessors
- Using the PreCSS library
- Converting a WordPress installation
- Setting up our environment
- Considering the conversion process
- Making changes to our code
- Compiling and testing the changes
- Summary
- 13. Troubleshooting PostCSS Issues
- Exploring some common issues
- Getting help from others
- Summary
- 14. Preparing for the Future
- Converting CSS4 styles for use
- Supporting future syntax with cssnext
- Creating plugins to provide extra CSS4 support
- Summary
- Index
The PostCSS system will quite happily play nicely with other plugins, be they Gulp-based, or using another task runner such as Grunt or Broccoli. This opens up a real world of possibilities, limited only by your imagination! There is one small but important point, though—it makes it crucial that we not only optimize our processor output (as we have done), but also fine tune it to ensure that we've added functionality that suits our needs.
So, what can we add? Well, here's a starter for ten: how about compressing images? Another common task relates to adding responsive content—we've already covered this earlier in the book with the postcss-responsive-type plugin. We could take that further, by adding a task that resizes images automatically to different sizes; we can then use these as appropriate in a responsive site.
Ultimately, it is up to you—as time goes by and you get more accustomed to using PostCSS, then it is likely that you will find yourself using some plugins more than others. The key here, though, is not about simply adding in plugins haphazardly—instead, we're looking for plugins that we would use regularly in our development workflow, and can form the basis of a baseline processor. Any additional functionality that is needed to support a particular project can then be added at the appropriate time.
A great place to look is the PostCSS plugin directory at http://postcss.parts—it's worth taking a look to see what is there, and giving them a try! To get us started, we're going to work through a few ideas that are likely to be useful additions to your processor, beginning with improving support for source maps.
If we take a look back at our gulp file prior to completing the exercise in Fixing our gulp task file, we can see it worked, but it suffered from a major drawback. The compilation process produced an extra source map which was minified by name, but not in reality! This is clearly something we didn't need—the changes made to this task transformed it into what we have now:
var sourceMapLocation = ['dest/*.css', '!dest/*.min.css'];
...
gulp.task('sourcemap', ['rename'], function () {
  return gulp.src(sourceMapLocation)
...
});
This is a much better version—it only produces one source map file, which is not compressed; compression is not needed. That being said, we can still improve on it; it's simply a matter of working through the documentation to really explore what is available, and see if it can help us. As a starter, try this for size.
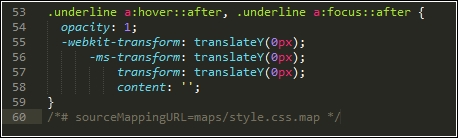
There may be instances where we need control over the full URL when compiling our code and creating the source map, for example, if we're transferring from a test environment to a production one. In an ideal world, we would use a relative file structure to avoid this issue, but for those occasions where this isn't possible, a simple change to our Gulp task will suffice:
    .pipe(sourcemaps.write('maps/', {
      sourceMappingURLPrefix: 'https://www.mydomain.com/'
    }))
We can see the result in this screenshot:
Ultimately, the requirements for our projects will determine how source map support needs to be configured—we may even have to go as far as compiling multiple files into one larger master file, if our project requirements dictate.
There's one thing to bear in mind, though—there are plans to include native source map support in Gulp 4; this will likely mean that the need for a separate plugin will become redundant. It pays to keep abreast of changes, particularly if it might affect our processor!
Let's change tack at this point, changing the source map compilation process was a straightforward alteration. We can take it up a notch with another key area—vendor prefixes. We've already covered the basics, so we'll take a look at how we can improve support.
Aha, prefixes! The bane of any designer: adding them and keeping them up to date can be a real chore.
The autoprefixer task that has already featured throughout these pages goes some way to reducing the burden: it will add the current prefixes and remove any that are no longer needed. This is good…but we can do better! This time around, though, the emphasis is less on code, and more on the kinds of decisions we need to make:
- What browser versions do you need to support? The
autoprefixerplugin already uses data from http://caniuse.com/, which is sufficient for most requirements. However, we can tweak our code to use Browserslist (hosted at https://github.com/ai/browserslist) to determine which versions to support. For example, we might add > 5% to limit support to browsers which have over 5% of global use:.pipe(postcss([ rucksack(), autoprefixer({browsers: ['last 2 versions']}) ])In an ideal world, I would push that as high as 10%, but that might be taking it too far!
- From a consistency perspective, we should make it clear that
autoprefixerisdisabledfrom within Rucksack—my preference is not to enable it there, as it can get confusing as to which plugin is adding prefixes (given thatcssnanocan add them too). To correct this, all we need to do is to change this line:.pipe(postcss([ rucksack({autoprefixer: false }), autoprefixer({browsers: ['last 2 versions']}) ])
It's not obligatory, but it at least makes it clear! If we wanted to be real purists, we would split this task into two separate ones, so that we're keeping to the one task: one role mantra:
- Although
autoprefixerhandles the removal of redundant prefixes, there is a useful trick we can use: add support for thepostcss-remove-prefixesandpostcss-unprefixplugins. The reason for this is simple—we may well not have a level playing field when runningautoprefixer, where some vendor prefixes may be missing from our code. Adding these two plugins ensures that our code is as terse as possible prior to runningautoprefixer. - If our code is based on using SASS, then there is a good chance that the Compass library is being used—it is worth checking to see if this is being used to add vendor prefixes. If it is, it may be worth switching to using
autoprefixer, as it is reported to be more efficient at removing code. Don't forget that we can compile SASS code within our Gulp file at the same time as running PostCSS plugins—we will explore more of this later in this book.
It goes without saying that vendor prefixes continually change; with careful planning and the right use of plugins, we can be safe in the knowledge that no matter what happens, our code will be updated at the next compilation.
Now, moving on: I am sure you are familiar with the ubiquitous pseudo-selector, such as hover. This is one area where we need to carefully consider what we might incorporate into our baseline processor; PostCSS has a number of plugins that can facilitate handling pseudo-selectors in our code. Let's take a look at this in more detail.
When designing sites, pseudo-selectors are a key part of providing interaction—they can be anything from the simple hover, all the way through to newer elements such as :range or :placeholder. We also have to be mindful of support—thankfully most elements will work in reasonably recent browsers (yes, even IE8!), but not all browsers use the same format of single or double colons when referencing the selector in CSS.
To help with both styling and providing consistency, PostCSS has a number of options we can use; we will explore using the postcss-pseudo-elements-content plugin in a moment, but for now, let's take a quick look at some of the options to give you a flavor of what is available:
- Do you often find yourself adding the
focuspseudo-selector to your code? If the answer is yes, then thepostcss-focusplugin will be of interest. Available from https://github.com/postcss/postcss-focus, this plugin will add afocuspseudo-selector automatically, when compiling code. The styles will be the same as the:hoverelement. - We've just talked about adding a
focuselement automatically—the developer Jonathan Neal had the idea of creating a polyfill to add support for an:enter pseudo-selector, which would replace both :hover and :focus within code. When compiled, the code would transpile any instance of:enterinto:hoverand:activestyles in our code. Head over to https://github.com/jonathantneal/postcss-pseudo-class-enter for more details on this plugin. - This next plugin could be euphemistically described as being one for those who have better things to do than write styles for links…. In plain speak, this is a real shortcut of a plugin! It adds styles for all of the link-related classes automatically; browse to https://github.com/jedmao/postcss-all-link-colors for an example of how to be really lazy…
- For those of you who regularly have to style form buttons (and face it, who doesn't?), then this next plugin from https://github.com/andrepolischuk/postcss-pseudo-class-any-button will be of interest: it allows us to use the
:any-buttonselector (which isn't an official selector). When compiled, it transpiles this into four different types—plain button and three inputs (reset, submit, and button).
This is just a small selection of the handful of plugins currently available in the PostCSS ecosystem, for handling pseudo-selectors. We can talk about using them, but in reality, the best way to understand their usefulness is to see them in action! With this in mind, let's take a look at one in action: postcss-pseudo-elements-content. This little beauty has but one purpose in life: to add a content: attribute to appropriate pseudo-selectors, if one is not present in our code.
There are a few examples of plugins that help handle pseudo-selectors better; our projects will dictate whether we should use them on a per case basis, or can incorporate some or all of them into our baseline processors.
One example that might suit being added to our baseline processor is postcss-pseudo-elements-content, which is available from https://github.com/omgovich/postcss-pseudo-elements-content. This simple plugin parses our code and will add a content: '' statement to our code, when it sees instances of appropriate pseudo-selectors. It doesn't require any configuration, so without further ado, let's get stuck into using it:
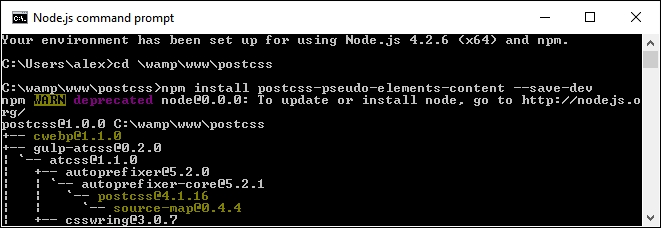
- We'll start as always with installing the plugin—for this, fire up a Node.js command prompt window and change the working folder to our project area.
- In the prompt, go ahead and run this command:
npm install postcss-pseudo-elements-content --save-dev
If all is well, we should see something akin to this:
- From a copy of the code download that accompanies this book, extract a copy of
style.cssandcontent.htmlfrom theT51 - adding before and after contentfolder. Save the style sheet to thesrcfolder, and thecontent.htmlto the root of our project area. - Open up a copy of
gulpfile.jsthat is at the root of our project area, then add this line in at line 11:var pseudoContent = require('postcss-pseudo-elements-content'); - A little further down, we need to update our first task to allow for the additional plugin; go ahead and alter the line as indicated:
gulp.task('styles', function() { return gulp.src('src/*.css') .pipe(postcss([ autoprefixer(), pseudoContent() ])) - In the Node.js command prompt, enter
gulpthen press Enter—if all is well, we should see our style sheet files and source map appear in thedestfolder. - Copy the contents of this folder to the
cssfolder at the root of our project areas; if we previewcontent.html, we should see our menu appear:
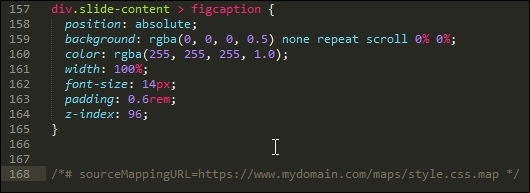
In a sense, this could be treated as a shortcut plugin (in a similar fashion to ones we worked with earlier in the book). The magic happens by adding –c after our pseudo-selector, as shown in this code extract:
.underline a:hover::after-c, .underline a:focus::after-c {
  opacity: 1;
  transform: translateY(0px);
}
When compiled, it adds the content: '' attribute, as shown in this screenshot:
Although it is debatable whether it is worth adding a plugin for something this small, it does at least ensure that we keep a consistent code base when compiling our style sheet.
The real decision is whether your code has sufficient instances of pseudo-selectors to warrant installing these plugins as part of a baseline, or if your projects dictate their use on a case-by-case basis.
Let's change tack, most of the improvements we've covered relate to text. Text sites can be very unappealing without images—thankfully, there are some plugins available to help extend our baseline processor, and better manage images. I feel a demo coming on, so let's go explore this in more detail.
If we were to consider our processor as being solely for compiling PostCSS code, then we are selling ourselves short—we've already covered how the use of a task runner such as Gulp allows us to add additional tasks such as autoprefixer and cssnano.
A great one to consider adding is the ability to compress our images for optimum size; would you want to do this manually, no matter how much or how little might be saved in size? I thought not. Automating this process means we can get on with tasks that add more value to the process. We can achieve this with the gulp-imagemin plugin, available from https://github.com/sindresorhus/gulp-imagemin—let's take a look at what might be involved in minifying our images:
- Fire up a Node.js command prompt window, then change the working directory to our project area.
- In the prompt, enter both commands, pressing Enter after each:
npm install gulp-imagemin --save-dev
npm install imagemin-jpegtran --save-dev
Keep the prompt open—we will use it again shortly.
- From the code download that accompanies this book, go ahead and extract copies of the
gulpfile.jsandpackage.jsonfiles from theT52 - optimizing imagesfolder; save these to the root of our project area. - Create a folder called
imgat the root of our project folder; this will be used as a temporary replacement for thedestfolder already present. - Find some large images—they should be JPEG format, and ideally be several megabytes in size; about four to six images will suffice.
- Go back to the Node.js prompt, then enter
gulpand press Enter—the screenshot below shows an example I performed with a handful of images: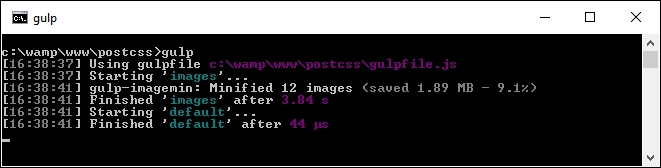
If all is well, we should see our newly compressed images in the img folder—this is a useful task to have within our processor, so let's go through a few points in more detail.
Image compression is key to a performant site—users will be turned off if the text appears within a couple of seconds, but images take much longer to appear! There are a few points to consider, though, with this approach:
- It's not particularly fast—minifying a dozen images each around 2 MB in size isn't too bad, but this isn't going to improve if you have to minify large numbers of images.
- We've limited our support to JPEG images—it is possible to optimize SVG and PNG images, but this will require changes to our code. If we look closely at the code used, we can see this:
var images = require('gulp-imagemin');
var jpegtran = require('imagemin-jpegtran');
The latter plugin is installed automatically by gulp-imagemin, and would need to be changed if working with SVG or PNG images:
- Tests performed locally seem to indicate that the size of reduction isn't as good as one might expect; I suspect that this will improve with much larger images. It is worth experimenting with changing the compression level—make sure your source images are as large as possible!
Once our images have been optimized for size, we can then explore further options—here are a couple worth considering:
- In the age of development over multiple devices, we need our images to be responsive; the gulp-responsive plugin available from https://github.com/azat-io/postcss-responsive-images can help create these images.
- We might want to use sprites instead. Thankfully, adding sprite support is easy within PostCSS: take a look at the postcss-sprites plugin for this task.
- You may like to consider using an asset manager to resolve URLs—the postcss-assets plugin is a perfect candidate for this task. The source and details for using are available from https://github.com/assetsjs/postcss-assets.
There's an important point to note, though—although plugins are available for the purpose, it is not worth considering minifying HTML; it is unlikely that you will get any significant space back, and the code will become hard to read. It is best to reserve minifying files for those external assets that have to be linked to your HTML pages, in order to get the most benefit.
Okay, let's move on: before we test our processor, there is one more idea that may be worth consideration. Adding an automatic reload capability to our code means that we do not need to reload our pages to view updated content. There is a heavy reliance on the use of Chrome to make it work, so it won't be for everyone: let's look at what would be involved in more detail.