Table of Contents for
Mastering PostCSS for Web Design
 Mastering PostCSS for Web Design
Published by
Packt Publishing, 2016
Mastering PostCSS for Web Design
Published by
Packt Publishing, 2016
- Cover
- Table of Contents
- Mastering PostCSS for Web Design
- Mastering PostCSS for Web Design
- Credits
- About the Author
- About the Reviewer
- www.PacktPub.com
- Preface
- What you need for this book
- Who this book is for
- Conventions
- Reader feedback
- Customer support
- 1. Introducing PostCSS
- Introducing PostCSS
- Setting up a development environment
- Creating a simple example using PostCSS
- Linting code using plugins
- Exploring how PostCSS works
- Summary
- 2. Creating Variables and Mixins
- Creating a hover effect example
- Transitioning to using PostCSS
- Adding variable support to PostCSS
- Updating our hover effect demo
- Setting the order of plugins
- Creating mixins with PostCSS
- Looping content with PostCSS
- Summary
- 3. Nesting Rules
- Navigating through pages
- Transitioning to using PostCSS plugins
- Exploring the pitfalls of nesting
- Making the switch to BEM
- Exploring our changes in more detail
- Summary
- 4. Building Media Queries
- Exploring custom media queries in PostCSS
- Making images responsive
- Adding responsive text support
- Optimizing media queries
- Retrofitting support for older browsers
- Moving away from responsive design
- Taking things further with CSS4
- Summary
- 5. Managing Colors, Images, and Fonts
- Managing fonts with PostCSS
- Creating image sprites
- Working with SVG in PostCSS
- Adding support for WebP images
- Manipulating colors and color palettes
- Creating color functions with PostCSS
- Summary
- 6. Creating Grids
- Creating an example with Bourbon Neat
- Exploring the grid plugins in PostCSS
- Transitioning to using PostCSS-Neat
- Creating a site using Neat and PostCSS
- Adding responsive capabilities
- Summary
- 7. Animating Elements
- Moving away from jQuery
- Making use of pre-built libraries
- Switching to using SASS
- Making the switch to PostCSS
- Exploring plugin options within PostCSS
- Updating code to use PostCSS
- Creating a demo in PostCSS
- Optimizing our animations
- Using our own animation plugin
- Summary
- 8. Creating PostCSS Plugins
- Dissecting the architecture of a standard plugin
- Creating an transition plugin
- Building a custom font plugin
- Simplifying the development process
- Guidelines for plugin building
- Making the plugin available for use
- Summary
- 9. Working with Shortcuts, Fallbacks, and Packs
- Exploring plugin packs for PostCSS
- Adding shortcuts with Rucksack
- Linting and optimizing your code
- Providing fallback support
- Summary
- 10. Building a Custom Processor
- Exploring our processor
- Dissecting issues with our processor
- Optimizing the output
- Adding reload capabilities
- Extending our processor further
- Testing the final pre-processor
- Getting started with some hints and tips
- Introducing the CSStyle library
- Summary
- 11. Manipulating Custom Syntaxes
- Preparing our environment
- Implementing custom syntax plugins
- Parsing CSS
- Formatting the output with the API
- Highlighting our syntax code
- Summary
- 12. Mixing Preprocessors
- Exploring the conversion process
- Introducing the Pleeease library
- Compiling with other preprocessors
- Using the PreCSS library
- Converting a WordPress installation
- Setting up our environment
- Considering the conversion process
- Making changes to our code
- Compiling and testing the changes
- Summary
- 13. Troubleshooting PostCSS Issues
- Exploring some common issues
- Getting help from others
- Summary
- 14. Preparing for the Future
- Converting CSS4 styles for use
- Supporting future syntax with cssnext
- Creating plugins to provide extra CSS4 support
- Summary
- Index
Remember our demo with a Japanese theme from earlier, in Creating an example with Bourbon Neat? It's a simple demo, using Bourbon Neat to help create our grid. The downside, though, is, of course, the dependency on SASS!
Well, we can fix that: PostCSS has a plugin available that mimics Bourbon Neat, but is written entirely in JavaScript, so there is no dependency on SASS. It's easy to install and use, over the next few pages, we'll work through the changes required to switch to this plugin.
First though, let's get it set up:
- We'll begin by extracting a copy of the
Tutorial32folder from the code download that accompanies this book. Save this to the root of our project area. - Copy the
sample pre-compile.cssfile to thesrcfolder at the root of our project area. - Copy the
gulpfile.js,samplesite.htmlandpackage.jsonfiles to the root of our project area. These should replace any existing versions that are present. - Next, we need to install two plugins, although we've covered using
postcss-css-variablesearlier in the book, installing them will ensure the right references are added to thepackage.jsonfile. Go ahead and fire up a Node.js command prompt, then change the working folder to our project area. - At the command prompt, enter these two statements in turn, pressing Enter between each one:
npm install postcss-css-variables --save-dev
npm install postcss-nested
- When both plugins are installed, go ahead and enter
gulp, then press Enter to fire off a compilation of our style sheet. - If all is well, we should see two style sheets and a source
mapfolder appear in thedestfolder. Copy these to thecssfolder at the root of our project area. - If we fire up a copy of
samplesite.html, we should see our demo appear as before, but this time without the dependency on SASS: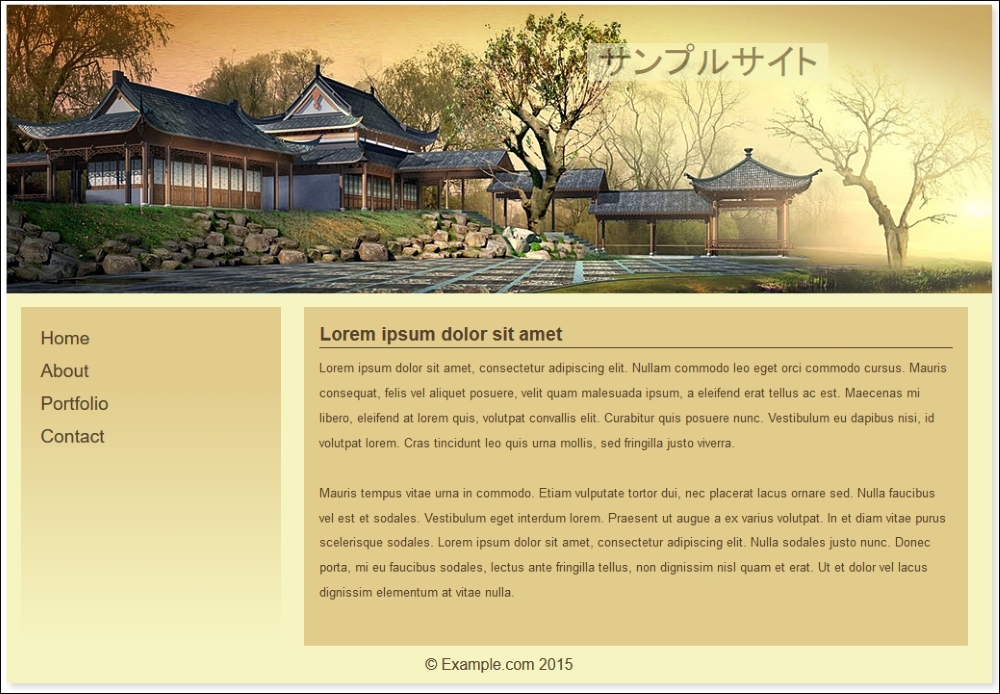
Do you notice any difference to our SASS-only version of this demo, from earlier? Hopefully not; while it may not be pixel-identical to the original, it is not far from it! However, it does show that with a little ingenuity, it is possible to make the transition to using PostCSS and still maintain the same results. It will require a few changes to your code and processes, so let's take a look at these in more detail, starting with the style sheet.
Making the switch requires changes in both the gulp task file and style sheet. These are not to change how the page will look, but to maintain the same theme from the original demo. The key changes made to the style sheet are:
- The
_reset.scsspartial style sheet that we import will no longer work, as we are removing the reliance on SASS. To maintain its use, a compiled version was created using the online playground at Sassmeister (http://www.sassmeister.com); we can then link to it from our markup page. - If you take a peek at the source version of
sample.css, you will see a:rootblock at the top of the file; this replaces theimportstatements we used. This block can be used to store any variables used, and we will cover this in more detail when we explore the changes made to ourgulptask file. - We no longer needed the following three statements; they are used to debug the SASS version of Bourbon Neat, and were then removed:
$visual-grid: true;
$visual-grid-color: #E6F6FF;
$visual-grid-opacity: 0.4;
- We're using PostCSS equivalents for all of the variable statements. The SASS versions were modified using search and replace from
$...tovar(--….), where the ... represents the variable name. - Our original code had a number of references to
Bourbonmixins which had to be updated. We used the same search and replace principle, this time changing@include outer…to@neat-outer…throughout the code. - To keep things simple, we manually calculated any instance where
$body-line-heightwas referenced, and replaced the calculation with the result. We could have stayed with using calculations, but it would have required the use of another plugin which would have been overkill for their limited use in our code. - We also adjusted the width of the main area in our page; it's a minor quirk, but required to ensure we had two areas side by side, and not one above the other!
In addition to altering our style sheet, we also had to make some changes to the gulp task file. They center around replacing the main compilation task and adding in additional tasks to manage production and minification of our source files:
- We added in the rename, lint-styles, and sourcemap tasks covered in earlier demos. These already worked well, and required no modification.
- We stripped out the original styles task, and replaced it with this:

This time, we're calling them
nested(),cssvariables()and Neat plugins. These are referenced used variables and are added in at the top of ourgulpfile. - Our final change is at the end of the
gulpfile, where we had to adjust the default and watcher tasks to include the additional tasks that we added to ourgulpfile.
At this stage, do we have a working demo ready for use? Well, not quite, but let's try resizing our demo:
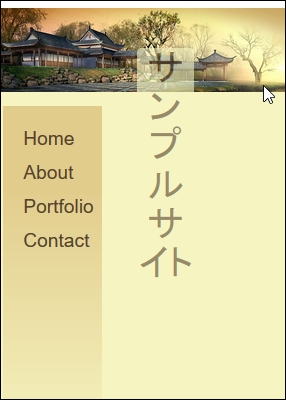
Hmm, what's happened to our content? It doesn't look great, does it? We can easily fix it though; it just requires the addition of some media queries to reorganize how our content is displayed on the screen. Let's dive in and take a look at what is needed to get our demo looking better at smaller sizes.