Table of Contents for
Mastering PostCSS for Web Design
 Mastering PostCSS for Web Design
Published by
Packt Publishing, 2016
Mastering PostCSS for Web Design
Published by
Packt Publishing, 2016
- Cover
- Table of Contents
- Mastering PostCSS for Web Design
- Mastering PostCSS for Web Design
- Credits
- About the Author
- About the Reviewer
- www.PacktPub.com
- Preface
- What you need for this book
- Who this book is for
- Conventions
- Reader feedback
- Customer support
- 1. Introducing PostCSS
- Introducing PostCSS
- Setting up a development environment
- Creating a simple example using PostCSS
- Linting code using plugins
- Exploring how PostCSS works
- Summary
- 2. Creating Variables and Mixins
- Creating a hover effect example
- Transitioning to using PostCSS
- Adding variable support to PostCSS
- Updating our hover effect demo
- Setting the order of plugins
- Creating mixins with PostCSS
- Looping content with PostCSS
- Summary
- 3. Nesting Rules
- Navigating through pages
- Transitioning to using PostCSS plugins
- Exploring the pitfalls of nesting
- Making the switch to BEM
- Exploring our changes in more detail
- Summary
- 4. Building Media Queries
- Exploring custom media queries in PostCSS
- Making images responsive
- Adding responsive text support
- Optimizing media queries
- Retrofitting support for older browsers
- Moving away from responsive design
- Taking things further with CSS4
- Summary
- 5. Managing Colors, Images, and Fonts
- Managing fonts with PostCSS
- Creating image sprites
- Working with SVG in PostCSS
- Adding support for WebP images
- Manipulating colors and color palettes
- Creating color functions with PostCSS
- Summary
- 6. Creating Grids
- Creating an example with Bourbon Neat
- Exploring the grid plugins in PostCSS
- Transitioning to using PostCSS-Neat
- Creating a site using Neat and PostCSS
- Adding responsive capabilities
- Summary
- 7. Animating Elements
- Moving away from jQuery
- Making use of pre-built libraries
- Switching to using SASS
- Making the switch to PostCSS
- Exploring plugin options within PostCSS
- Updating code to use PostCSS
- Creating a demo in PostCSS
- Optimizing our animations
- Using our own animation plugin
- Summary
- 8. Creating PostCSS Plugins
- Dissecting the architecture of a standard plugin
- Creating an transition plugin
- Building a custom font plugin
- Simplifying the development process
- Guidelines for plugin building
- Making the plugin available for use
- Summary
- 9. Working with Shortcuts, Fallbacks, and Packs
- Exploring plugin packs for PostCSS
- Adding shortcuts with Rucksack
- Linting and optimizing your code
- Providing fallback support
- Summary
- 10. Building a Custom Processor
- Exploring our processor
- Dissecting issues with our processor
- Optimizing the output
- Adding reload capabilities
- Extending our processor further
- Testing the final pre-processor
- Getting started with some hints and tips
- Introducing the CSStyle library
- Summary
- 11. Manipulating Custom Syntaxes
- Preparing our environment
- Implementing custom syntax plugins
- Parsing CSS
- Formatting the output with the API
- Highlighting our syntax code
- Summary
- 12. Mixing Preprocessors
- Exploring the conversion process
- Introducing the Pleeease library
- Compiling with other preprocessors
- Using the PreCSS library
- Converting a WordPress installation
- Setting up our environment
- Considering the conversion process
- Making changes to our code
- Compiling and testing the changes
- Summary
- 13. Troubleshooting PostCSS Issues
- Exploring some common issues
- Getting help from others
- Summary
- 14. Preparing for the Future
- Converting CSS4 styles for use
- Supporting future syntax with cssnext
- Creating plugins to provide extra CSS4 support
- Summary
- Index
A challenge that any developer or designer will face is which color should be used on a site—a nice shade of red, or how about sea blue, for example? It doesn't matter whether they are responsible for choosing the shade to use, or if they have to pick the right RGB or HEX color to use.
Irrespective of where responsibilities lie, we still have to choose a color, and there is a good chance we won't be choosing one that comes from the default 256-color palette, but one that is likely to be a lighter or darker shade, or perhaps a mix of two colors:

Anyone used to working with SASS will already be aware of functions such as lighten(), darken() or saturate()—the great thing about PostCSS is that we can replicate similar functionality for those who want to move away from the dependency of SASS.
To see how easy it is to use, we're going to combine the power of two plugins for PostCSS—postcss-color-palette (available at https://github.com/zaim/postcss-color-palette), and postcss-color-mix (from https://github.com/iamstarkov/postcss-color-mix). The former allows us to choose one or more colors from any of three palettes, while postcss-color-mix will mix specific colors to make a new color. There are reasons for using these plugins, which will become clear; for now, let's get stuck in and watch these plugins in action.
In this exercise, we're going to take a look at mixing colors; postcss-color-palette allows us to choose multiple colors by name (and not by number!), then converts them to HEX equivalent values. We can then either create gradient-type effects, or simply mix the colors together (using postcss-color-mix) to produce a new color.
Let's make a start:
- We'll start by extracting a copy of the
Tutorial24folder from the code download that accompanies this book; save the folder to the root of our project area. - From the
Tutorial24folder, copy thepackage.jsonandgulpfile.jsfiles to the root of our project area. - We also need our stylesheet, for this, go ahead and copy the
style – pre-compile.cssfile from the same folder and drop this into thesrcfolder in our project area. Rename it asstyle.css. - At this point we need to install the plugin, for this, so go ahead and fire up a Node.js command prompt session, then change the working folder to our project area.
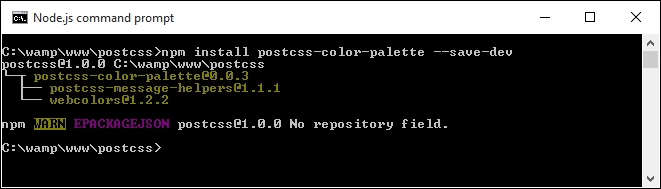
- At the prompt, enter the command shown in this screenshot, then press Enter, if all is well, we should see confirmation that the plugin has installed correctly:
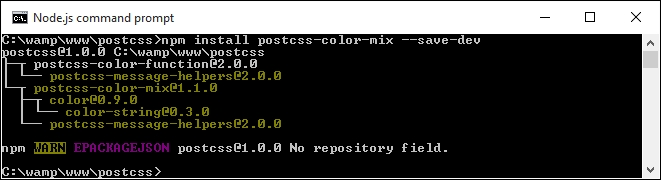
- Repeat step 5, but this time, run the command shown in this screenshot:
- At the prompt, enter
gulp, then press Enter—PostCSS will go away and compile the style sheet, and drop the compiled results into thedestfolder. - Copy the contents of the
destfolder (which will be the uncompressed and minified style sheets, along with a source map file) to thecssfolder within theTutorial24folder. - Try previewing
index.htmlat the root of ourTutorial24folder; if all is well, we should see our mixed colors, as shown in this screenshot:
Okay, the colors I've chosen clearly aren't going to win any style awards any time soon, but they help serve a purpose: it is very easy to use proper color names, if preferred, while still allowing PostCSS to compile them into valid HEX values. That aside, let's take a moment to consider the code we've used in this demo—it does raise a few key points, which we should cover, when using these plugins.
The demo we've created follows similar principles to most other demos we've built so far; we begin with declaring variables to store instances of our plugins, thus:
var palette = require('postcss-color-palette');
var colormix = require('postcss-color-mix')
The magic then happens in this task, within our gulp file:
gulp.task('palette', function () {
  return gulp.src('src/*.css')
  .pipe(postcss([ autoprefixer, palette({ palette: 'mrmrs' }), colormix() ]))
  .pipe(gulp.dest('dest/'));
});
Notice that we've specified a palette to use, the mrmrs option is the default, but we can equally use material or flatui as alternatives. All three reference the webcolors plugin from https://github.com/zaim/webcolors/; this package could be expanded to include other palettes if desired.
With the links to our two plugins in place, and the task set up, we can then begin to specify rules within our style sheet, which will use the plugins. We've created three, and all three use the postcss-color-palette to determine what the HEX value should be for each color; the third and final mixes the two colors together once HEX values have been assigned:
#box0 { background: linear-gradient(aqua, blue 50%, purple); }

#box1 { background: linear-gradient(to right, orange, red, yellow); }

#box2 { background: mix(teal, navy, 80%); }
Getting the mix of the color right for the third rule isn't easy, the key to a successful mix is to avoid using colors that are in the same spectrum; the closer they are, the less impact the mix will have!
If you want a quick way to gauge how well colors have mixed, then try http://jackiebalzer.com/color—this demo has a mix() option in it, which will compile them in the browser and avoid the need to run the compilation process manually.
We've covered some of the plugins that are likely to be more popular; there are more available via the PostCSS.parts directory, which may be of interest:
colorguard: Helps maintain a consistent color palettepostcss-ase-colors: Replaces color names with values read from an ASE palette file; this is perfect if you happen to be a user of Adobe PhotoShop, InDesign, or Illustratorpostcss-shades-of-gray: Helps keep grayscale colors consistent to a gray palettepostcss-color-pantone: Transforms Pantone color to RGB.
In the meantime, let's move on: we've explored using palettes to select our colors, before mixing them to create new ones. This is just scratching the surface of what is possible; how about creating different shades of colors, using functions such as darken(), tint() or lightness()? Such functions already exist in most preprocessors, such as SASS; let's explore how we can achieve the same results using PostCSS plugins.