Table of Contents for
OpenLayers 3.x Cookbook - Second Edition
 OpenLayers 3.x Cookbook - Second Edition
Published by
Packt Publishing, 2016
OpenLayers 3.x Cookbook - Second Edition
Published by
Packt Publishing, 2016
- Cover
- Table of Contents
- OpenLayers 3.x Cookbook Second Edition
- OpenLayers 3.x Cookbook Second Edition
- Credits
- About the Authors
- About the Reviewer
- www.PacktPub.com
- Preface
- What you need for this book
- Who this book is for
- Sections
- Conventions
- Reader feedback
- Customer support
- 1. Web Mapping Basics
- Creating a simple fullscreen map
- Playing with the map's options
- Managing the map's stack layers
- Managing the map's controls
- Moving around the map view
- Restricting the map's extent
- 2. Adding Raster Layers
- Using Bing imagery
- Using OpenStreetMap imagery
- Adding WMS layers
- Changing the zoom effect
- Changing layer opacity
- Buffering the layer data to improve map navigation
- Creating an image layer
- Setting the tile size in WMS layers
- 3. Working with Vector Layers
- Adding a GML layer
- Adding a KML layer
- Creating features programmatically
- Exporting features as GeoJSON
- Reading and creating features from a WKT
- Using point features as markers
- Removing or cloning features using overlays
- Zooming to the extent of a layer
- Adding text labels to geometry points
- Adding features from a WFS server
- Using the cluster strategy
- Reading features directly using AJAX
- Creating a heat map
- 4. Working with Events
- Creating a side-by-side map comparator
- Implementing a work-in-progress indicator for map layers
- Listening for the vector layer features' events
- Listening for mouse or touch events
- Using the keyboard to pan or zoom
- 5. Adding Controls
- Adding and removing controls
- Working with geolocation
- Placing controls outside the map
- Drawing features across multiple vector layers
- Modifying features
- Measuring distances and areas
- Getting feature information from a data source
- Getting information from a WMS server
- 6. Styling Features
- Styling layers
- Styling features based on geometry type
- Styling based on feature attributes
- Styling interaction render intents
- Styling clustered features
- 7. Beyond the Basics
- Working with projections
- Creating a custom control
- Selecting features by dragging out a selection area
- Transitioning between weather forecast imagery
- Using the custom OpenLayers library build
- Drawing in freehand mode
- Modifying layer appearance
- Adding features to the vector layer by dragging and dropping them
- Making use of map permalinks
- Index
We are going to create a map comparator. The goal is to have two maps side-by-side from different providers and synchronize the same position and zoom level. The source code can be found in ch04/ch04-map-comparator. Here's a screenshot of our two synchronized maps, side-by-side:
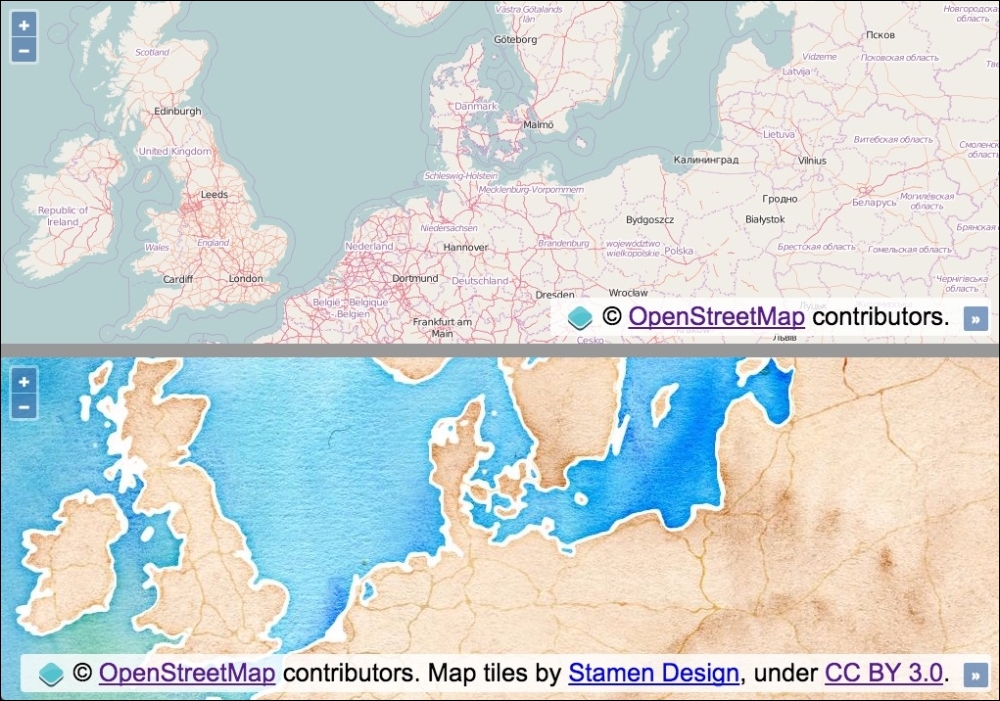
To have two maps work in synchronization, perform the following steps:
- Create an HTML file with OpenLayers library dependencies. In particular, the markup for the two maps and separator should look like the following:
<div id="js-map1"></div>
<hr/>
<div id="js-map2"></div>
- Create a custom JavaScript file and set up the shared
view:var view = new ol.View({ zoom: 5, center: [1252000, 7240000] }); - Instantiate the first map with the shared
view, as follows:var map1 = new ol.Map({ view: view, target: 'js-map1', layers: [ new ol.layer.Tile({source: new ol.source.OSM()}) ] }); - Finish off by instantiating the second map with the same shared
view:var map2 = new ol.Map({ view: view, target: 'js-map2', layers: [ new ol.layer.Tile({ source: new ol.source.Stamen({layer: 'watercolor'}) }) ] });
Although the CSS importantly presents the two maps side-by-side, we're going to skip over the details of the styling implementation in order to focus on the JavaScript. Please view the accompanying source code for a complete understanding behind the layout.
You can see that, with minimal effort, we can mirror the zoom and position of the map by simply sharing the view. We caught wind of how easy this was to do when we looked at the Buffering the layer data to improve the map navigation recipe in Chapter 2, Adding Raster Layers, where the solution also had two maps in synchronization.
OpenLayers 3 has externalized the view from any given map instance. This loose coupling design decision makes techniques like this possible. The OpenLayers view object is referenced by both map instances; so, when one map moves, the underlying object updates. This means that the new values also get presented within the other map instance.
As a learning exercise, we can demonstrate how to manually subscribe to the zoom, and position change events from one map instance and reflect the changes onto the other map instance. In this example, the views would not be shared:
map1.getView().on(['change:resolution', 'change:center'], syncMap);

function syncMap(event) {
  if (event.type === 'change:resolution') {
    map2.getView().setZoom(event.currentTarget.getZoom());
  } else {
    map2.getView().setCenter(event.currentTarget.getCenter());
  }
};
For the first map instance, we get hold of the view (getView), subscribe to the change:resolution and change:center events, and provide a handler function, namely syncMap. The change:center event is published when the map position has moved, and the change:resolution event is published when the map zoom level has changed.
When these events get published, our handler is called and passed an event object. This object contains the type of event (event.type). This is important as our handler captures multiple types of events. So, using this information, we're able to determine what action to perform based on the type of event.
The event object also contains a reference to the view that has been modified, namely event.currentTarget. We use this reference to the view to either retrieve the new zoom value (getZoom) or the new center coordinates (getCenter). We reflect these new values on the second map instance using either the setZoom or setCenter methods from the view object (of the second map instance).
This code has been simplified for brevity, as you'd also need to register for the same event types from the second map instance so that the first map instance can also be updated.
As well as listening to events, we can also cease listening to the notifications if we wish to do so.
The ol.Observable class has the un method, as well as the on method. The un method allows us to unsubscribe our listener functions from the published events that we previously subscribed to.
If we continue with our manual subscription example, to unsubscribe from future changes in the zoom level, we can perform the following:
map1.getView().un('change:resolution', syncMap);Similar to the on method, the un method allows you to unregister multiple listeners, so we could have passed an array of event types like we did for on, had we wanted to do this.
Our syncMap event handler will no longer be passed the zoom level event type.
There's also a method of ol.Observable, which is called once, that provides the ability to subscribe to an event, listen to just one published event of that type, and then automatically unsubscribe from future notifications.
There may be circumstances where this could prove very useful.
- The Using Bing imagery recipe in Chapter 2, Adding Raster Layers
- The Implementing a work-in-progress indicator for map layers recipe
- The Listening for vector layer features events recipe