Table of Contents for
OpenLayers 3.x Cookbook - Second Edition
 OpenLayers 3.x Cookbook - Second Edition
Published by
Packt Publishing, 2016
OpenLayers 3.x Cookbook - Second Edition
Published by
Packt Publishing, 2016
- Cover
- Table of Contents
- OpenLayers 3.x Cookbook Second Edition
- OpenLayers 3.x Cookbook Second Edition
- Credits
- About the Authors
- About the Reviewer
- www.PacktPub.com
- Preface
- What you need for this book
- Who this book is for
- Sections
- Conventions
- Reader feedback
- Customer support
- 1. Web Mapping Basics
- Creating a simple fullscreen map
- Playing with the map's options
- Managing the map's stack layers
- Managing the map's controls
- Moving around the map view
- Restricting the map's extent
- 2. Adding Raster Layers
- Using Bing imagery
- Using OpenStreetMap imagery
- Adding WMS layers
- Changing the zoom effect
- Changing layer opacity
- Buffering the layer data to improve map navigation
- Creating an image layer
- Setting the tile size in WMS layers
- 3. Working with Vector Layers
- Adding a GML layer
- Adding a KML layer
- Creating features programmatically
- Exporting features as GeoJSON
- Reading and creating features from a WKT
- Using point features as markers
- Removing or cloning features using overlays
- Zooming to the extent of a layer
- Adding text labels to geometry points
- Adding features from a WFS server
- Using the cluster strategy
- Reading features directly using AJAX
- Creating a heat map
- 4. Working with Events
- Creating a side-by-side map comparator
- Implementing a work-in-progress indicator for map layers
- Listening for the vector layer features' events
- Listening for mouse or touch events
- Using the keyboard to pan or zoom
- 5. Adding Controls
- Adding and removing controls
- Working with geolocation
- Placing controls outside the map
- Drawing features across multiple vector layers
- Modifying features
- Measuring distances and areas
- Getting feature information from a data source
- Getting information from a WMS server
- 6. Styling Features
- Styling layers
- Styling features based on geometry type
- Styling based on feature attributes
- Styling interaction render intents
- Styling clustered features
- 7. Beyond the Basics
- Working with projections
- Creating a custom control
- Selecting features by dragging out a selection area
- Transitioning between weather forecast imagery
- Using the custom OpenLayers library build
- Drawing in freehand mode
- Modifying layer appearance
- Adding features to the vector layer by dragging and dropping them
- Making use of map permalinks
- Index
Bing Maps is the mapping service provided by Microsoft. OpenLayers makes integration with this tile service very easy with the class ol.source.BingMaps. We'll explore the variety of imagery Bing Maps offers.
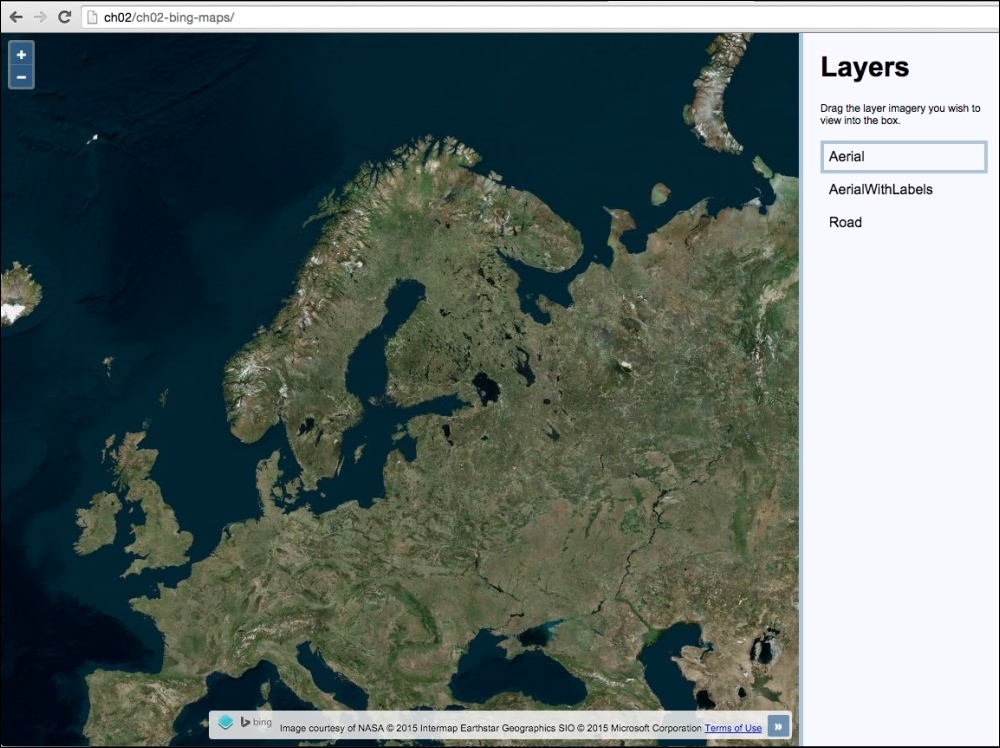
We're going to create a map with a panel containing a list of layers you can switch between. The source code can be found in ch02/ch02-bing-maps/. We will end up with something similar to the following screenshot:
Bing Maps requires you to register as a consumer user in order to access their REST tile service. Once registered, you'll be able to view your personal API key which is needed to initialize the OpenLayers Bing Maps source layer. Your API key is used to authenticate you against the Bing Maps service.
Note
You can find out how to register for an API key at https://www.bingmapsportal.com.
In addition to this, you can learn about the imagery that Bing Maps offers at https://msdn.microsoft.com/en-us/library/ff701716.aspx.
From this point on, it is assumed that you have an API key to be used in the upcoming code.
In this section, we will see how to use Bing Maps imagery. Here are the steps to follow:
- Create an HTML file and add the OpenLayers dependencies, as well as jQuery and jQuery UI (responsible for the sortable list of layers).
- Add the DOM elements to hold the map and layers panel, as follows:
<div id="js-map" class="map"></div>
<div class="pane">
  <h1>Layers</h1>
  <p>Drag the layer imagery you wish to view into the box.</p>
  <ul id="js-layers"></ul>
</div>
- Within your custom JavaScript file, create this map instance:
var map = new ol.Map({ view: new ol.View({ zoom: 4, center: [2520000, 8570000] }), target: 'js-map' }); - Store your API key into a variable, as follows:
var apiKey = 'your_api_key';
- Create a layer group with some Bing layers and add it to the map:
var layerGroup = new ol.layer.Group({ layers: [ new ol.layer.Tile({ source: new ol.source.BingMaps({ key: apiKey, imagerySet: 'Aerial' }), title: 'Aerial' }), new ol.layer.Tile({ source: new ol.source.BingMaps({ key: apiKey, imagerySet: 'AerialWithLabels' }), title: 'AerialWithLabels', visible: false }), new ol.layer.Tile({ source: new ol.source.BingMaps({ key: apiKey, imagerySet: 'Road', culture: 'en-GB' }), title: 'Road', visible: false }) ] }); map.addLayer(layerGroup); - Dynamically populate the list of layers in the UI:
var $layersList = $('#js-layers'); layerGroup.getLayers().forEach(function(element) { var $li = $('<li />'); $li.text(element.get('title')); $layersList.append($li); }); - Update the layer to be displayed on the map when the layers are reordered in the UI:
$layersList.sortable({
  update: function() {
    var topLayer = $layersList.find('li:first- child').text();

    layerGroup.getLayers().forEach(function(element) {
      element.setVisible(element.get('title') === topLayer);
    });
  }
});
The HTML and CSS divide the page into two sections: the map to the left and a slim layer-switching panel to the right. We won't go into anymore detail here, as we want to focus on the OpenLayers JavaScript code:
var map = new ol.Map({
  view: new ol.View({
    zoom: 4,
    center: [2520000, 8570000]
  }),
  target: 'js-map'
});
We create the map instance with properties view and target. We set up the layers property momentarily.
var apiKey = 'your_api_key';
We set up a variable to store our key inside, namely apiKey. Replace the 'your_api_key' string with your own API key, which will be a long random string.
The code moves on to build out a layer group containing three different imagery layers from Bing Maps. Let's examine these layers individually:
new ol.layer.Tile({
  source: new ol.source.BingMaps({
    key: apiKey,
    imagerySet: 'Aerial'
  }),
  title: 'Aerial'
})
Each Bing Maps layer is an instance of the ol.layer.Tile class, of which the source is an instance of ol.source.BingMaps. The mandatory properties are key and imagerySet. The layer type for this one is Aerial, which provides impressive satellite imagery of the world.
We set a custom title property of 'Aerial' for this layer. This name will be displayed in the layers list of the UI and is used for some JavaScript logic later on. You'll see that we give a custom title to each of our Bing Maps layers in order to identify them.
new ol.layer.Tile({
  source: new ol.source.BingMaps({
    key: apiKey,
    imagerySet: 'AerialWithLabels'
  }),
  title: 'AerialWithLabels',
  visible: false
})
Similar to the first Bing Maps layer, this layer type is AerialWithLabels. This imagery extends the Aerial imagery with some useful labels. We've also given this layer a custom title and set its visibility to false. This is because we only want to display a single layer at any one time. This will ensure OpenLayers doesn't make any unnecessary tile requests when a layer is out of sight.
new ol.layer.Tile({
  source: new ol.source.BingMaps({
    key: apiKey,
    imagerySet: 'Road',
    culture: 'en-GB'
  }),
  title: 'Road',
  visible: false
})
The final Bing Maps layer is of type Road. It comes as no surprise that this layer provides road details, great for navigation guidance. Familiar properties aside (title and visible), we've set a new property culture with the 'en-GB' value. Bing Maps attempts to localize street names into the local culture if applicable. So, if you were to request a location in Great Britain (en-GB), it will load localized data wherever available for this layer. For other supported culture codes, visit https://msdn.microsoft.com/en-us/library/hh441729.aspx.
map.addLayer(layerGroup);
The group of Bing layers is added to the map:
var $layersList = $('#js-layers');

layerGroup.getLayers().forEach(function(element) {
  var $li = $('<li />');
  $li.text(element.get('title'));
  $layersList.append($li);
});
We cache the layers list (<ul id="js-layers" class="layers"></ul>) into a variable, namely $layersList. We then loop over each layer of the layer group and dynamically add the layer name into the list for display. The handy get method is used to fetch the title of the layer we set during initialization.
$layersList.sortable({
  update: function() {
    var topLayer = $layersList.find('li:first-child').text();

    layerGroup.getLayers().forEach(function(element) {
      element.setVisible(element.get('title') === topLayer);
    });
  }
});
jQuery UI enables the list of layers to be sorted. When an item is dragged into a new position in the list, the update event fires. Within our event handler, we cache the name of the top layer in the list (topLayer). After this, we loop over all the layers on the map and display the corresponding layer. All other layers get hidden (by setting their visibility to false). We are able to link the two sets of layers via their title property.