Table of Contents for
OpenLayers 3.x Cookbook - Second Edition
 OpenLayers 3.x Cookbook - Second Edition
Published by
Packt Publishing, 2016
OpenLayers 3.x Cookbook - Second Edition
Published by
Packt Publishing, 2016
- Cover
- Table of Contents
- OpenLayers 3.x Cookbook Second Edition
- OpenLayers 3.x Cookbook Second Edition
- Credits
- About the Authors
- About the Reviewer
- www.PacktPub.com
- Preface
- What you need for this book
- Who this book is for
- Sections
- Conventions
- Reader feedback
- Customer support
- 1. Web Mapping Basics
- Creating a simple fullscreen map
- Playing with the map's options
- Managing the map's stack layers
- Managing the map's controls
- Moving around the map view
- Restricting the map's extent
- 2. Adding Raster Layers
- Using Bing imagery
- Using OpenStreetMap imagery
- Adding WMS layers
- Changing the zoom effect
- Changing layer opacity
- Buffering the layer data to improve map navigation
- Creating an image layer
- Setting the tile size in WMS layers
- 3. Working with Vector Layers
- Adding a GML layer
- Adding a KML layer
- Creating features programmatically
- Exporting features as GeoJSON
- Reading and creating features from a WKT
- Using point features as markers
- Removing or cloning features using overlays
- Zooming to the extent of a layer
- Adding text labels to geometry points
- Adding features from a WFS server
- Using the cluster strategy
- Reading features directly using AJAX
- Creating a heat map
- 4. Working with Events
- Creating a side-by-side map comparator
- Implementing a work-in-progress indicator for map layers
- Listening for the vector layer features' events
- Listening for mouse or touch events
- Using the keyboard to pan or zoom
- 5. Adding Controls
- Adding and removing controls
- Working with geolocation
- Placing controls outside the map
- Drawing features across multiple vector layers
- Modifying features
- Measuring distances and areas
- Getting feature information from a data source
- Getting information from a WMS server
- 6. Styling Features
- Styling layers
- Styling features based on geometry type
- Styling based on feature attributes
- Styling interaction render intents
- Styling clustered features
- 7. Beyond the Basics
- Working with projections
- Creating a custom control
- Selecting features by dragging out a selection area
- Transitioning between weather forecast imagery
- Using the custom OpenLayers library build
- Drawing in freehand mode
- Modifying layer appearance
- Adding features to the vector layer by dragging and dropping them
- Making use of map permalinks
- Index
The panning and zoom effects are very important actions that are related to the user navigation experience. In Chapter 1, Web Mapping Basics, the Moving around the map view recipe shows you how you can control and animate the way the map can be panned, zoomed, and rotated.
In this recipe, we'll explore animations even further by demonstrating different ways that you can customize transition effects between two zoom levels on the layer.
By default, OpenLayers animates the zoom transitions. In order to customize this ourselves, OpenLayers comes with a series of different animation methods that are available from ol.animation object. For this recipe, we'll use the ol.animation.bounce and ol.animation.zoom methods to customize the zoom effects.
We will have a panel on the right so that you can choose the animation-easing algorithm, the duration and whether or not to use the bounce effect.
Here's a screenshot of what we'll end up with (the source code can be found in ch02/ch02-zoom-effect):
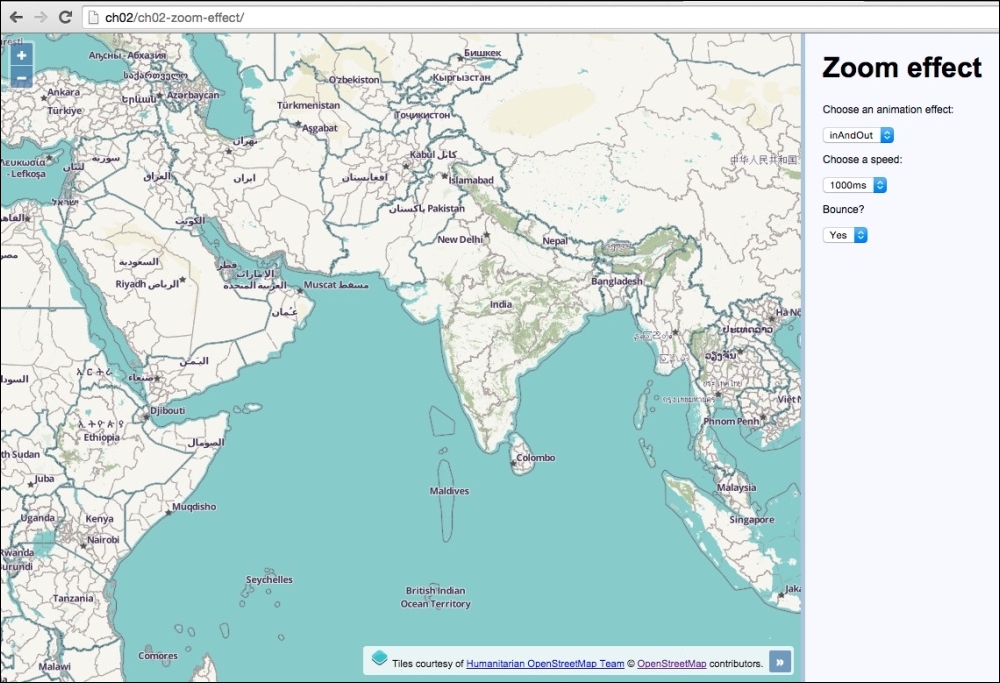
In this section we'll see how to change the zoom effects. Follow the steps outlined:
- Create an HTML file and include the required OpenLayers dependencies. In particular, create the form elements to dynamically update the effects:
<p>Choose an animation effect:</p>
<select id="js-zoom-effect">
  <option value="easeIn">easeIn</option>
  <option value="easeOut">easeOut</option>
  <option value="inAndOut" selected>inAndOut</option>
  <option value="linear">linear</option>
</select>

<p>Choose a speed:</p>
<select id="js-zoom-speed">
  <option value="100">100ms</option>
  <option value="250">250ms</option>
  <option value="500">500ms</option>
  <option value="1000" selected>1000ms</option>
</select>

<p>Bounce?</p>
<select id="js-bounce">
  <option value="true">Yes</option>
  <option value="false">No</option>
</select>
- Create your custom JavaScript file and build the
mapinstance with the Humanitarian OpenStreetMap layer:var map = new ol.Map({ view: new ol.View({ zoom: 5, center: [9686000, 1707000] }), target: 'js-map', layers: [ new ol.layer.Tile({ source: new ol.source.OSM({ attributions: [ new ol.Attribution({ html: 'Tiles courtesy of ' + '<a href="http://hot.openstreetmap.org">' + 'Humanitarian OpenStreetMap Team</a>' }), ol.source.OSM.ATTRIBUTION ], url: 'http://{a-c}.tile.openstreetmap.fr/' + 'hot/{z}/{x}/{y}.png' }) }) ] }); - Cache the form DOM elements into variables, as follows:
var easingSelect = document.getElementById('js-zoom-effect'); var durationSelect = document.getElementById('js-zoom-speed'); var bounceSelect = document.getElementById('js-bounce'); - Add an event listener to the map view for zoom changes and create the animation effects based off the current form input values:
map.getView().on('change:resolution', function(event) {
  if (bounceSelect.value === 'true') {
    map.beforeRender(ol.animation.bounce({
      resolution: map.getView().getResolution() * 1.5,
      duration: parseInt(durationSelect.value, 10)
    }));
  } else {
    map.beforeRender(ol.animation.zoom({
      resolution: event.oldValue,
      duration: parseInt(durationSelect.value, 10),
      easing: ol.easing[easingSelect.value]
    }));
  }
});
The HTML form elements provide a live reflection of the animation configuration. Each form element has an ID attribute that we use to select and cache the DOM elements within JavaScript, as we'll potentially access the values of these elements many times.
Our JavaScript sets up the map and associative properties, including the OpenStreetMap Humanitarian layer. This should all look familiar to you, so without further ado, we'll examine the logic behind the zoom transitions:
map.getView().on('change:resolution', function(event) {We subscribe to any resolution (zoom) changes on the map view and register an anonymous function as the event handler.
if (bounceSelect.value === 'true') {
    map.beforeRender(ol.animation.bounce({
      resolution: map.getView().getResolution() * 1.5,
      duration: parseInt(durationSelect.value, 10)
    }));
  }
We run a conditional check to see whether or not the value for the bounce select menu is 'true' or 'false'. If it's true, then we register a customized ol.animation.bounce method to be added onto the beforeRender queue. We pass in a desired resolution of 1.5 times the original resolution, to give it a suitable bounce effect. The duration amount is derived from the durationSelect menu value. We run the duration value through the JavaScript parseInt method to ensure it's in the right type for OpenLayers. The duration is in milliseconds.
Note
To describe the bounce effect by analogy, is to imagine a tennis ball hitting the ground from some height. As it impacts the surface, it jumps back up until it finally loses momentum and comes to rest on the surface. For example, when you zoom into the map, it's as though you become the descending ball, so you bounce your way to the final resolution. When you alter the easing value (the algorithm used), such as easeOut, it changes the spacing between the animation frames resulting in a different motion of events.
As we can see, the map instance has a beforeRender method that expects a function of type ol.PreRenderFunction. The ol.animation methods return a function of this expected type. This function type performs incremental manipulation of the view before rendering the final state of the view, which is perfect for animations.
The ol.PreRenderFunction method accepts two parameters: the map instance, and the frame state. The latter is a shared object in OpenLayers that represents the current render frame state. It provides information such as the current state of the view (center position, resolution, and so on) and current timestamp. These are metrics that animation algorithms (made up mostly of mathematical calculations to apply easing techniques) utilize to perform their visual effects. Within the function, you return true to run this function for the next frame; otherwise, you return false to dispose of it (in other words, your animation is complete).
The ol.animation.bounce variation of this function type performs incremental manipulations that produce a zooming request that 'bounces' into position.
} else {
  map.beforeRender(ol.animation.zoom({
    resolution: event.oldValue,
    duration: parseInt(durationSelect.value, 10),
    easing: ol.easing[easingSelect.value]
  }));
}
If the bounce effect has been disabled, then we add a standard zoom animation with the ol.animation.zoom method to the beforeRender map method.
For the starting point of the animation, the resolution is set to the old resolution value, which is available from the event object (event.oldValue). The duration is once again plucked straight from the duration select menu and passed into the JavaScript parseInt method for type conversion.
We can customize the easing algorithm that is used for the zoom animation effect. The easing property expects an appropriate easing function. OpenLayers comes with a selection of effects to choose from, the majority of which we made available from the easing select menu.
For example, one of the OpenLayers easing methods is ol.easing.easeIn. To dynamically use one of these easing functions from a value in the select menu, we perform an object lookup via array notation. So, to continue with this example, if you select the easeIn option from the select menu, ol.easing[easingSelect.value] becomes ol.easing['easeIn'].
Although OpenLayers offers some easing methods out of the box, you can just as well extend the list and provide any easing algorithms yourself. You may have used some easing algorithms from other libraries that you'd like to port into OpenLayers.
The ol.animation methods all have a start property. This means that you can delay the start of the animation. The default start time is immediately.