
Let's start with an example. The React Native component you'll use to render lists is FlatList, which works the same way on iOS and Android. List views accepts a data property, which is an array of objects. These objects can have any properties you like, but they do require a key property. This is similar to the key property requirement for rendering <li> elements inside of a <ul> element. This helps the list to efficiently render the list when changes are made to the list data.
Let's implement a basic list now. Here's the code to render a basic 100-item list:
import React from 'react';
import { Text, View, FlatList } from 'react-native';

import styles from './styles';

const data = new Array(100)
  .fill(null)
  .map((v, i) => ({ key: i.toString(), value: `Item ${i}` }));

export default () => (
  <View style={styles.container}>
    <FlatList
      data={data}
      renderItem={({ item }) => (
        <Text style={styles.item}>{item.value}</Text>
      )}
    />
  </View>
);
Let's walk through what's going on here, starting with the data constant. This is an array of 100 items in it. It is created by filling a new array with 100 null values and then mapping this to a new array with the objects that you want to pass to <FlatList>. Each object has a key property because this is a requirement. Anything else is optional. In this case, you've decided to add a value property that value be used later or when the list is rendered.
Next, you render the <FlatList> component. It's within a <View> container because list views need a height in order to make scrolling work correctly. The data and the renderItem properties are passed to <FlatList>, which ultimately determines the rendered content.
At first glance, it would seem that the FlatList component doesn't do too much. You have to figure out how the items look? Well, yes, the FlatList component is supposed to be generic. It's supposed to excel at handling updates, and embeds scrolling capabilities into lists for us. Here are the styles that were used to render the list:
import { StyleSheet } from 'react-native';

export default StyleSheet.create({
  container: {
    // Flexing from top to bottom gives the
    // container a height, which is necessary
    // to enable scrollable content.
    flex: 1,
    flexDirection: 'column',
    paddingTop: 20,
  },

  item: {
    margin: 5,
    padding: 5,
    color: 'slategrey',
    backgroundColor: 'ghostwhite',
    textAlign: 'center',
  },
});
Here, you're styling each item in your list. Otherwise, each item would be text-only and would be difficult to differentiate between other list items. The container style gives the list a height by setting the flexDirection to column. Without a height, you won't be able to scroll properly.
Let's see what this thing looks like now:
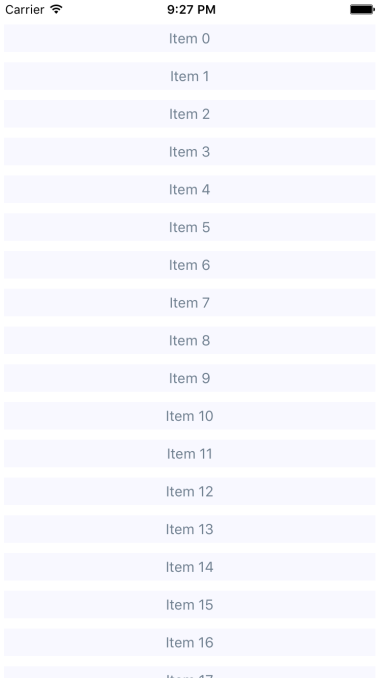
If you're running this example in a simulator, you can click and hold down the mouse button anywhere on the screen, like a finger, then scroll up or down through the items.