Table of Contents for
Mastering OpenLayers 3
 Mastering OpenLayers 3
Published by
Packt Publishing, 2016
Mastering OpenLayers 3
Published by
Packt Publishing, 2016
- Cover
- Table of Contents
- Mastering OpenLayers 3
- Mastering OpenLayers 3
- Credits
- About the Author
- About the Reviewer
- www.PacktPub.com
- Preface
- What you need for this book
- Who this book is for
- Conventions
- Reader feedback
- Customer support
- 1. Creating Simple Maps with OpenLayers 3
- Structure of OpenLayers 3
- Building the layout
- Using the API documentation
- Debugging the code
- Summary
- 2. Applying Custom Styles
- Customizing the default appearance
- Styling vector layers
- Customizing the appearance with JavaScript
- Creating a WebGIS client layout
- Summary
- 3. Working with Layers
- Building a layer tree
- Adding layers dynamically
- Adding vector layers with the File API
- Adding vector layers with a library
- Removing layers dynamically
- Changing layer attributes
- Changing the layer order with the Drag and Drop API
- Clearing the message bar
- Summary
- 4. Using Vector Data
- Accessing attributes
- Setting attributes
- Validating attributes
- Creating thematic layers
- Saving vector data
- Saving with WFS-T
- Modifying the geometry
- Summary
- 5. Creating Responsive Applications with Interactions and Controls
- Building the toolbar
- Mapping interactions to controls
- Building a set of feature selection controls
- Adding new vector layers
- Building a set of drawing tools
- Modifying and snapping to features
- Creating new interactions
- Building a measuring control
- Summary
- 6. Controlling the Map – View and Projection
- Customizing a view
- Constraining a view
- Creating a navigation history
- Working with extents
- Rotating a view
- Changing the map's projection
- Creating custom animations
- Summary
- 7. Mastering Renderers
- Using different renderers
- Creating a WebGL map
- Drawing lines and polygons with WebGL
- Blending layers
- Clipping layers
- Exporting a map
- Creating a raster calculator
- Creating a convolution matrix
- Clipping a layer with WebGL
- Summary
- 8. OpenLayers 3 for Mobile
- Responsive styling with CSS
- Generating geocaches
- Adding device-dependent controls
- Vectorizing the mobile version
- Making the mobile application interactive
- Summary
- 9. Tools of the Trade – Integrating Third-Party Applications
- Exporting a QGIS project
- Importing shapefiles
- Spatial analysis with Turf
- Spatial analysis with JSTS
- 3D rendering with Cesium
- Summary
- 10. Compiling Custom Builds with Closure
- Configuring Node JS
- Compiling OpenLayers 3
- Bundling an application with OpenLayers 3
- Extending OpenLayers 3
- Creating rich documentation with JSDoc
- Summary
- Index
As a first task, we will need a copy of Node JS running on our system. We can get this piece of software in different ways on different systems. This book covers the installation process on Windows and Linux systems. After the installation, everything will work similarly from the command line or terminal.
Tip
If you use the Mac OS X, there are great tutorials to install Node JS on the Web. The http://coolestguidesontheplanet.com/installing-node-js-on-osx-10-10-yosemite/ website shows you how to install it with a precompiled binary (do not be misled by the title; it's the one for El Capitan), while http://sourabhbajaj.com/mac-setup/Node.js/README.html shows you how to install it using brew.
To get Node JS on Windows, we have to download the installer from its home page. First, we navigate to https://nodejs.org/en/, where the site tries to detect our system configuration and automatically offers a version to download. In most cases, this version is the appropriate one.
Next, we download the installer and run it. Then, the installation wizard leads us through the installation process. We can leave every option in their default values. After the installation is finished, we get some shortcuts for different purposes:
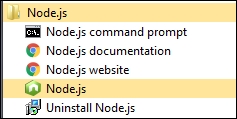
From the available shortcuts, we will need the command prompt (Node.js command prompt) as we will need to start various JavaScript programs. When we start a program, we get a default command line with the message: the command line is configured to work with Node JS. The only thing left to do is navigate to the folder containing the source code of OpenLayers 3. We can easily do this with the cd command and a relative path from the current directory.
Tip
If you have your source code on a different partition, you have to change the current partition first. You can do this by simply typing in the letter of the partition. For example, if you have your source code on partition D and you are in partition C, just type D: in the command prompt before changing the current directory.
In Linux, we can easily install Node JS if we have a distribution with a package management system. The only restriction is that we must have superuser privileges to install new packages. Therefore, we have to change to a superuser with su or prepend sudo to the following commands. For Debian-based distributions (such as Ubuntu), we have to run the following command in the terminal:
apt-get install node
In systems based on Fedora and Red Hat, we can use the yum package manager to achieve the same results:
yum install node
If we used su to switch to the superuser, we switch back with the exit or logout commands, and navigate to the source code's directory using cd.
The installation process of Node JS gave us two programs for our use: node and
npm. npm stands for Node Package Manager, and we will use it to install every dependency of OpenLayers 3. npm can be used to install packages globally or only for a single project. We will use the latter option as it is a cleaner solution for our case. From now on, every step will be almost identical on different operating systems.
To resolve the dependencies of OpenLayers 3, we only have to type the following command in the terminal from the directory of the source code (src/ol3-3.11.1):
npm install
If we wait for the command to finish, we will notice that there are two new folders in the directory, called node_modules and build. The node_modules folder contains every node package used by OpenLayers 3 on compilation. The other folder contains some external JavaScript libraries, which are bundled with OpenLayers 3.