Table of Contents for
Mastering OpenLayers 3
 Mastering OpenLayers 3
Published by
Packt Publishing, 2016
Mastering OpenLayers 3
Published by
Packt Publishing, 2016
- Cover
- Table of Contents
- Mastering OpenLayers 3
- Mastering OpenLayers 3
- Credits
- About the Author
- About the Reviewer
- www.PacktPub.com
- Preface
- What you need for this book
- Who this book is for
- Conventions
- Reader feedback
- Customer support
- 1. Creating Simple Maps with OpenLayers 3
- Structure of OpenLayers 3
- Building the layout
- Using the API documentation
- Debugging the code
- Summary
- 2. Applying Custom Styles
- Customizing the default appearance
- Styling vector layers
- Customizing the appearance with JavaScript
- Creating a WebGIS client layout
- Summary
- 3. Working with Layers
- Building a layer tree
- Adding layers dynamically
- Adding vector layers with the File API
- Adding vector layers with a library
- Removing layers dynamically
- Changing layer attributes
- Changing the layer order with the Drag and Drop API
- Clearing the message bar
- Summary
- 4. Using Vector Data
- Accessing attributes
- Setting attributes
- Validating attributes
- Creating thematic layers
- Saving vector data
- Saving with WFS-T
- Modifying the geometry
- Summary
- 5. Creating Responsive Applications with Interactions and Controls
- Building the toolbar
- Mapping interactions to controls
- Building a set of feature selection controls
- Adding new vector layers
- Building a set of drawing tools
- Modifying and snapping to features
- Creating new interactions
- Building a measuring control
- Summary
- 6. Controlling the Map – View and Projection
- Customizing a view
- Constraining a view
- Creating a navigation history
- Working with extents
- Rotating a view
- Changing the map's projection
- Creating custom animations
- Summary
- 7. Mastering Renderers
- Using different renderers
- Creating a WebGL map
- Drawing lines and polygons with WebGL
- Blending layers
- Clipping layers
- Exporting a map
- Creating a raster calculator
- Creating a convolution matrix
- Clipping a layer with WebGL
- Summary
- 8. OpenLayers 3 for Mobile
- Responsive styling with CSS
- Generating geocaches
- Adding device-dependent controls
- Vectorizing the mobile version
- Making the mobile application interactive
- Summary
- 9. Tools of the Trade – Integrating Third-Party Applications
- Exporting a QGIS project
- Importing shapefiles
- Spatial analysis with Turf
- Spatial analysis with JSTS
- 3D rendering with Cesium
- Summary
- 10. Compiling Custom Builds with Closure
- Configuring Node JS
- Compiling OpenLayers 3
- Bundling an application with OpenLayers 3
- Extending OpenLayers 3
- Creating rich documentation with JSDoc
- Summary
- Index
In the next example, called ch08_controls, we create some roles for the different devices identified by OpenLayers 3. Firstly, we add some CSS rules for our new text-based control:
@media only screen and (orientation: portrait) {
    […]
    .ol-geoloc {
        bottom: 0;
        right: .5em;
        white-space: pre-wrap;
    }
}
@media only screen and (orientation: landscape) {
    […]
    .ol-geoloc {
        top: 0;
        right: .5em;
    }
}
As we will place our control in a pre element for correct line break detection, we need to wrap it in portrait mode. Otherwise, the end of the lines would be off the screen. We also change the position of this control based on the orientation of the device. Next, we change our Geolocation object a little bit to request high accuracy data on a regular basis:
var geoloc = new ol.Geolocation({
    projection: map.getView().getProjection(),
    tracking: true,
    trackingOptions: {
        enableHighAccuracy: true,
        maximumAge: 2000
    }
});
Now, if we can access the GPS, the data will be updated at 2-second intervals with high accuracy.
Note
There are three tracking options in OpenLayers 3's Geolocation object, just like in the HTML5 Geolocation API. The enableHighAccuracy parameter requests data from GPS results in higher-precision and higher-power consumption. The timeout parameter defines how old the received data can be before it is considered outdated. The maximumAge parameter denotes how old a cached position can be before it is considered outdated. The last two parameters are accepted in milliseconds.
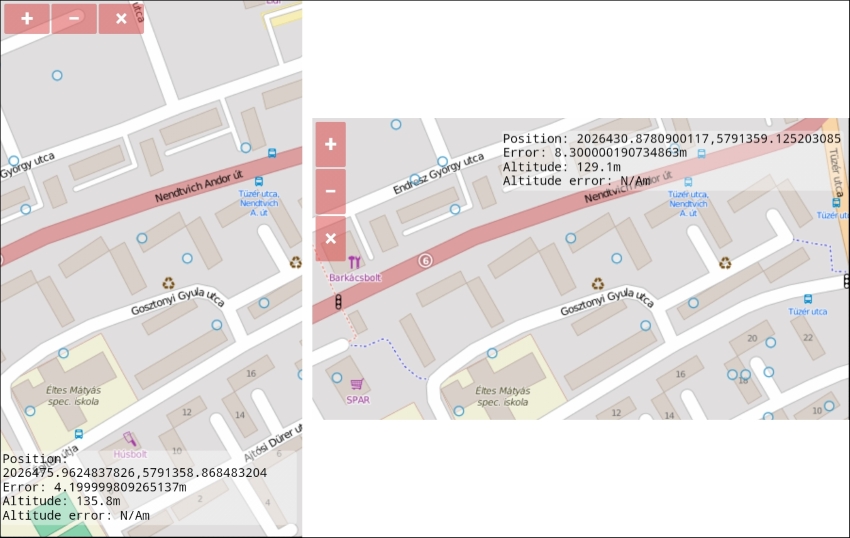
As a next step, we define some controls that will only be added when we open our application from a touch device. We add a full screen control for maximum usability and a custom control to display Geolocation-related data:
if (ol.has.TOUCH) {
    document.getElementById('map').classList.add('ol-touch');
    map.addControl(new ol.control.FullScreen({
        target: 'toolbar'
    }));
    var geolocData = document.createElement('pre');
    geolocData.className = 'ol-geoloc ol-unselectabble ol-control';
    geoloc.on('change', function (evt) {
        var dataString = 'Position: ' + this.getPosition() + '\nError: ' + this.getAccuracy() + 'm\nAltitude: ' + this.getAltitude() + 'm\nAltitude error: ' + this.getAltitudeAccuracy() + 'm';
        geolocData.textContent = dataString.replace(/undefined/g, 'N/A');
    });
    map.addControl(new ol.control.Control({
        element: geolocData
    }));
}
As we concatenate Geolocation-related data to a single string with line breaks, we provide them in a pre element; thus, the browsers will follow those breaks. If we cannot access a value and the library returns undefined, we simply replace that value to N/A with a regular expression. If you save the code in this state and load it up from your smartphone, you will see uniform control buttons and a nice text output in full screen. This is the way our application should be used on touch devices:
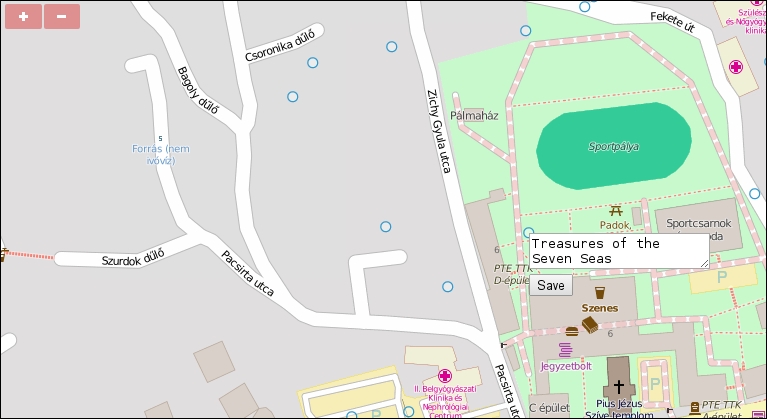
If the library detects a regular device, it gives that a dispatcher role. A dispatcher should be able to move points and edit the loot of the geocaches in our scenario. Therefore, we add two such interactions to our map. We also disable Geolocation as we do not need it from a desktop computer:
} else {
    geoloc.once('change', function (evt) {
        this.setTracking(false);
        map.addInteraction(new ol.interaction.Modify({
            features: new ol.Collection(geoCaching.getSource().getFeatures())
        }));
    });
Finally, we create our next interaction by registering a listener to the map's click event. We query every feature under the click location, which has a loot attribute, and create an output with its value. We wrap this output in an overlay and display it on the map anchored on the clicked feature. We use the usual forEachFeatureAtPixel method that accepts a layer filter function and, thus, only queries our geocaches:
   map.on('click', function (evt) {
        map.getOverlays().clear();
        this.forEachFeatureAtPixel(evt.pixel, function (feature) {
            if (feature && feature.get('loot')) {
                var overlayElem = document.createElement('div');
                var lootElem = document.createElement('textarea');
                lootElem.textContent = feature.get('loot');
                overlayElem.appendChild(lootElem);
                overlayElem.appendChild(document.createElement('br'));
                var saveButton = document.createElement('button');
                saveButton.textContent = 'Save';
                overlayElem.appendChild(saveButton);
                var overlay = new ol.Overlay({
                    position: feature.getGeometry().getCoordinates(),
                    element: overlayElem
                });
                saveButton.addEventListener('click', function (evt) {
                    feature.set('loot', lootElem.value);
                    map.removeOverlay(overlay);
                });
                map.addOverlay(overlay);
            }
        }, this, function (layer) {
            if (layer === geoCaching) {
                return true;
            }
            return false;
        });
    });
}If you save the code and load it up on your desktop computer, you can move the geocaches and edit their loot attribute: