Table of Contents for
Mastering OpenLayers 3
 Mastering OpenLayers 3
Published by
Packt Publishing, 2016
Mastering OpenLayers 3
Published by
Packt Publishing, 2016
- Cover
- Table of Contents
- Mastering OpenLayers 3
- Mastering OpenLayers 3
- Credits
- About the Author
- About the Reviewer
- www.PacktPub.com
- Preface
- What you need for this book
- Who this book is for
- Conventions
- Reader feedback
- Customer support
- 1. Creating Simple Maps with OpenLayers 3
- Structure of OpenLayers 3
- Building the layout
- Using the API documentation
- Debugging the code
- Summary
- 2. Applying Custom Styles
- Customizing the default appearance
- Styling vector layers
- Customizing the appearance with JavaScript
- Creating a WebGIS client layout
- Summary
- 3. Working with Layers
- Building a layer tree
- Adding layers dynamically
- Adding vector layers with the File API
- Adding vector layers with a library
- Removing layers dynamically
- Changing layer attributes
- Changing the layer order with the Drag and Drop API
- Clearing the message bar
- Summary
- 4. Using Vector Data
- Accessing attributes
- Setting attributes
- Validating attributes
- Creating thematic layers
- Saving vector data
- Saving with WFS-T
- Modifying the geometry
- Summary
- 5. Creating Responsive Applications with Interactions and Controls
- Building the toolbar
- Mapping interactions to controls
- Building a set of feature selection controls
- Adding new vector layers
- Building a set of drawing tools
- Modifying and snapping to features
- Creating new interactions
- Building a measuring control
- Summary
- 6. Controlling the Map – View and Projection
- Customizing a view
- Constraining a view
- Creating a navigation history
- Working with extents
- Rotating a view
- Changing the map's projection
- Creating custom animations
- Summary
- 7. Mastering Renderers
- Using different renderers
- Creating a WebGL map
- Drawing lines and polygons with WebGL
- Blending layers
- Clipping layers
- Exporting a map
- Creating a raster calculator
- Creating a convolution matrix
- Clipping a layer with WebGL
- Summary
- 8. OpenLayers 3 for Mobile
- Responsive styling with CSS
- Generating geocaches
- Adding device-dependent controls
- Vectorizing the mobile version
- Making the mobile application interactive
- Summary
- 9. Tools of the Trade – Integrating Third-Party Applications
- Exporting a QGIS project
- Importing shapefiles
- Spatial analysis with Turf
- Spatial analysis with JSTS
- 3D rendering with Cesium
- Summary
- 10. Compiling Custom Builds with Closure
- Configuring Node JS
- Compiling OpenLayers 3
- Bundling an application with OpenLayers 3
- Extending OpenLayers 3
- Creating rich documentation with JSDoc
- Summary
- Index
Now that we have covered some of the most essential structural aspects of the library, let's consider the architecture of an application deployed in a production environment. Take another look at the code. There is a chapters folder in which you can access the examples within the appropriate subfolder. If you open ch01, you can see three file types in it. As you have noticed, the different parts of the web page (HTML, CSS, and JavaScript) are separated. There is one main reason behind this: the code remains as clean as possible.
With a clean and rational design, you will always know where to look when you would like to make a modification. Moreover, if you're working for a company there is a good chance someone else will also work with your code. This kind of design will make sure your colleague can easily handle your code. On top of that, if you have to develop a wrapper API around OpenLayers 3, this is the only way your code can be integrated into future projects.
As the different parts of the application are separated, we will create a minimalistic HTML document. It will expand with time as the application becomes more complicated and needs more container elements. For now, let's write a simple HTML document:
<!DOCTYPE html>
<html lang="en">
    <head>
        <title>Chapter 1 - Creating a simple map</title>
        <link href="../../js/ol3-3.11.0/ol.css" rel="stylesheet">
        <link href="ch01.css" rel="stylesheet">
        <script type="text/javascript" src="../../js/ol3-3.11.0/ol.js"></script>
        <script type="text/javascript" src="ch01_simple_map.js"></script>
    </head>
    <body>
        <div id="map" class="map"></div>
    </body>
</html>
Tip
Downloading the example code
You can download the example code files from your account at http://www.packtpub.com for all the Packt Publishing books you have purchased. If you purchased this book elsewhere, you can visit http://www.packtpub.com/support and register to have the files e-mailed directly to you.
In this simple document, we defined the connection points between the external resources, and our web page. In the body, we created a simple div element with the required properties. We don't really need anything else; the magic will happen entirely in our code. Now we can go on with our CSS file and define one simple class, called map:
.map {
    width: 100%;
    height: 100%;
}
Save this simple rule to a file named ch01.css, in the same folder you just saved the HTML file.
Now that we have a nice container for our map, let's concentrate on the code. In this book, most of the action will take place in the code; therefore this will be the most important part. First, we write the main function for our code:
function init() {
    document.removeEventListener('DOMContentLoaded', init);
}
document.addEventListener('DOMContentLoaded', init);
By using an event listener, we can make sure the code only runs when the structure of the web page has been initialized. This design enables us to use relative values for sizing, which is important for making adaptable applications. Also, we make sure the map variable is wrapped into a function (therefore we do not expose it) and seal a potential security breach. In the init function, we detach the event listener from the document, because it will not be needed once the DOM structure has been created.
Tip
The DOMContentLoaded event waits for the DOM structure to build up. It does not wait for images, frames, and dynamically added content; therefore the application will load faster. Only IE 8 and prior versions do not support this event type, but if you have to fall back you can always use the window object's load event. To check a feature's support in major browsers, you can consult the following site: http://www.caniuse.com/.
Next, we extend the init function by creating a vector layer and assigning it to a variable. Note that in OpenLayers 3.5.0, creating vector layers has been simplified. Now, a vector layer has only a single source class, and the parser can be defined as a format in the source:
var vectorLayer = new ol.layer.Vector({
    source: new ol.source.Vector({
        format: new ol.format.GeoJSON({
            defaultDataProjection: 'EPSG:4326'
        }),
        url: '../../res/world_capitals.geojson',
        attributions: [
            new ol.Attribution({
                html: 'World Capitals © Natural Earth'
            })
        ]
    })
});
We are using a GeoJSON data source with a WGS84 projection. As the map will use a Web Mercator projection, we provide a defaultDataProjection value to the parser, so the data will be transformed automagically into the view's projection. We also give attribution to the creators of the vector dataset.
Finally, construct the map object, with some extra controls and one extra interaction:
var map = new ol.Map({
    target: 'map',
    layers: [
        new ol.layer.Tile({
            source: new ol.source.OSM()
        }),
        vectorLayer
    ],
    controls: [
        //Define the default controls
        new ol.control.Zoom(),
        new ol.control.Rotate(),
        new ol.control.Attribution(),
        //Define some new controls
        new ol.control.ZoomSlider(),
        new ol.control.MousePosition(),
        new ol.control.ScaleLine(),
        new ol.control.OverviewMap()
    ],
    interactions: ol.interaction.defaults().extend([
        new ol.interaction.Select({
            layers: [vectorLayer]
        })
    ]),
    view: new ol.View({
        center: [0, 0],
        zoom: 2
    })
});
In this example, we provide two layers: a simple OpenStreetMap tile layer and the custom vector layer saved into a separate variable. For the controls, we define the default ones, then provide a zoom slider, a scale bar, a mouse position notifier, and an overview map. There are too many default interactions, therefore we extend the default set of interactions with ol.interaction.Select. This is the point where saving the vector layer into a variable becomes necessary. The view object is a simple view that defaults to projection EPSG:3857 (Web Mercator).
Tip
OpenLayers 3 also has a default set of controls that can be accessed similarly to the interactions, under ol.control.defaults(). Default controls and interactions are instances of ol.Collection, therefore both of them can be extended and modified like any other collection object. Note that the extend method requires an array of features.
Save the code to a file named ch01_simple_map.js in the same folder as your HTML file. If you open the HTML file, you should see the following map:
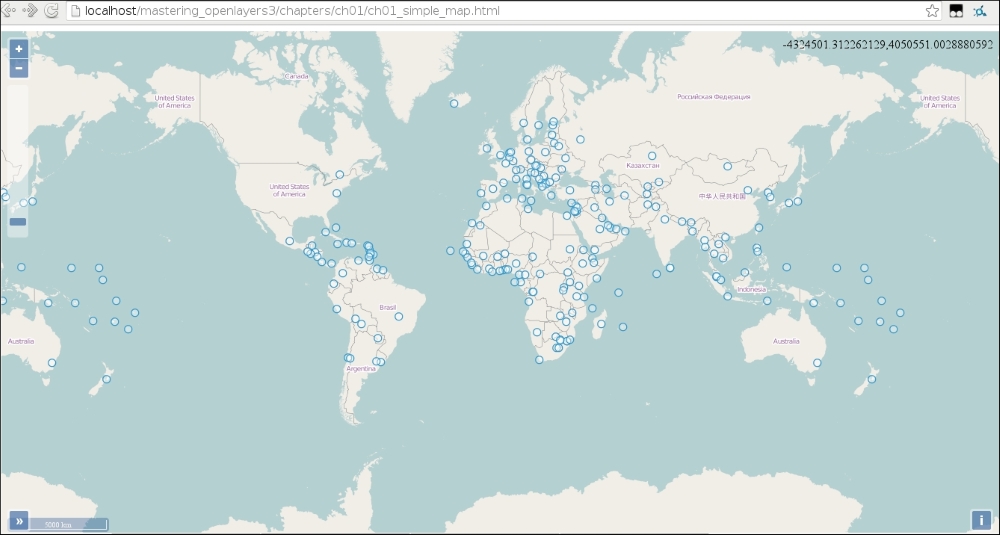
Note
You have different, or no results? Do not worry, not even a bit! Open up your browser's developer console (F12 in modern ones, or CTRL + J if F12 does not work), and resolve the error(s) noted there. If there is no result, double-check the HTML and CSS files; if you have a different result, check the code or the CORS requirements based on the error message. If you use Internet Explorer, make sure you have version 9 or higher.