Table of Contents for
Mastering OpenLayers 3
 Mastering OpenLayers 3
Published by
Packt Publishing, 2016
Mastering OpenLayers 3
Published by
Packt Publishing, 2016
- Cover
- Table of Contents
- Mastering OpenLayers 3
- Mastering OpenLayers 3
- Credits
- About the Author
- About the Reviewer
- www.PacktPub.com
- Preface
- What you need for this book
- Who this book is for
- Conventions
- Reader feedback
- Customer support
- 1. Creating Simple Maps with OpenLayers 3
- Structure of OpenLayers 3
- Building the layout
- Using the API documentation
- Debugging the code
- Summary
- 2. Applying Custom Styles
- Customizing the default appearance
- Styling vector layers
- Customizing the appearance with JavaScript
- Creating a WebGIS client layout
- Summary
- 3. Working with Layers
- Building a layer tree
- Adding layers dynamically
- Adding vector layers with the File API
- Adding vector layers with a library
- Removing layers dynamically
- Changing layer attributes
- Changing the layer order with the Drag and Drop API
- Clearing the message bar
- Summary
- 4. Using Vector Data
- Accessing attributes
- Setting attributes
- Validating attributes
- Creating thematic layers
- Saving vector data
- Saving with WFS-T
- Modifying the geometry
- Summary
- 5. Creating Responsive Applications with Interactions and Controls
- Building the toolbar
- Mapping interactions to controls
- Building a set of feature selection controls
- Adding new vector layers
- Building a set of drawing tools
- Modifying and snapping to features
- Creating new interactions
- Building a measuring control
- Summary
- 6. Controlling the Map – View and Projection
- Customizing a view
- Constraining a view
- Creating a navigation history
- Working with extents
- Rotating a view
- Changing the map's projection
- Creating custom animations
- Summary
- 7. Mastering Renderers
- Using different renderers
- Creating a WebGL map
- Drawing lines and polygons with WebGL
- Blending layers
- Clipping layers
- Exporting a map
- Creating a raster calculator
- Creating a convolution matrix
- Clipping a layer with WebGL
- Summary
- 8. OpenLayers 3 for Mobile
- Responsive styling with CSS
- Generating geocaches
- Adding device-dependent controls
- Vectorizing the mobile version
- Making the mobile application interactive
- Summary
- 9. Tools of the Trade – Integrating Third-Party Applications
- Exporting a QGIS project
- Importing shapefiles
- Spatial analysis with Turf
- Spatial analysis with JSTS
- 3D rendering with Cesium
- Summary
- 10. Compiling Custom Builds with Closure
- Configuring Node JS
- Compiling OpenLayers 3
- Bundling an application with OpenLayers 3
- Extending OpenLayers 3
- Creating rich documentation with JSDoc
- Summary
- Index
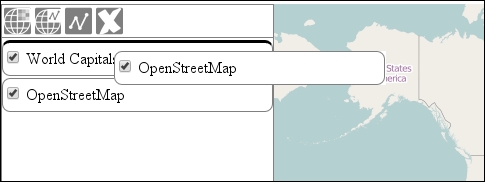
In the final step, we implement some logic to change the layer order. The code for this example is named ch03_layerorder. As we want to have a convenient and full GUI implementation, we use the HTML5 Drag and Drop API to achieve our task.
This API needs a simple draggable declaration on an element and a set of dragging-related events. The browser needs to know what to do when an element is dragged; when it is over, another element is declared draggable in a case where it is dropped due to such an element. First, we prepare our layer elements by creating a CSS class to give visual feedback when a layer is dragged over another one:
.layer.over {
    border-top: 3px solid black;
}
Next, we extend our createRegistry function to make this process possible:
this.createRegistry = function (layer, buffer) {
    […]
    var _this = this;
    layerDiv.draggable = true;
    layerDiv.addEventListener('dragstart', function (evt) {
        evt.dataTransfer.effectAllowed = 'move';
        evt.dataTransfer.setData('Text', this.id);
    });
    layerDiv.addEventListener('dragenter', function (evt) {
        this.classList.add('over');
    });
    layerDiv.addEventListener('dragleave', function (evt) {
        this.classList.remove('over');
    });
    layerDiv.addEventListener('dragover', function (evt) {
        evt.preventDefault();
        evt.dataTransfer.dropEffect = 'move';
    });
The events that are associated with the Drag and Drop API may need some explanation. The first event is fired when we drag the element. All other events fire when the element acts as a target. Note that only those elements that also bear the draggable attribute are recognized as target elements.
As the main concept behind the API is pure data transfer with the help of DOM elements, we need to define the data we would like to transfer in the dragstart event. As we don't have to deal with data from other sources, the simplest approach for this is to send the element's id as a string. We also notify the browser that we will move the element; therefore, it can assign a move cursor to the dragging process.
The dragenter and dragleave events are quite unequivocal ones. If we drag over a possible target, it will have a wider top border, while if we drag out of it, it returns to its normal state. There is some magic behind the dragover event, though. It has the default behavior of canceling the drop; thus, we have to prevent it. We also have to state that we would like to do this in a completely valid operation, which is in the list of allowed effects. Most of the magic is due to the drop event, though, where we change the order of the layers:
    layerDiv.addEventListener('drop', function (evt) {
        evt.preventDefault();
        this.classList.remove('over');
        var sourceLayerDiv = document.getElementById(evt.dataTransfer.getData('Text'));
        if (sourceLayerDiv !== this) {
            _this.layerContainer.removeChild(sourceLayerDiv);
            _this.layerContainer.insertBefore(sourceLayerDiv, this);
            var htmlArray = [].slice.call(_this.layerContainer.children);
            var index = htmlArray.length - htmlArray.indexOf(sourceLayerDiv) - 1;
            var sourceLayer = _this.getLayerById(sourceLayerDiv.id);
            var layers = _this.map.getLayers().getArray();
            layers.splice(layers.indexOf(sourceLayer), 1);
            layers.splice(index, 0, sourceLayer);
            _this.map.render();
        }
    });
It also has a nasty default behavior in some browsers, which is to redirect based on the given information in the dataTransfer object; therefore, our first task is defusing the bomb. Now we can go on and grab a reference to the dragged element based on id. If the source and its target elements are not the same, we can talk about a valid order change and go on with our logic.
First, we insert the dragged element before the target (that is why we have highlighted the target's top border to indicate the destination). Then, we calculate the layer's position in the layer stack from the array of layer elements. As the layer stack has an inverse order and starts with 0, we use the preceding formula.
Note
Querying the child elements of a node returns an HTML collection, not an array. To check the index of a given element in the collection, though, we need the indexOf method, which is exclusive to arrays. The JavaScript array object's slice method is perfect to convert array-like objects to arrays when called without any arguments. The full call would have been Array.prototype.slice.call, but instead, we used a shortcut.
Finally, we grab a reference to the map's layer collection's internal array, cut it out from its original position, and insert it into its a new position. We also have to call a rendering frame as performing operations on the internal array of an ol.Collection object does not fire any events.
Now, we only have to solve one final problem. As the elements can be dragged, we can't change the opacity of the layers with the slider because we would drag the entire element. We can solve this by registering two events to the slider. One of them disables dragging when we keep our mouse button on the slider, while the other one reactivates it when we release our mouse button:
    opacityHandler.addEventListener('mousedown', function () {
        layerDiv.draggable = false;
    });
    opacityHandler.addEventListener('mouseup', function () {
        layerDiv.draggable = true;
    });
Tip
The code we've just created is operational but far from perfect. For example, it has a weakness of not letting you place a layer at the bottom of the stack. You can fix this by adding an empty dummy layer element to the bottom of the stack and defining every drag event on it except for dragstart.
If you save the code and look it up in your favorite browser, you can try out our dragging mechanism: