Table of Contents for
Mastering OpenLayers 3
 Mastering OpenLayers 3
Published by
Packt Publishing, 2016
Mastering OpenLayers 3
Published by
Packt Publishing, 2016
- Cover
- Table of Contents
- Mastering OpenLayers 3
- Mastering OpenLayers 3
- Credits
- About the Author
- About the Reviewer
- www.PacktPub.com
- Preface
- What you need for this book
- Who this book is for
- Conventions
- Reader feedback
- Customer support
- 1. Creating Simple Maps with OpenLayers 3
- Structure of OpenLayers 3
- Building the layout
- Using the API documentation
- Debugging the code
- Summary
- 2. Applying Custom Styles
- Customizing the default appearance
- Styling vector layers
- Customizing the appearance with JavaScript
- Creating a WebGIS client layout
- Summary
- 3. Working with Layers
- Building a layer tree
- Adding layers dynamically
- Adding vector layers with the File API
- Adding vector layers with a library
- Removing layers dynamically
- Changing layer attributes
- Changing the layer order with the Drag and Drop API
- Clearing the message bar
- Summary
- 4. Using Vector Data
- Accessing attributes
- Setting attributes
- Validating attributes
- Creating thematic layers
- Saving vector data
- Saving with WFS-T
- Modifying the geometry
- Summary
- 5. Creating Responsive Applications with Interactions and Controls
- Building the toolbar
- Mapping interactions to controls
- Building a set of feature selection controls
- Adding new vector layers
- Building a set of drawing tools
- Modifying and snapping to features
- Creating new interactions
- Building a measuring control
- Summary
- 6. Controlling the Map – View and Projection
- Customizing a view
- Constraining a view
- Creating a navigation history
- Working with extents
- Rotating a view
- Changing the map's projection
- Creating custom animations
- Summary
- 7. Mastering Renderers
- Using different renderers
- Creating a WebGL map
- Drawing lines and polygons with WebGL
- Blending layers
- Clipping layers
- Exporting a map
- Creating a raster calculator
- Creating a convolution matrix
- Clipping a layer with WebGL
- Summary
- 8. OpenLayers 3 for Mobile
- Responsive styling with CSS
- Generating geocaches
- Adding device-dependent controls
- Vectorizing the mobile version
- Making the mobile application interactive
- Summary
- 9. Tools of the Trade – Integrating Third-Party Applications
- Exporting a QGIS project
- Importing shapefiles
- Spatial analysis with Turf
- Spatial analysis with JSTS
- 3D rendering with Cesium
- Summary
- 10. Compiling Custom Builds with Closure
- Configuring Node JS
- Compiling OpenLayers 3
- Bundling an application with OpenLayers 3
- Extending OpenLayers 3
- Creating rich documentation with JSDoc
- Summary
- Index
In this example, called ch05_select, we fill the gap between interactions and controls, and create a simple feature selecting the control. As we need to inform the user about the control's status, we create some CSS rules for active controls. Activated controls will have a nice orange color, which won't change, if we hover over them. We also extend the ol-unselectable class to our controls:
.layertree,.toolbar .ol-unselectable {
[…]
.toolbar .ol-control button.active {
    background-color: rgba(234,129,8,1);
}
.toolbar .ol-control button.active:hover {
    background-color: rgba(234,129,8,1);
}Next, we can go on and build a custom control that has only one job: managing the underlying interaction. Firstly, we set up the control's properties and GUI elements based on the supplied options:
ol.control.Interaction = function (opt_options) {
    var options = opt_options || {};
    var controlDiv = document.createElement('div');
    controlDiv.className = options.className || 'ol-unselectable ol-control';
    var controlButton = document.createElement('button');
    controlButton.textContent = options.label || 'I';
    controlButton.title = options.tipLabel || 'Custom interaction';
    controlDiv.appendChild(controlButton);
    var _this = this;
    controlButton.addEventListener('click', function () {
        if (_this.get('interaction').getActive()) {
            _this.set('active', false);
        } else {
            _this.set('active', true);
        }
    });
    var interaction = options.interaction;
We create a standard OpenLayers 3 control button: a button element inside a div element. We set up its style, title, and content; then, we add a listener to it. If we click on it in an active status, we deactivate it and vice versa.
Next, we call the original control constructor with our custom control setting it up. This is one of the two key steps in extending a class in OpenLayers 3. Only after this step, we can use the control's factory methods.
After we set up the control, we can set its properties. This is where we give it a toggle type. We also store the associated interaction in the control and a function that will remove the interaction from the map, if the control is removed:
    ol.control.Control.call(this, {
        element: controlDiv,
        target: options.target
    });
    this.setProperties({
        interaction: interaction,
        active: false,
        type: 'toggle',
        destroyFunction: function (evt) {
            if (evt.element === _this) {
                this.removeInteraction(_this.get('interaction'));
            }
        }
    });
Next, we close our control with a listener on its active property. If the control is activated, we activate the interaction and add the active class to it's class list. Finally, we copy the prototype chain of ol.control.Control to our control with ol.inherits method. This is the second key step in extending an OpenLayers 3 class:
    this.on('change:active', function () {
        this.get('interaction').setActive(this.get('active'));
        if (this.get('active')) {
            controlButton.classList.add('active');
        } else {
            controlButton.classList.remove('active');
        }
    }, this);
};
ol.inherits(ol.control.Interaction, ol.control.Control);
Note
The ol.inherits method is a simple reference to the Closure Library's goog.inherits. It takes two constructor functions; let's call them A and B. It simply copies the constructor B's prototype to the constructor A's prototype.constructor property. This not only exposes the constructor B's and all its parents' methods to the constructor A, but also makes an A instance of B and all its parents. One constructor can only have one inheritance with this method, it cannot be used as a mixin.
As our control has an underlying interaction, we have to make sure that it is correctly added to the map on addition and removed on removal. For this purpose, we already created a function that will act as an event listener on the map's control collection. However, as we add an event listener to an object, which doesn't get destroyed, we have to manually take care of unlistening on the removal of the control, thus, cleaning up after ourselves:
ol.control.Interaction.prototype.setMap = function (map) {
    ol.control.Control.prototype.setMap.call(this, map);
    var interaction = this.get('interaction');
    if (map === null) {
        ol.Observable.unByKey(this.get('eventId'));
    } else if (map.getInteractions().getArray().indexOf(interaction) === -1) {
        map.addInteraction(interaction);
        interaction.setActive(false);
        this.set('eventId', map.getControls().on('remove', this.get('destroyFunction'), map));
    }
};
Control objects have a setMap public method that can be overridden. This method gets the map object, the control is added to, and takes care of every map-related initialization. By calling the original method first, we can extend this functionality to our own needs.
If the control is added to a map or removed from it, this method gets invoked with the map object or a null value, respectively. This way, we can easily add the underlying interaction to the map, if it hasn't been added yet. However, we will have a hard time on the removal, as we don't have a reference to the map object then.
To overcome this problem, we register a listener to our map's control collection. If the listener detects that our control has been removed, it removes the associated interaction. If we save the key returned by the listener in a variable or a property (eventId), we can call the ol.Observable.unByKey static function with the key to remove the listener. This way, we do not need to have a reference to our map object.
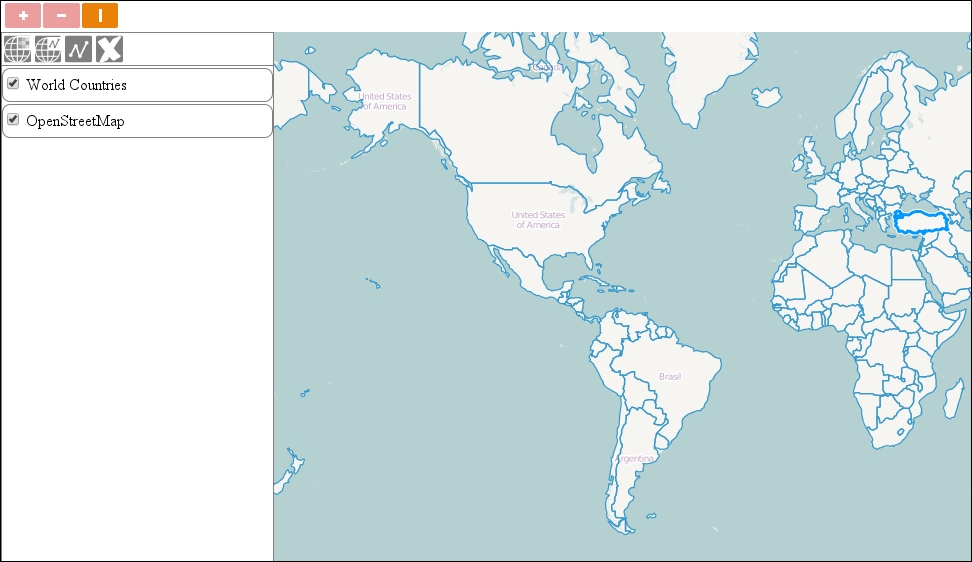
Now that we have a fully operational custom control for mapping interactions to control buttons, we can add a simple selection control to our map. We leave everything on their default values and pass only an ol.interaction.Select method to the constructor, which can select any feature from any vector layer when it is clicked on:
tools.addControl(new ol.control.Interaction({
    interaction: new ol.interaction.Select()
}));
If you save the code and open it in your favorite browser, you will see our new control in action: