Table of Contents for
Mastering OpenLayers 3
 Mastering OpenLayers 3
Published by
Packt Publishing, 2016
Mastering OpenLayers 3
Published by
Packt Publishing, 2016
- Cover
- Table of Contents
- Mastering OpenLayers 3
- Mastering OpenLayers 3
- Credits
- About the Author
- About the Reviewer
- www.PacktPub.com
- Preface
- What you need for this book
- Who this book is for
- Conventions
- Reader feedback
- Customer support
- 1. Creating Simple Maps with OpenLayers 3
- Structure of OpenLayers 3
- Building the layout
- Using the API documentation
- Debugging the code
- Summary
- 2. Applying Custom Styles
- Customizing the default appearance
- Styling vector layers
- Customizing the appearance with JavaScript
- Creating a WebGIS client layout
- Summary
- 3. Working with Layers
- Building a layer tree
- Adding layers dynamically
- Adding vector layers with the File API
- Adding vector layers with a library
- Removing layers dynamically
- Changing layer attributes
- Changing the layer order with the Drag and Drop API
- Clearing the message bar
- Summary
- 4. Using Vector Data
- Accessing attributes
- Setting attributes
- Validating attributes
- Creating thematic layers
- Saving vector data
- Saving with WFS-T
- Modifying the geometry
- Summary
- 5. Creating Responsive Applications with Interactions and Controls
- Building the toolbar
- Mapping interactions to controls
- Building a set of feature selection controls
- Adding new vector layers
- Building a set of drawing tools
- Modifying and snapping to features
- Creating new interactions
- Building a measuring control
- Summary
- 6. Controlling the Map – View and Projection
- Customizing a view
- Constraining a view
- Creating a navigation history
- Working with extents
- Rotating a view
- Changing the map's projection
- Creating custom animations
- Summary
- 7. Mastering Renderers
- Using different renderers
- Creating a WebGL map
- Drawing lines and polygons with WebGL
- Blending layers
- Clipping layers
- Exporting a map
- Creating a raster calculator
- Creating a convolution matrix
- Clipping a layer with WebGL
- Summary
- 8. OpenLayers 3 for Mobile
- Responsive styling with CSS
- Generating geocaches
- Adding device-dependent controls
- Vectorizing the mobile version
- Making the mobile application interactive
- Summary
- 9. Tools of the Trade – Integrating Third-Party Applications
- Exporting a QGIS project
- Importing shapefiles
- Spatial analysis with Turf
- Spatial analysis with JSTS
- 3D rendering with Cesium
- Summary
- 10. Compiling Custom Builds with Closure
- Configuring Node JS
- Compiling OpenLayers 3
- Bundling an application with OpenLayers 3
- Extending OpenLayers 3
- Creating rich documentation with JSDoc
- Summary
- Index
Creating new interactions is a little different than creating new controls. Instead of using a single root class, we can use ol.interaction.Pointer and ol.interaction.Interaction. We will cover, in this chapter, why we should use the pointer class. In this example, called ch05_pointer, we will implement two custom interactions. One for removing features and one for dragging features. Firstly, we define some CSS rules for our new controls, as usual:
.toolbar .ol-removefeat button {
    background-image: url(../../res/button_removefeat.png);
}
.toolbar .ol-dragfeat button {
    background-image: url(../../res/button_dragfeat.png);
}Before creating some custom interaction, let's discuss how the pointer interaction works and how we can utilize it for our needs. This simple class can be constructed with five different event handler functions. The handleEvent function overrides every other handler and allows us to freely decide what to do with every different mouse events. If we would like to use it, we can use ol.interaction.Interaction instead; thus, we won't discuss it further here.
The first important handler is handleDownEvent. It fires every time when the left-mouse button is pushed down. If it returns true, the map freezes and our custom interaction gets into work. In the other case, the event is propagated to other handlers; thus, in a default scenario, a map panning occurs.
The second one is
handleDragEvent. If handleDownEvent returns true, for every pointer that move afterwards, this function gets called. Finally, the handleUpEvent fires when we release the mouse button. Theoretically, if it returns false, the drag session is finished. In practice, however, its return value doesn't really matter. There are other checks to end the drag session, if it returns true or doesn't return anything at all.
There is one other handler called handleMoveEvent. It does not have much significance in our current use cases; however, it fires every time. We move our cursor while our interaction is active. It also fires during drag events along with the drag handler.
Now that we have completely understood the mechanics of the pointer interaction, it's time to create our first custom interaction: removing features. All our new interactions will operate on a user-provided collection of features; thus, we make them compatible with our editing toolbar's architectural design. Our new interactions consist of two parts: calling the ol.interaction.Pointer constructor with our handler functions, and setting some properties. Of course, we also have to make some inheritance, as usual:
ol.interaction.RemoveFeature = function (opt_options) {
    ol.interaction.Pointer.call(this, {
        handleDownEvent: function (evt) {
            this.set('deleteCandidate', evt.map.forEachFeatureAtPixel(evt.pixel,
                function (feature, layer) {
                    if (this.get('features').getArray().indexOf(feature) !== -1) {
                        return feature;
                    }
                }, this
            ));
            return !!this.get('deleteCandidate');
        },
        handleUpEvent: function (evt) {
            evt.map.forEachFeatureAtPixel(evt.pixel,
                function (feature, layer) {
                    if (feature === this.get('deleteCandidate')) {
                        layer.getSource().removeFeature(feature);
                        this.get('features').remove(feature);
                    }
                }, this
            );
            this.set('deleteCandidate', null);
        }
    });
    this.setProperties({
        features: opt_options.features,
        deleteCandidate: null
    });
};
ol.inherits(ol.interaction.RemoveFeature, ol.interaction.Pointer);
In this simple interaction, we define two handlers, one for pushing down the mouse button and one for releasing it. If we push down our mouse button, we check for features under the pixel of the event. If there is a feature under the pixel, which is also in our provided collection object, we save it and return true. Otherwise, we return false.
If our mouse down handler returns true, we check for features again when we release the mouse button. If the saved feature is still under the pointer, we remove the feature from the layer and also from the collection. With this logic, we not only implement a primitive, but also an effective cancel method. Finally, we null down our stored feature, set the default values for the interaction, and build the inheritance.
Our next custom interaction, which is capable of dragging features through the viewport, is slightly more difficult. We start it with the usual feature checking handler function:
ol.interaction.DragFeature = function (opt_options) {
    ol.interaction.Pointer.call(this, {
        handleDownEvent: function (evt) {
            this.set('draggedFeature', evt.map.forEachFeatureAtPixel(evt.pixel,
                function (feature, layer) {
                    if (this.get('features').getArray().indexOf(feature) !== -1) {
                        return feature;
                    }
                }, this
            ));
            if (this.get('draggedFeature')) {
                this.set('coords', evt.coordinate);
            }
            return !!this.get('draggedFeature');
        },
As you can see, there is only one difference between our previous interaction and this. If we have a catch, we save the event coordinates. Next, we implement the magic by moving the dragged feature by the difference between the consecutive event coordinates:
        handleDragEvent: function (evt) {
            var deltaX = evt.coordinate[0] - this.get('coords')[0];
            var deltaY = evt.coordinate[1] - this.get('coords')[1];
            this.get('draggedFeature').getGeometry().translate(deltaX, deltaY);
            this.set('coords', evt.coordinate);
        },
        handleUpEvent: function (evt) {
            this.setProperties({
                coords: null,
                draggedFeature: null
            });
        }
    });
After we translate the feature with the calculated delta values, we update our stored coordinates; thus, we can move the feature further on the next drag event. After we finish with moving the feature, we simply null our properties. Finally, we set up the default values and build the inheritance.
All the geometry manipulating methods (transform, translate, applyTransform, and type-specific ones) modify the geometry in place. If you need to keep your original geometry, you must clone it first with it's clone method:
    this.setProperties({
        features: opt_options.features,
        coords: null,
        draggedFeature: null
    });
};
ol.inherits(ol.interaction.DragFeature, ol.interaction.Pointer);As the last step, we only have to extend our addEditingToolBar method in order to see our new interactions in action:
toolBar.prototype.addEditingToolBar = function () {
[…]
var removeFeature = new ol.control.Interaction({
label: ' ',
tipLabel: 'Remove features',
className: 'ol-removefeat ol-unselectable ol-control',
interaction: new ol.interaction.RemoveFeature({
features: this.activeFeatures
})
}).setDisabled(true);
this.editingControls.push(removeFeature);
var dragFeature = new ol.control.Interaction({
label: ' ',
tipLabel: 'Drag features',
className: 'ol-dragfeat ol-unselectable ol-control',
interaction: new ol.interaction.DragFeature({
features: this.activeFeatures
})
}).setDisabled(true);
this.editingControls.push(dragFeature);
[…]
this.addControl(drawPoint).addControl(drawLine).addControl(drawPolygon)
.addControl(modifyFeature).addControl(snapFeature).addControl(removeFeature)
.addControl(dragFeature);
return this;
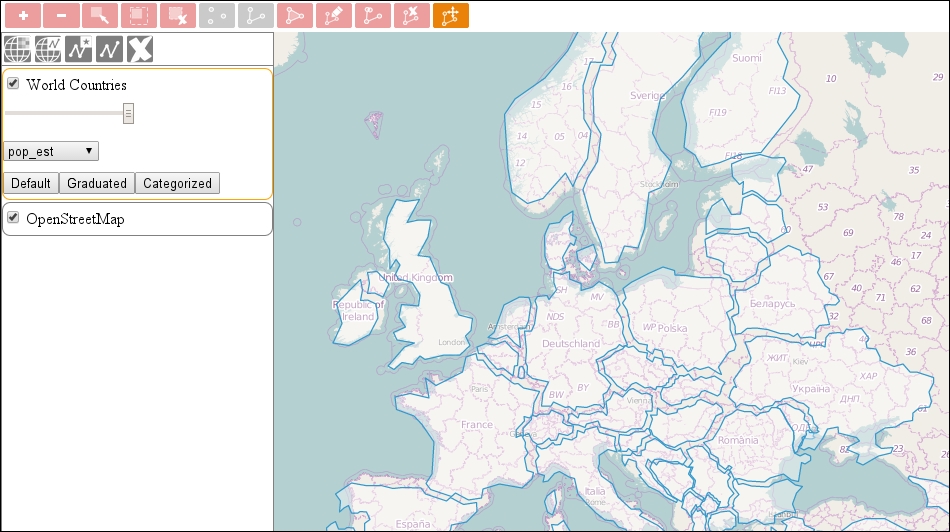
};As we calibrate our interactions to accept a collection object with features in it, we can simply pass our activeFeatures object to them. If you save the code and load it up, you can play with removing and dragging features: